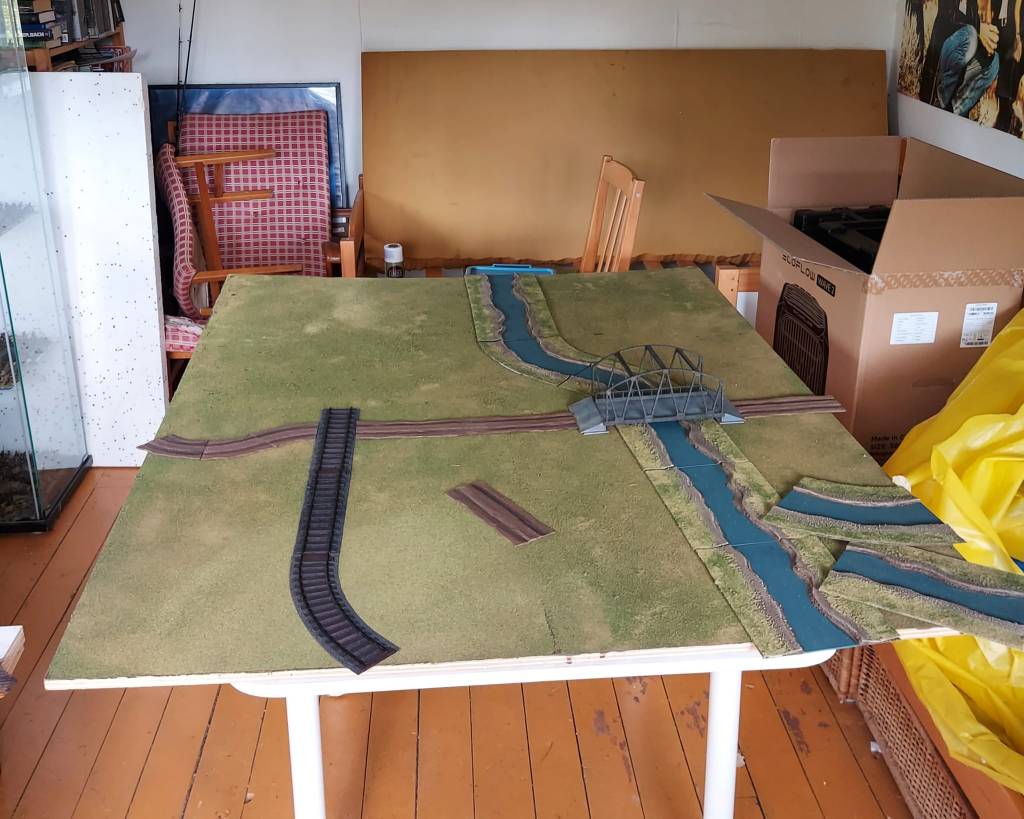
I generally spend much too much time on painting figures, and too little on doing the terrain for my game board. Ive been trying to change that, doing some river sections, roads and railroad sections. I am also working on expanding the gaming board itself, with a couple of additional smaller boards (not seen in the pictures).
The river sections are a type of moulded hard but thin plastic made by a company called Amera. I bought them relatively cheaply from a Swedish online wargames store. The material is similar too the plastic they used to do disposable plastic coffee cups with, but slightly thicker. It comes as plain white plastic sheets moulded in the river shape. I then added a plasticard base to each section to make them more sturdy, and painted the banks with textured paint (regular hobby paint+some sand). I then sprayed a base coat of brown over that, and painted the river itself a green-blue mix. Then I washed the textured river banks with a much watered down dark brown-black mix, and highlighted that with brown and finally, a beige white (Vallejo’s dark sand). In other words, I painted the river banks the same way I do the bases of my figures. On the outer edges I added some flock, a mix different shades of Woodland Scenics materials, to match the look of the table.
The Amera plastics seemed to me very easy to work with. It took very little effort, as I used very simple techniques. In the future, I may add a water effect to the river, but I am pretty happy with how it looks at the moment, so theres no rush. Amera seems not to get a lot of attention – Id never heard of them before I spotted the river sections online – but I must say I think their stuff was pretty good. Doing rivers can be pretty difficult if you do it yourself, from scratch, but at the same time, its one of those basic items youd want for your gaming table.
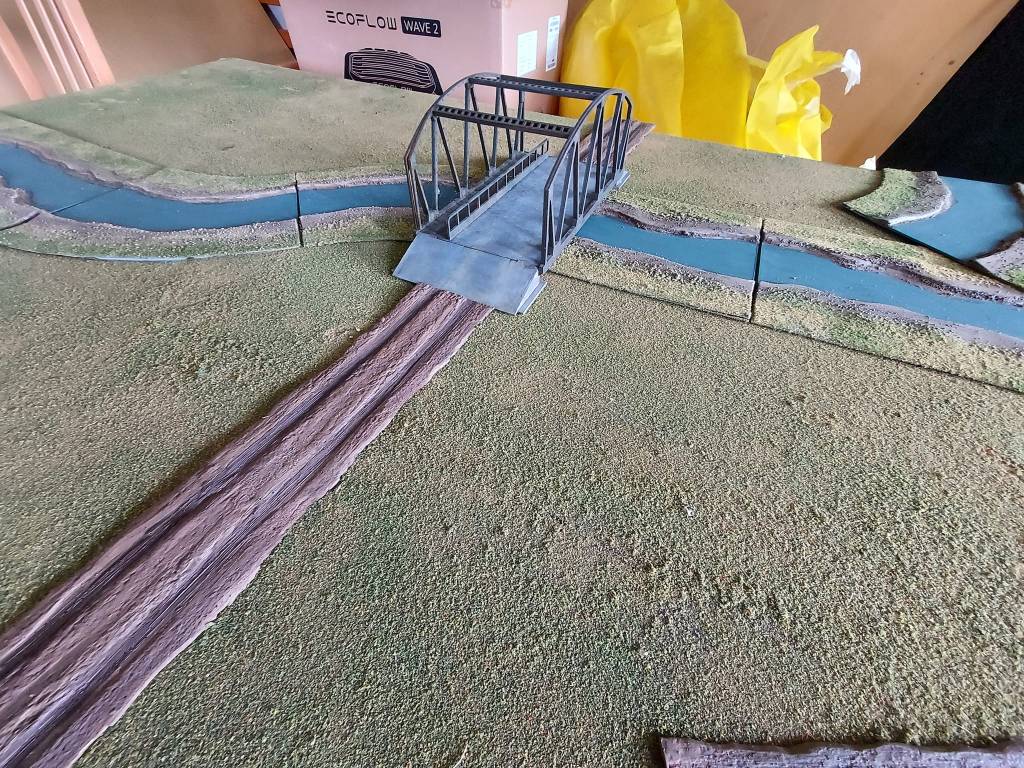
The roads are also pretty neat. I ordered them from another online source, I think they are in eastern Europe somewhere… Anyway, the road sections are made from latex rubber, which makes them flexible and quite practical when setting up a table. They werent super cheap, but I prefer them from DIY alternatives. I have painted them with Vallejo US Field Drab (again, a color I use for basing miniatures), which was washed dark brown/black and drybrushed with the base color again. If I have the time, I will throw some dust/earth pigments on them to give them a more dust-roady feel.
Both the bridge and the railway sections are mdf kits from Sarissa. Now, these are a different thing entirely. Ill admit, Sarissa do very nice kits. But, they take time to assemble and then a very long time to paint, in my experience. Granted, most good looking scenery items with a lot of detail will take some time in order for them to look really good. The bridge did turn out really well and was worth the effort. Its also a nice thing to have on the board, after all.
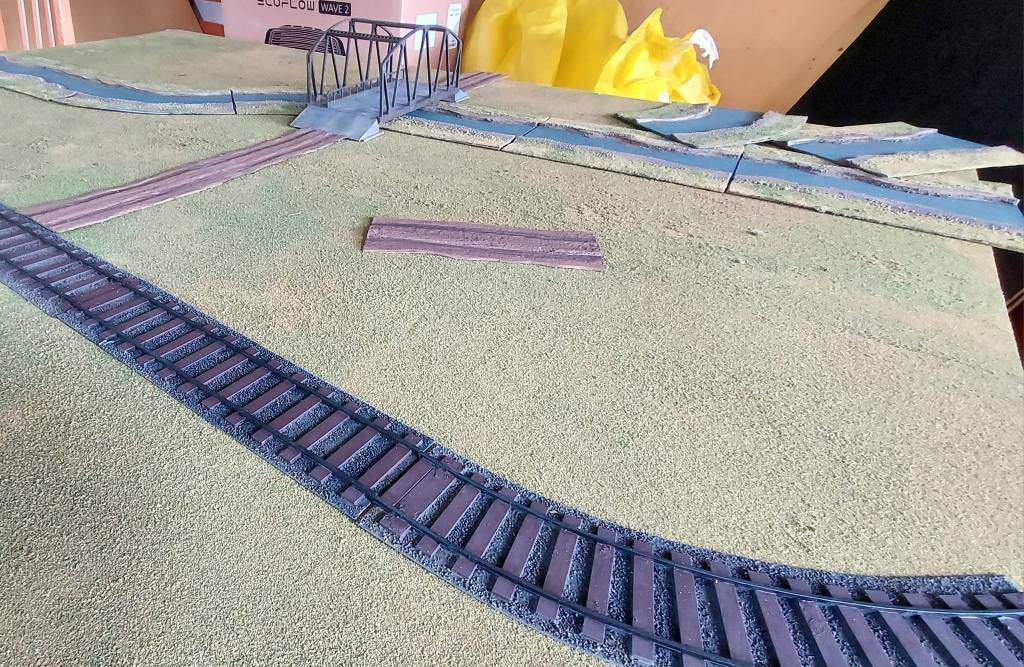
The railroads though, they are some of the most time consuming things Ive ever done. It such a simple thing, railroad tracks. How hard can it be? Well, first, the building takes some patience (its a couple of years now, so I don remember every detail, to be honest). I personally didnt like Sarissa’s system of connecting the sections together, that just looked silly to me. So I cut those parts away, but then I had to adjust them slightly, and so on…
Anyway, the painting was the most difficult part. I am still not finished with all of the sections I have put together. At first, I couldnt get the look of the ballast, and I tried a few different sizes of sand and various shades of paint. Having finally managed to get something I was relatively pleased with, on to the sleepers and the track itself. Thats several metres of detail painting, and theres no getting around the fact that you have to paint hundreds of individual sleepers. And preferably, some a rust effect on the track once you have painted it in the dark metal shade that is appropriate. As you can see, I havent done the rust yet, and the sleepers are only done in a single shade of dark brown, which could do with a highlight, and maybe I should do some grass around the edges, etc, etc… In the end, I settled with a “table top standard” paint job – its just so much work if you want to do 2 metres worth! Much better to do the whole thing in a plain but acceptable look so that it can be used than it sitting on a shelf for another year…
