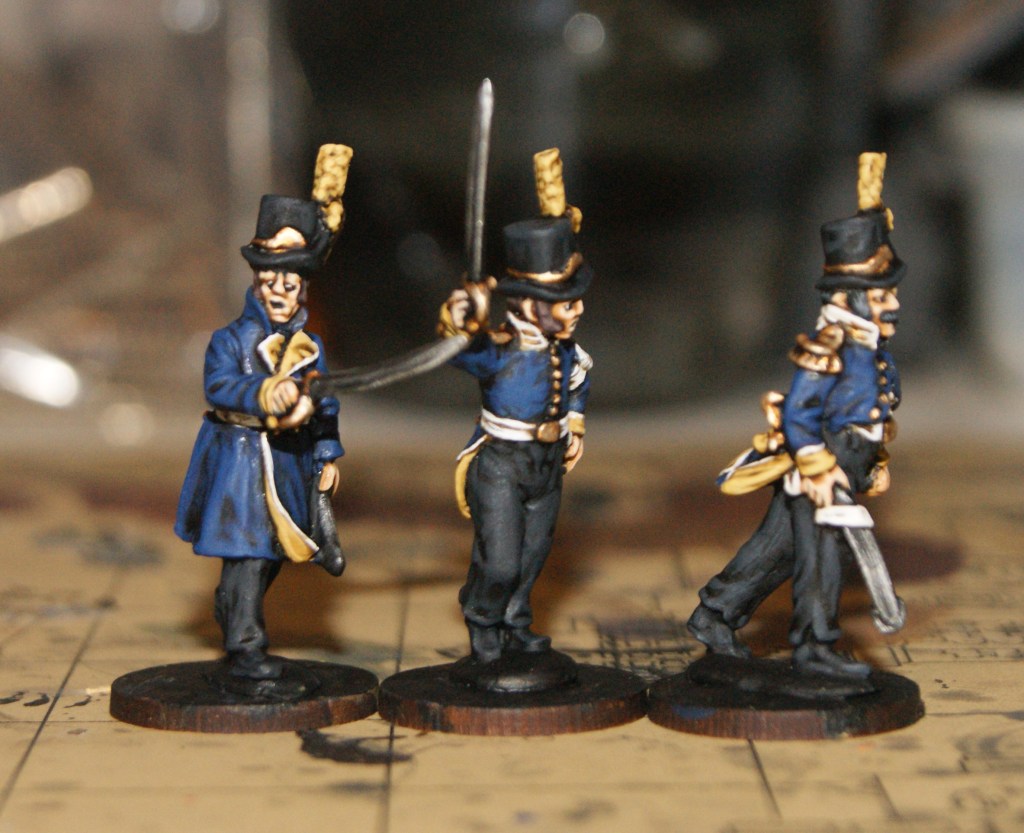
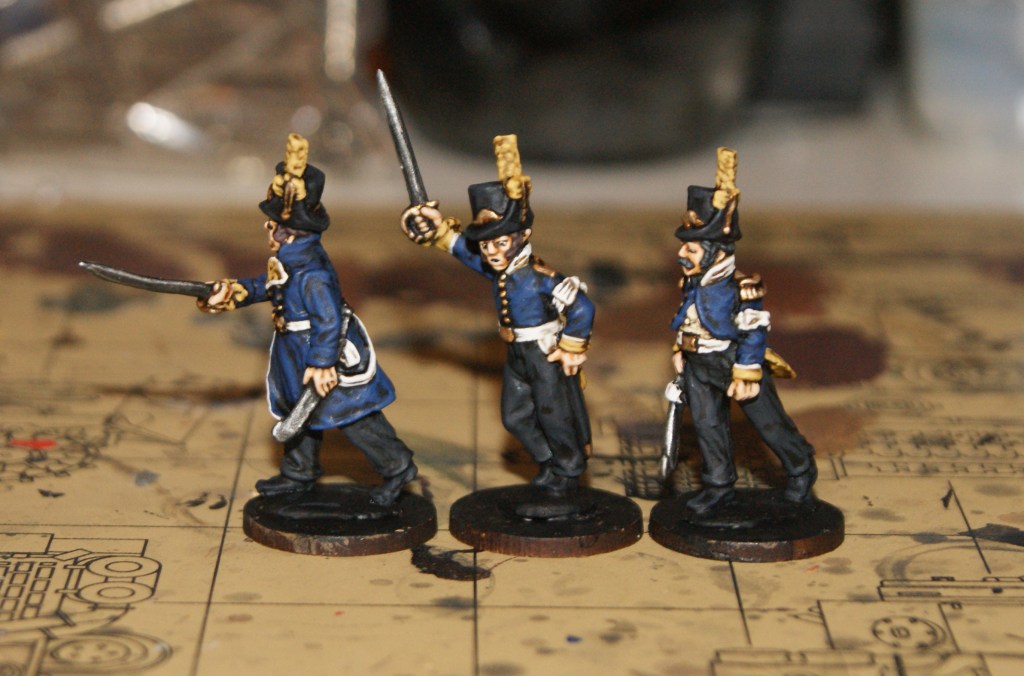
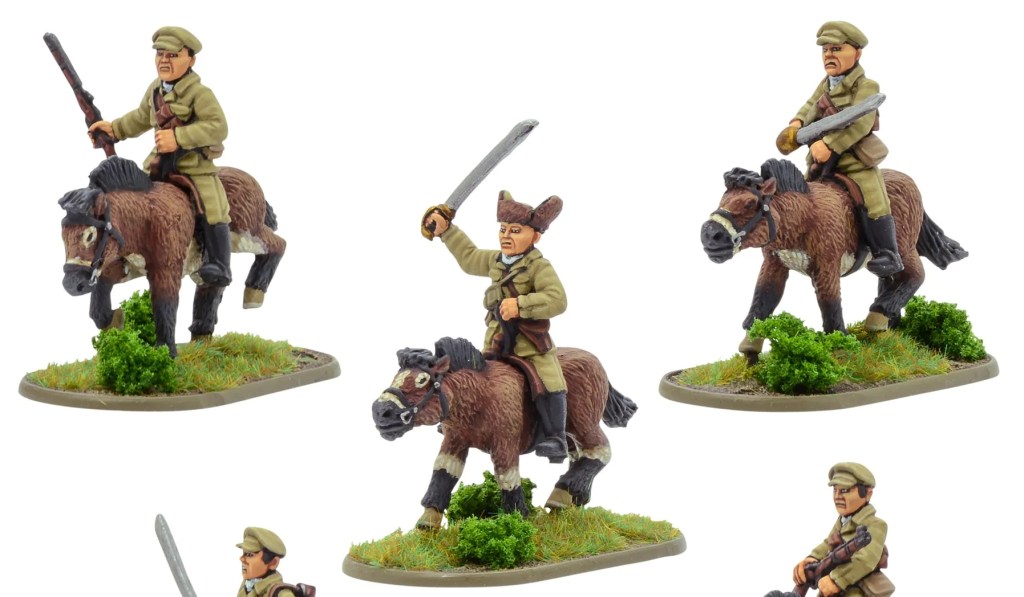
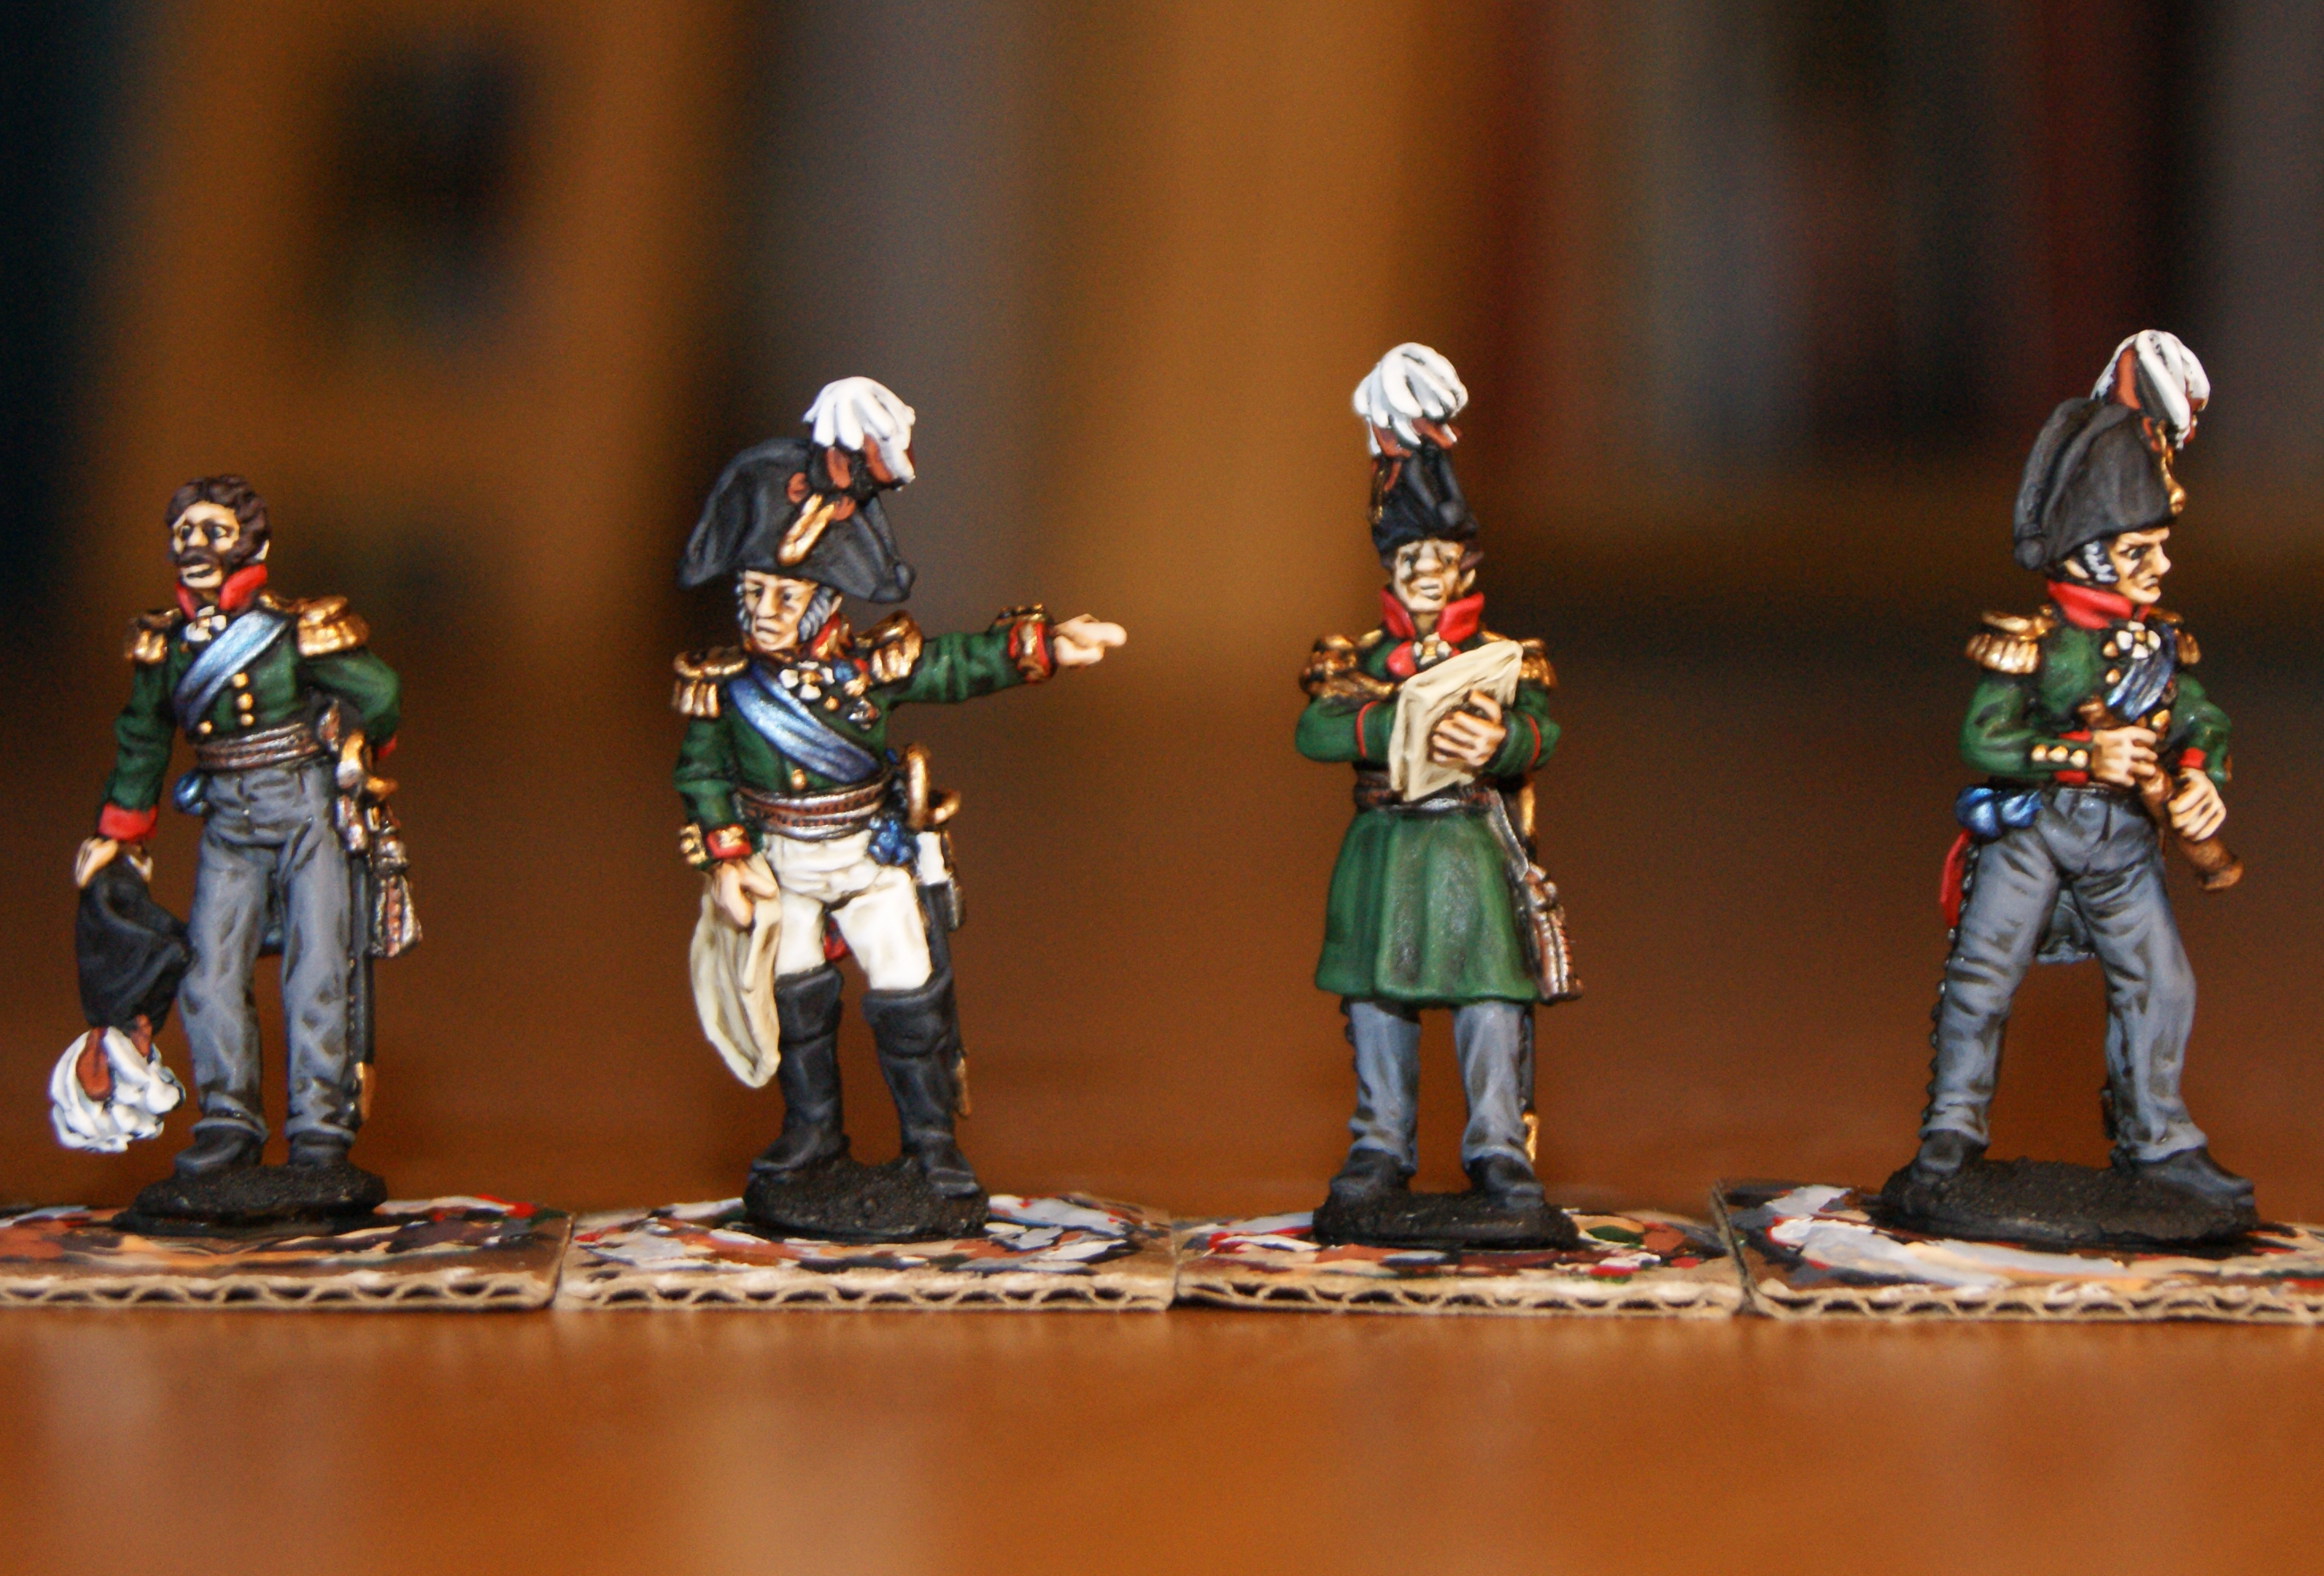
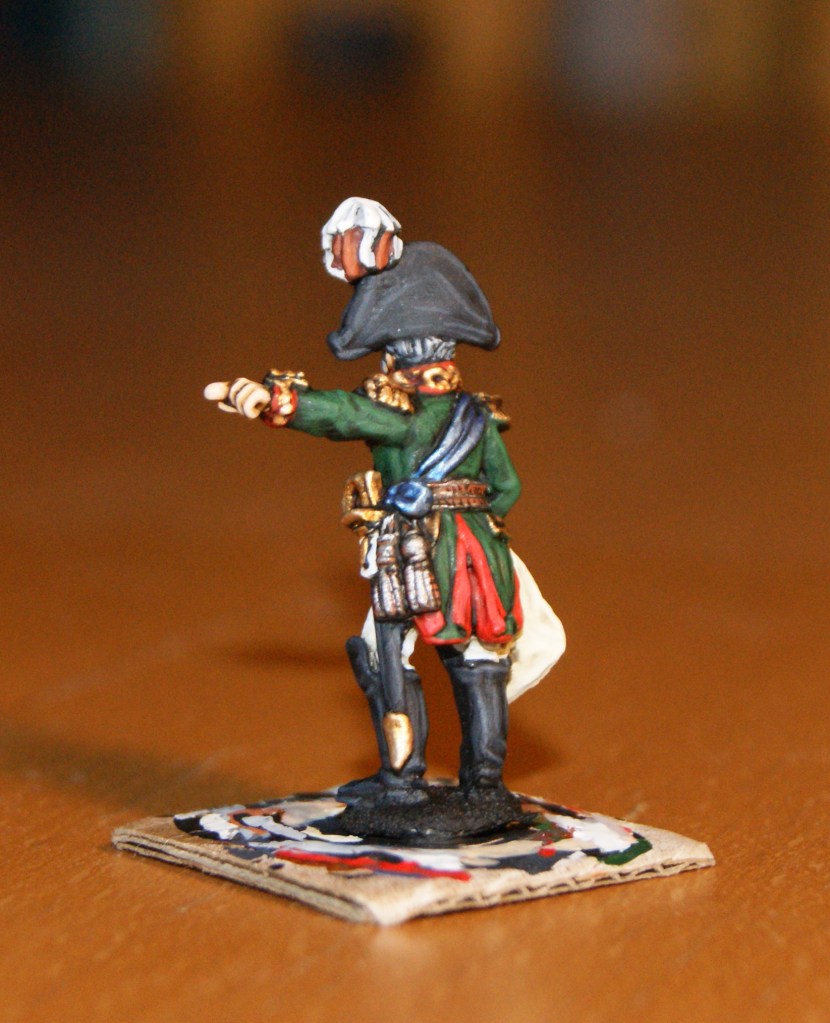
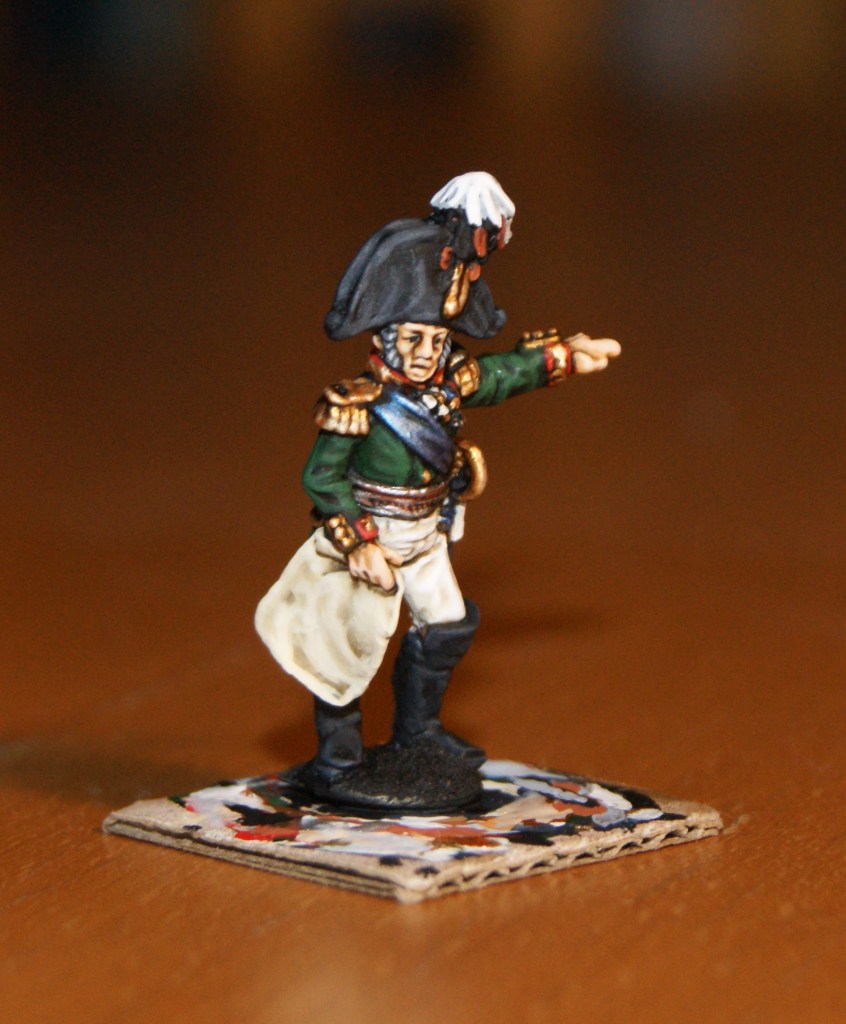
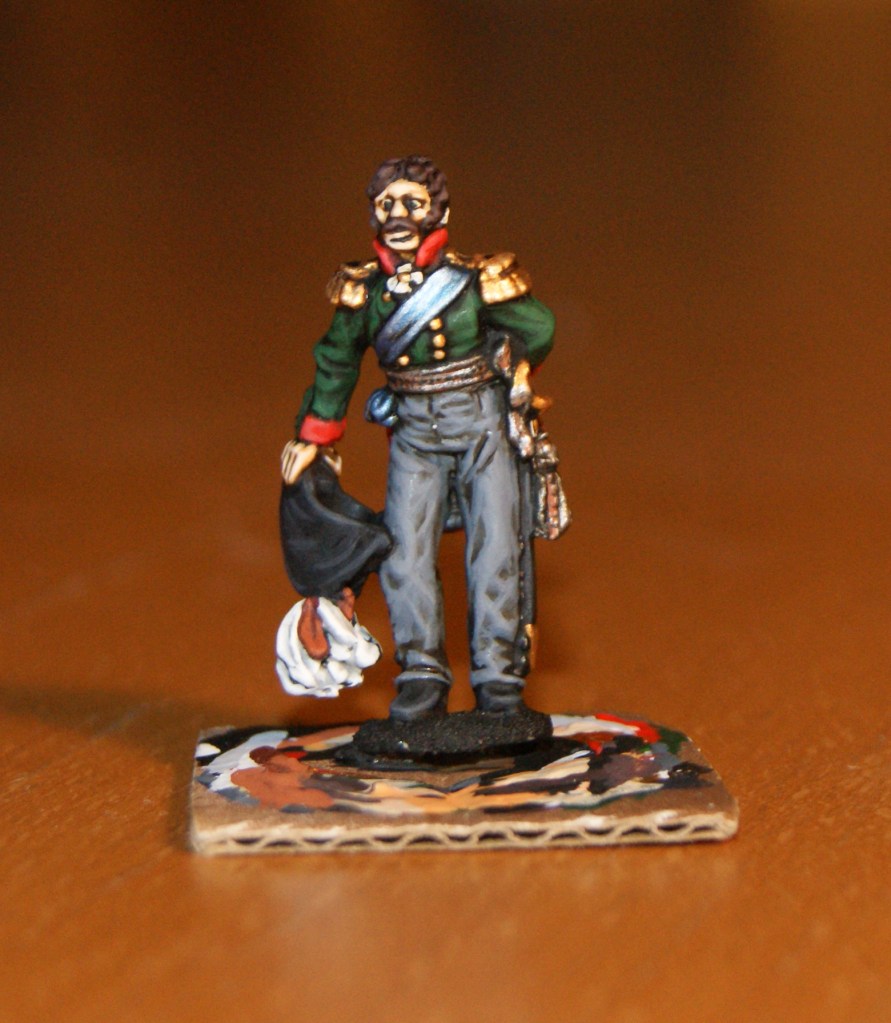
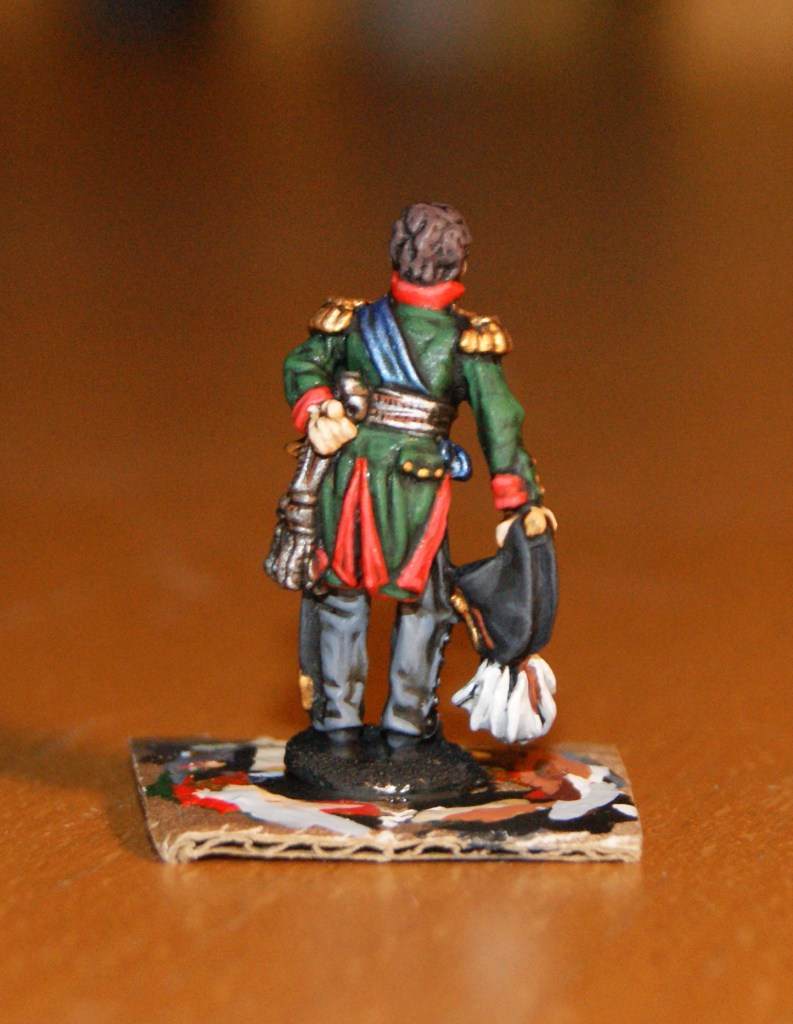
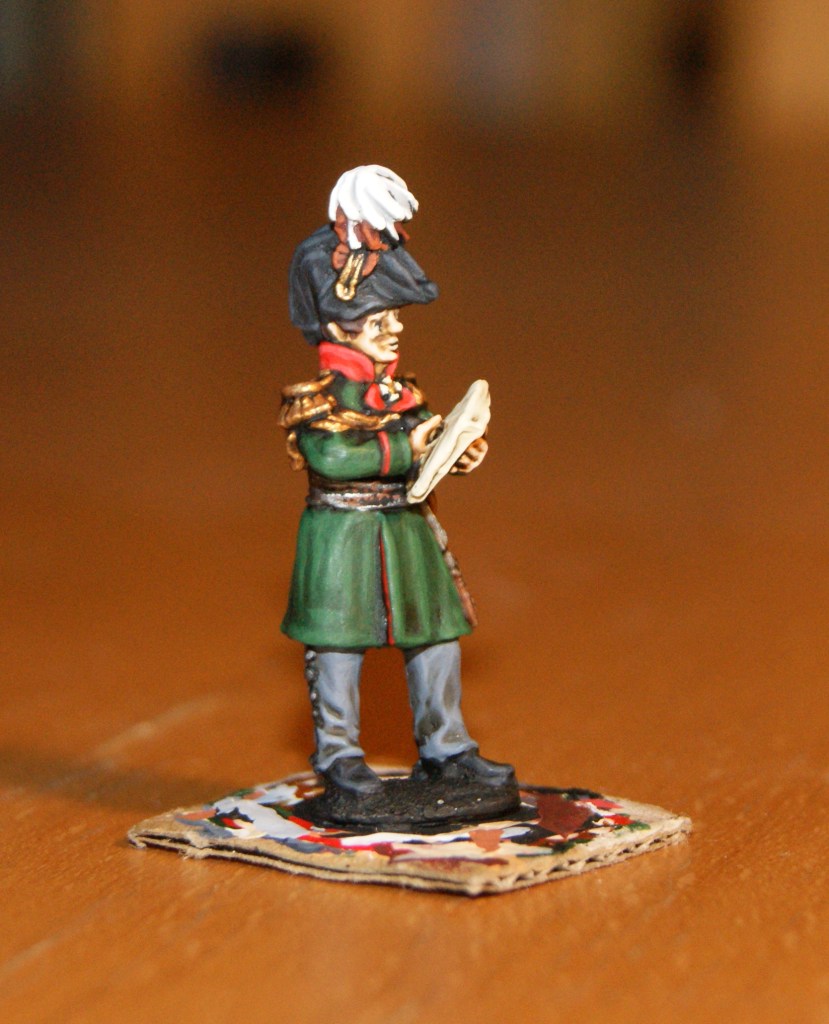
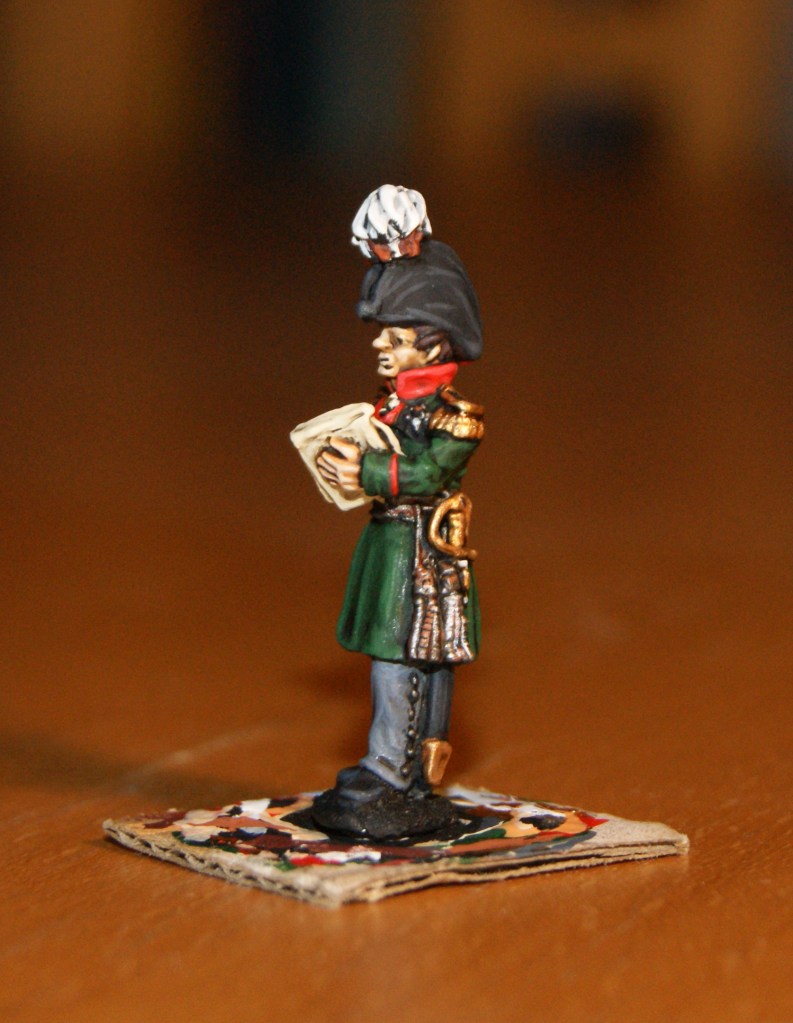
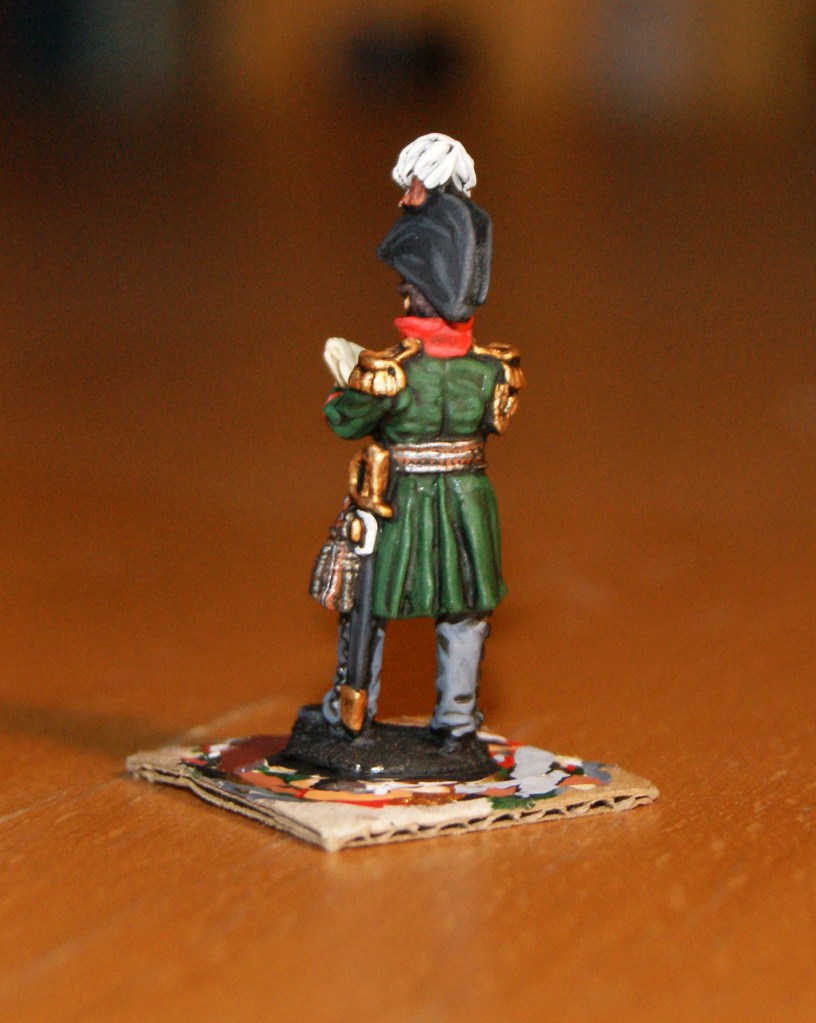
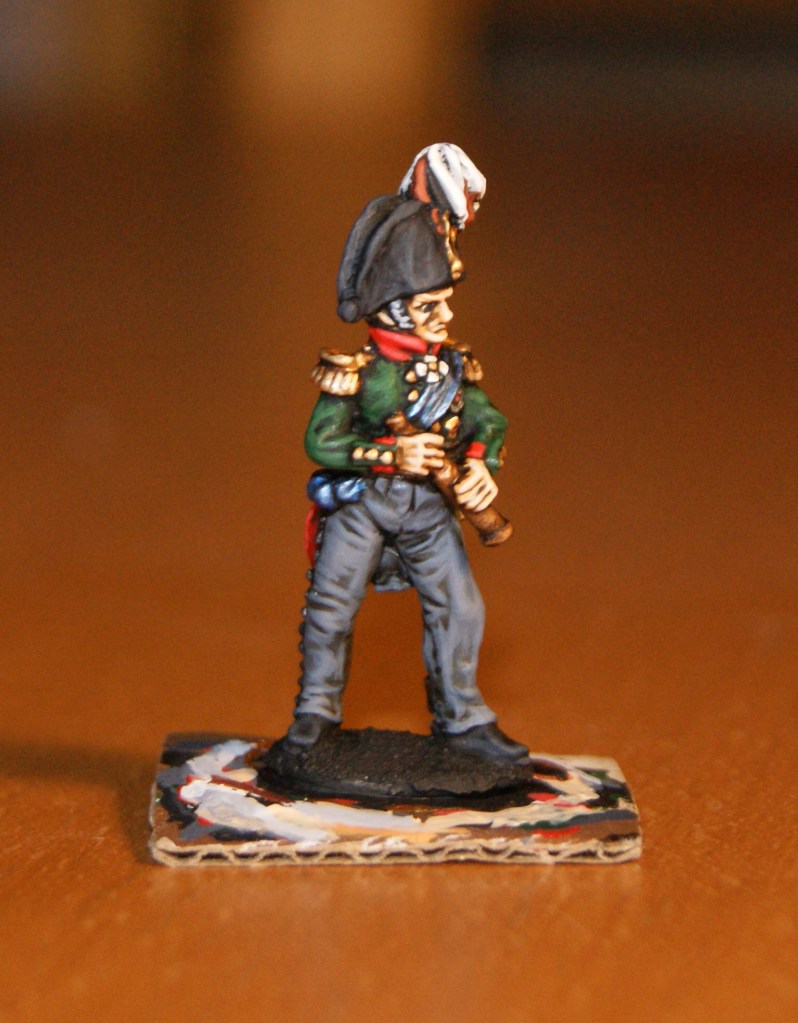
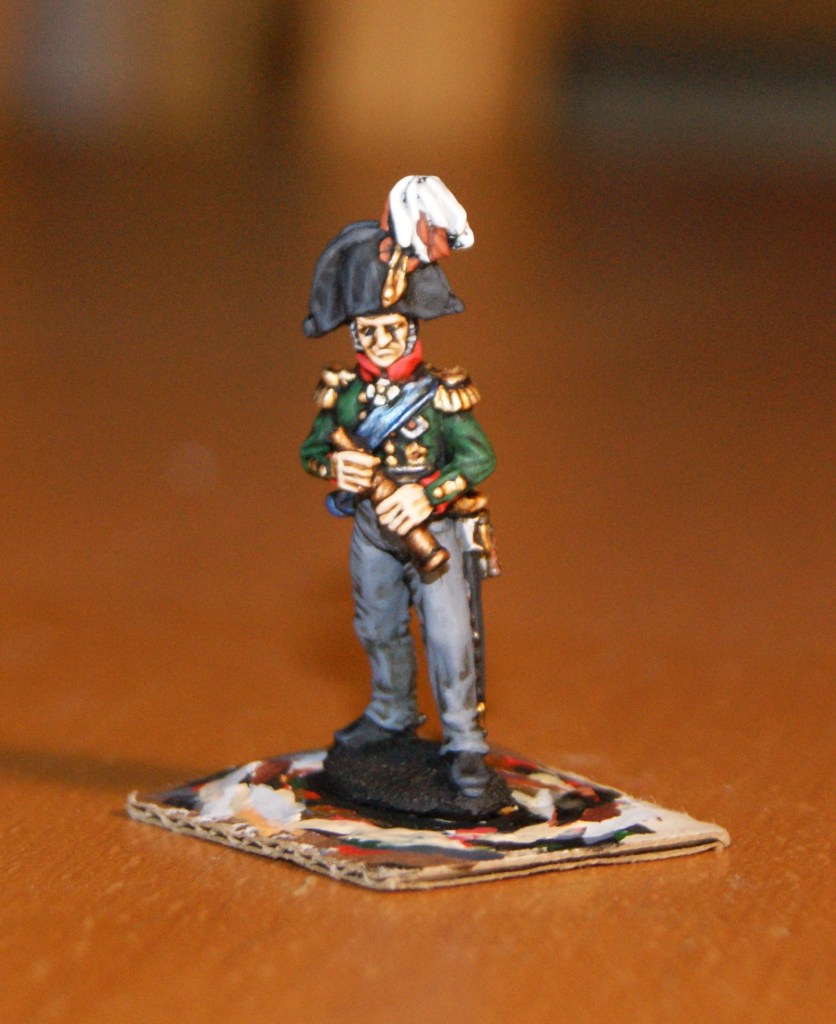
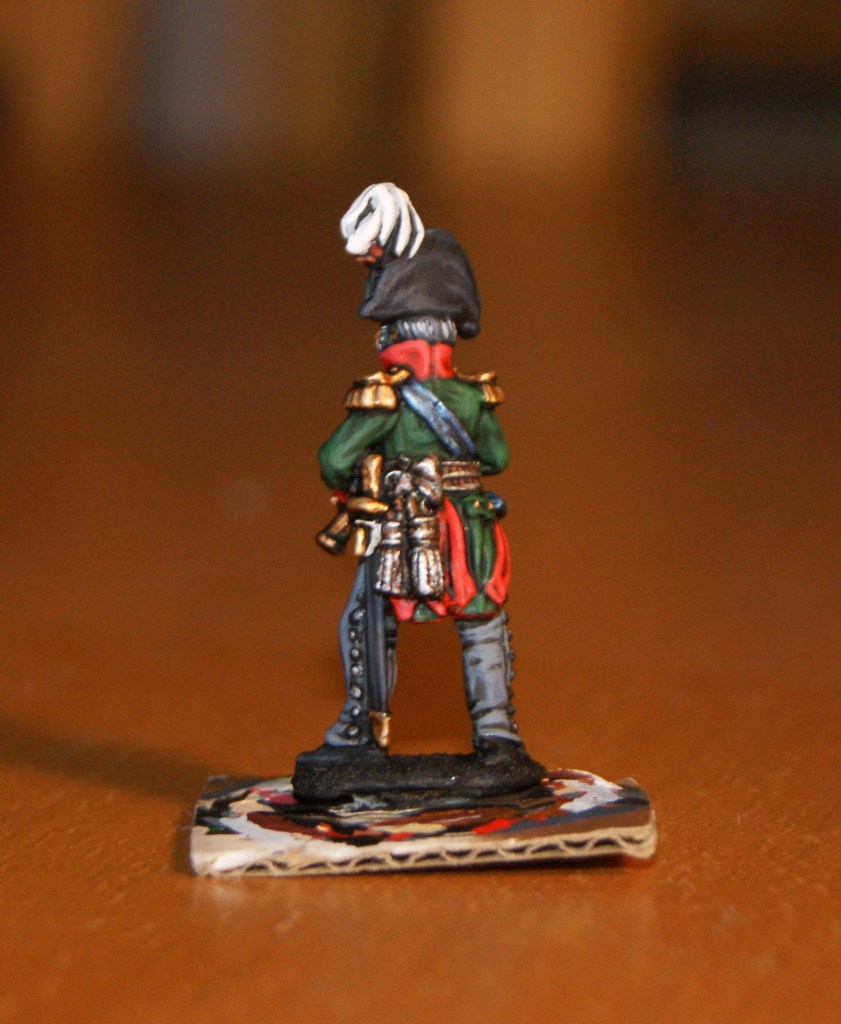
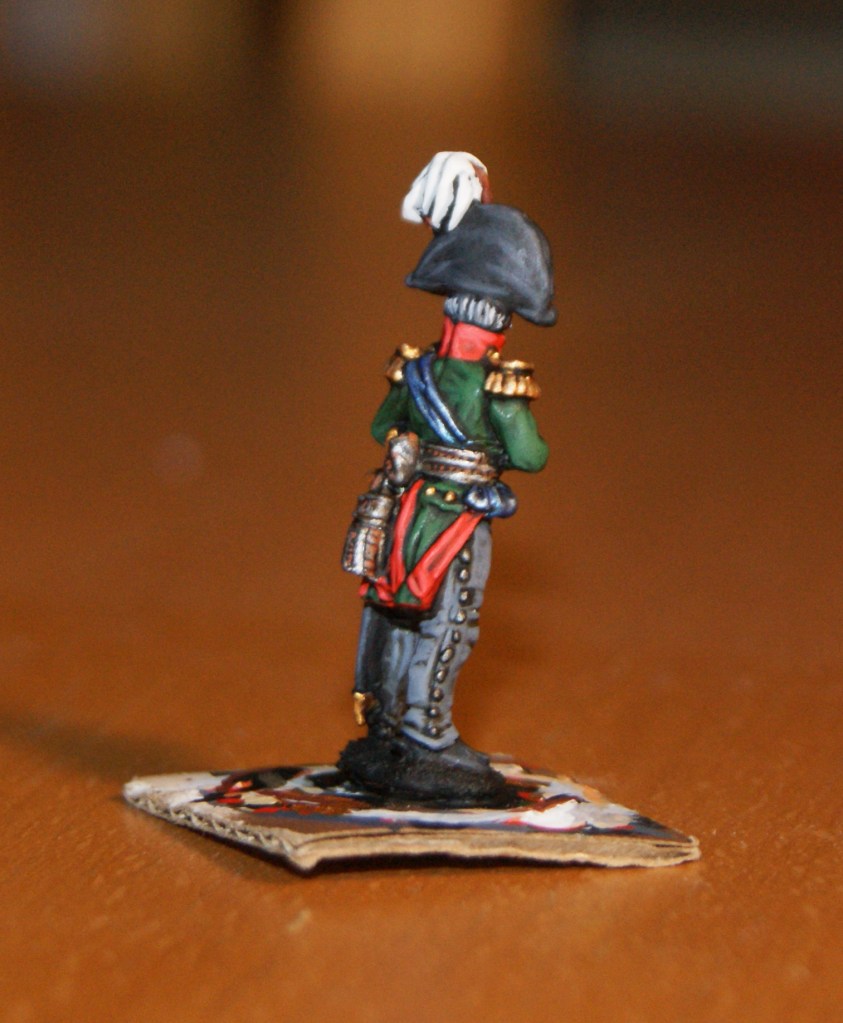
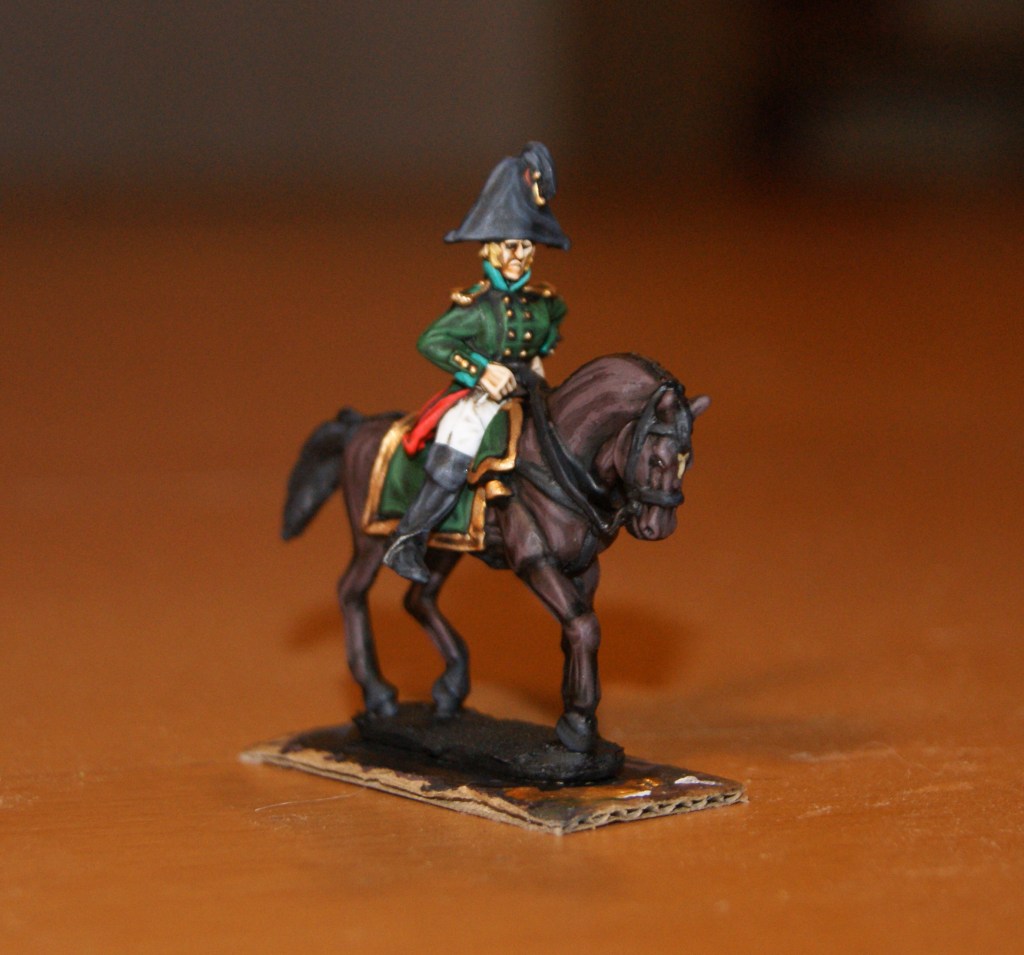
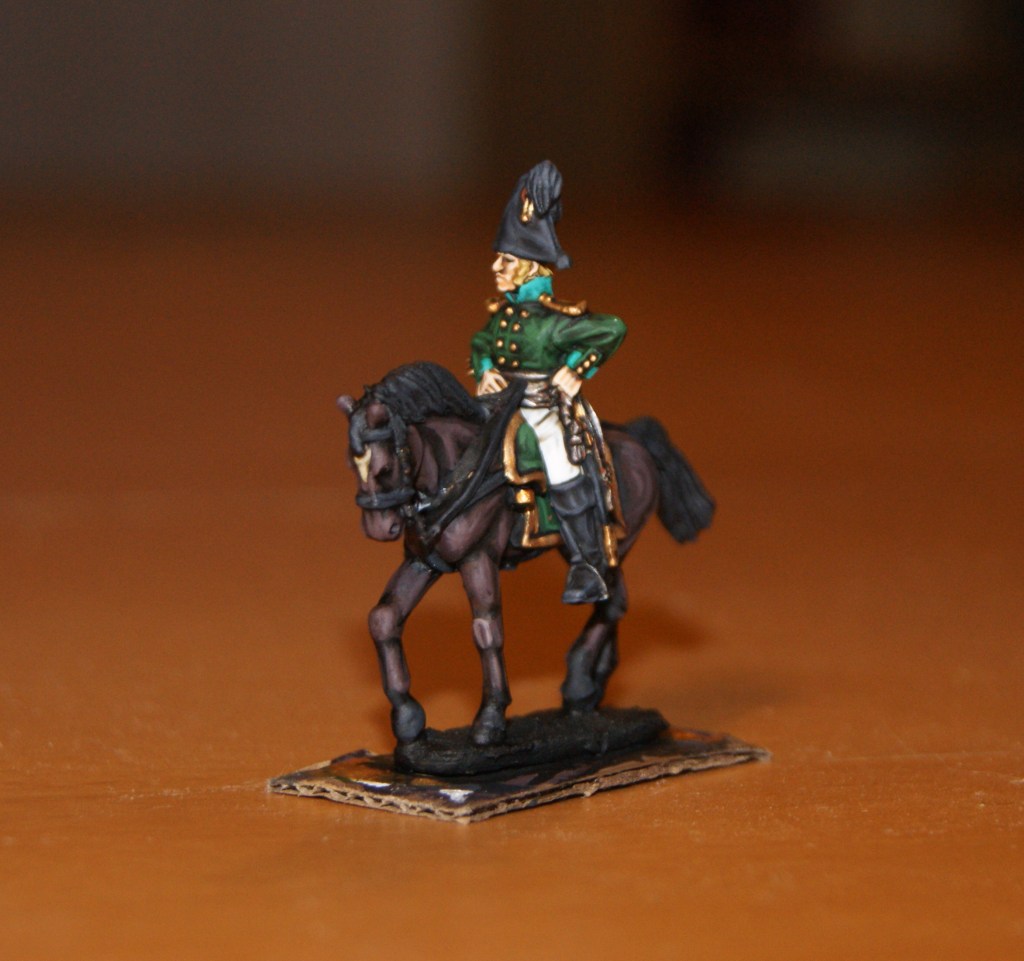
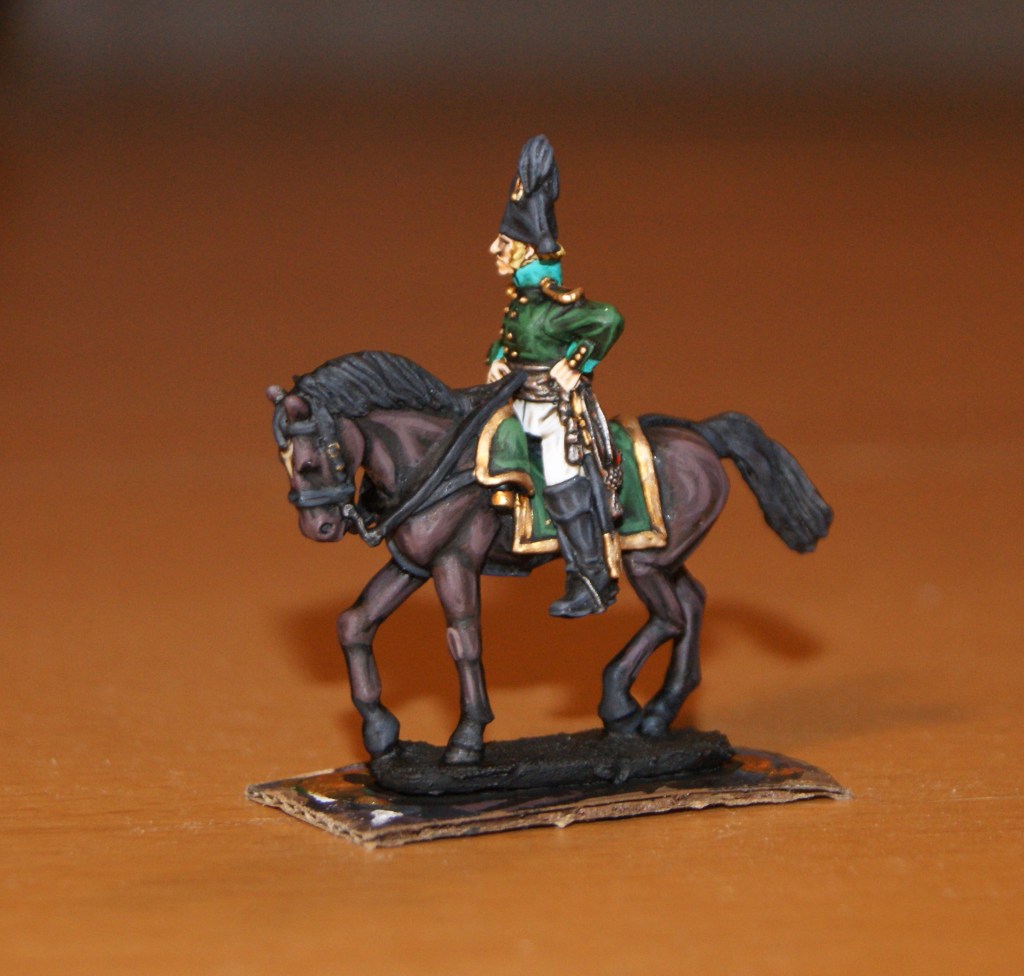
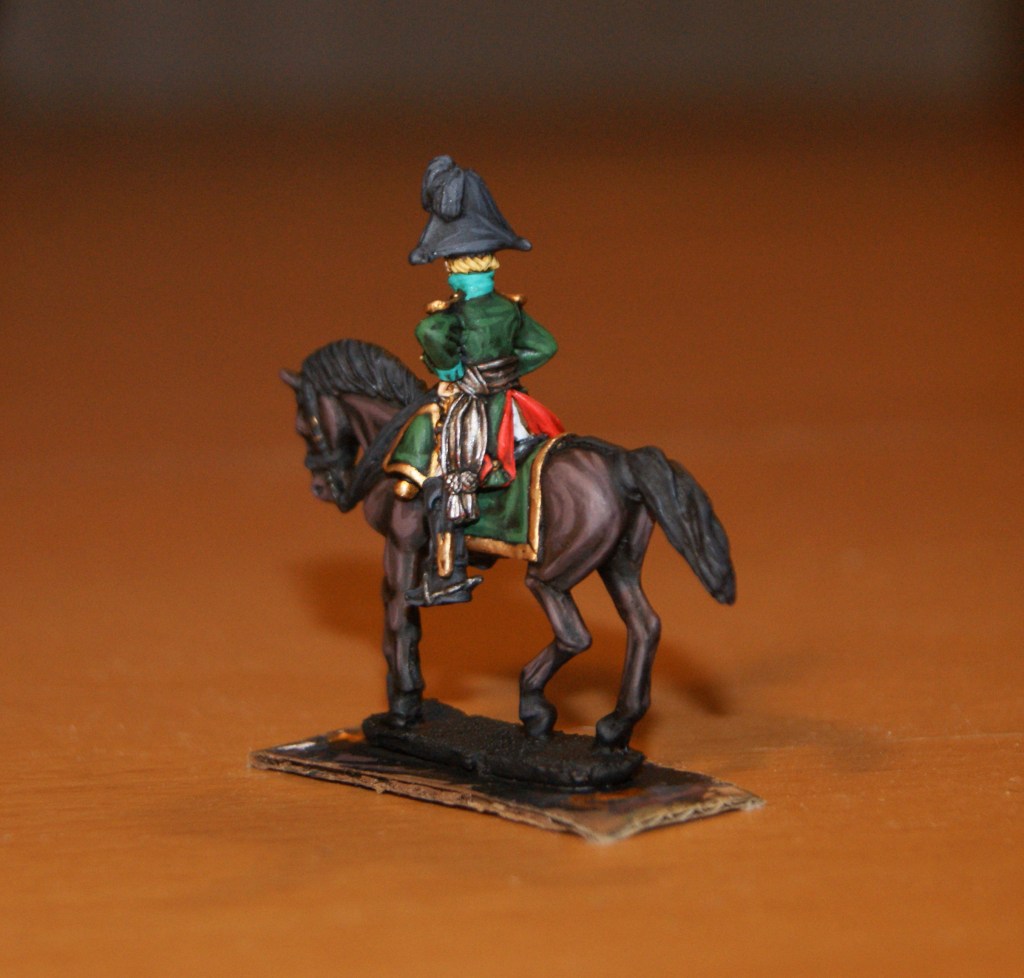
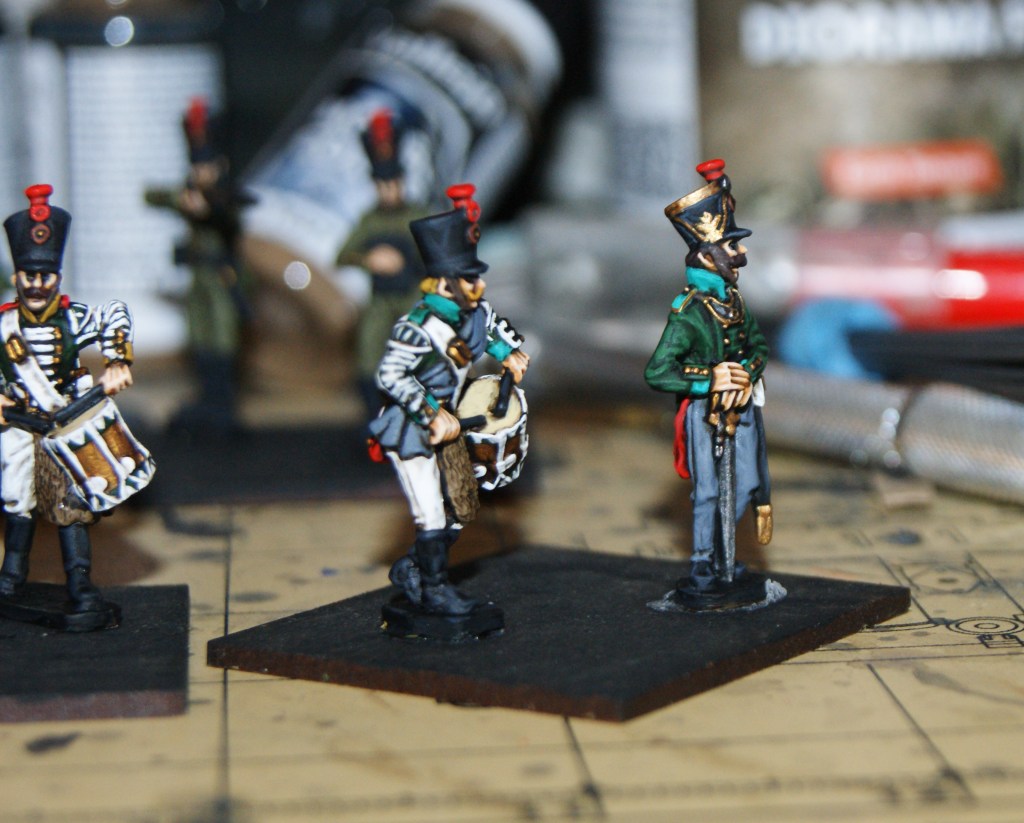
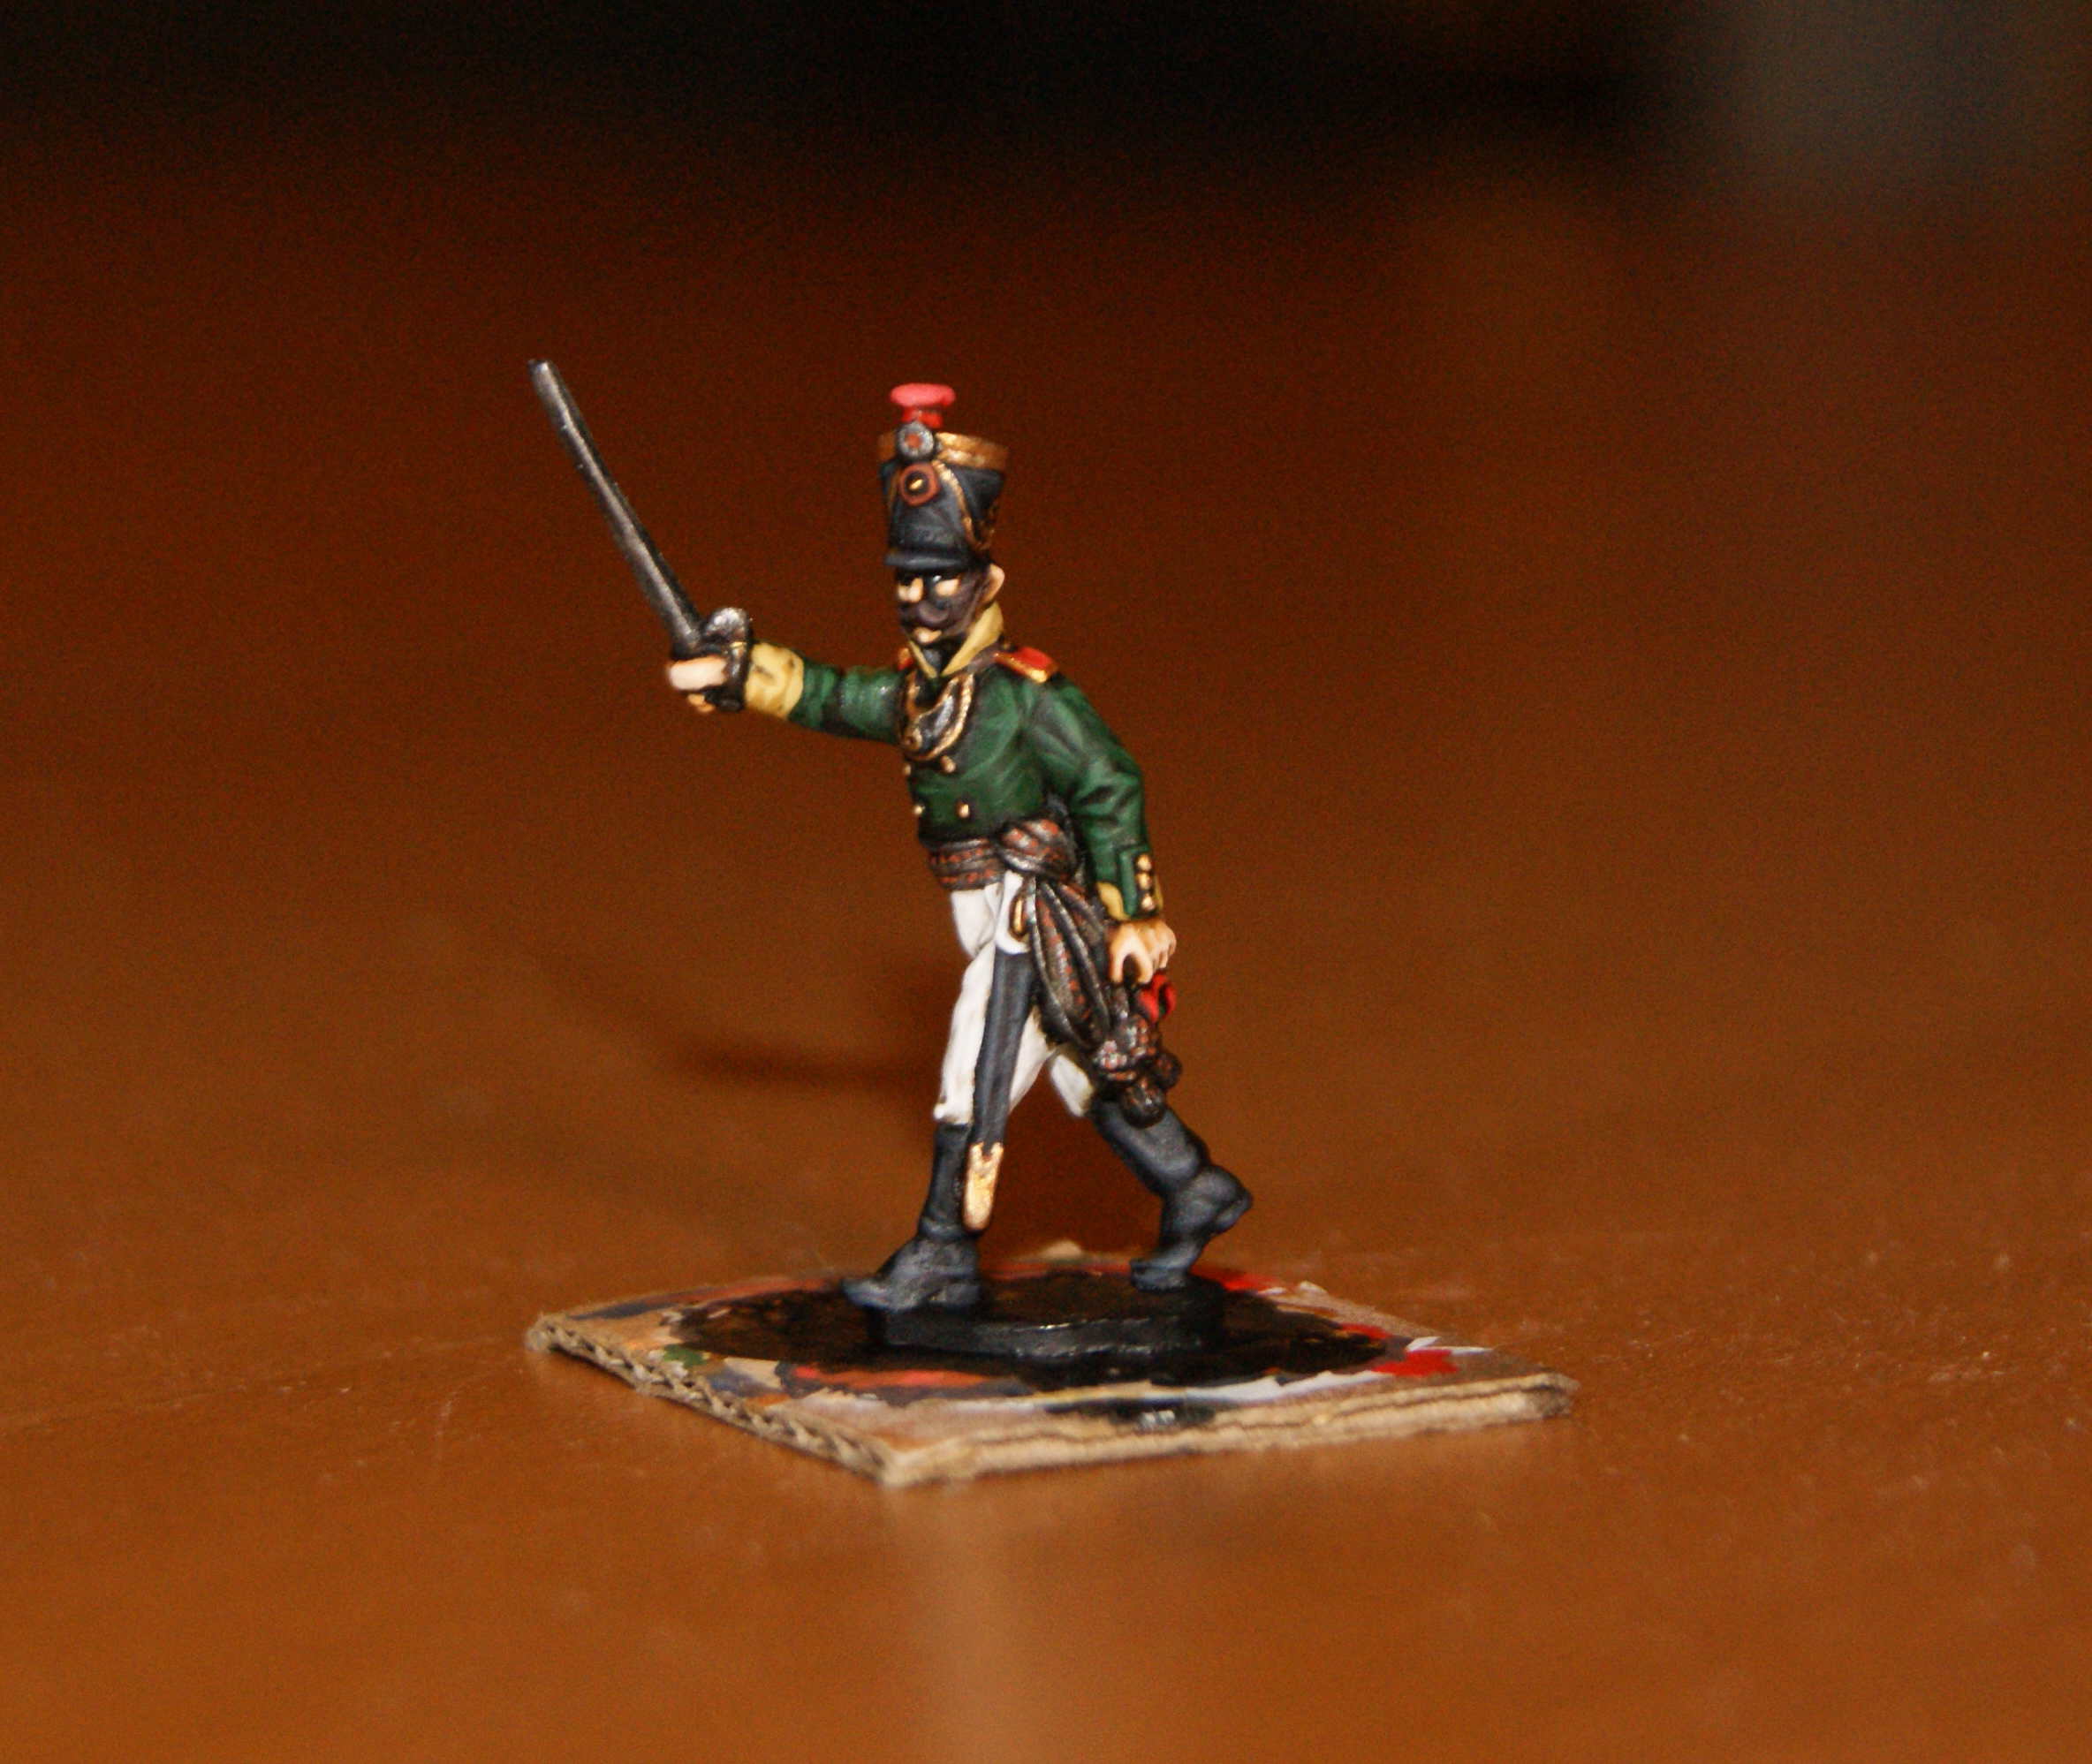
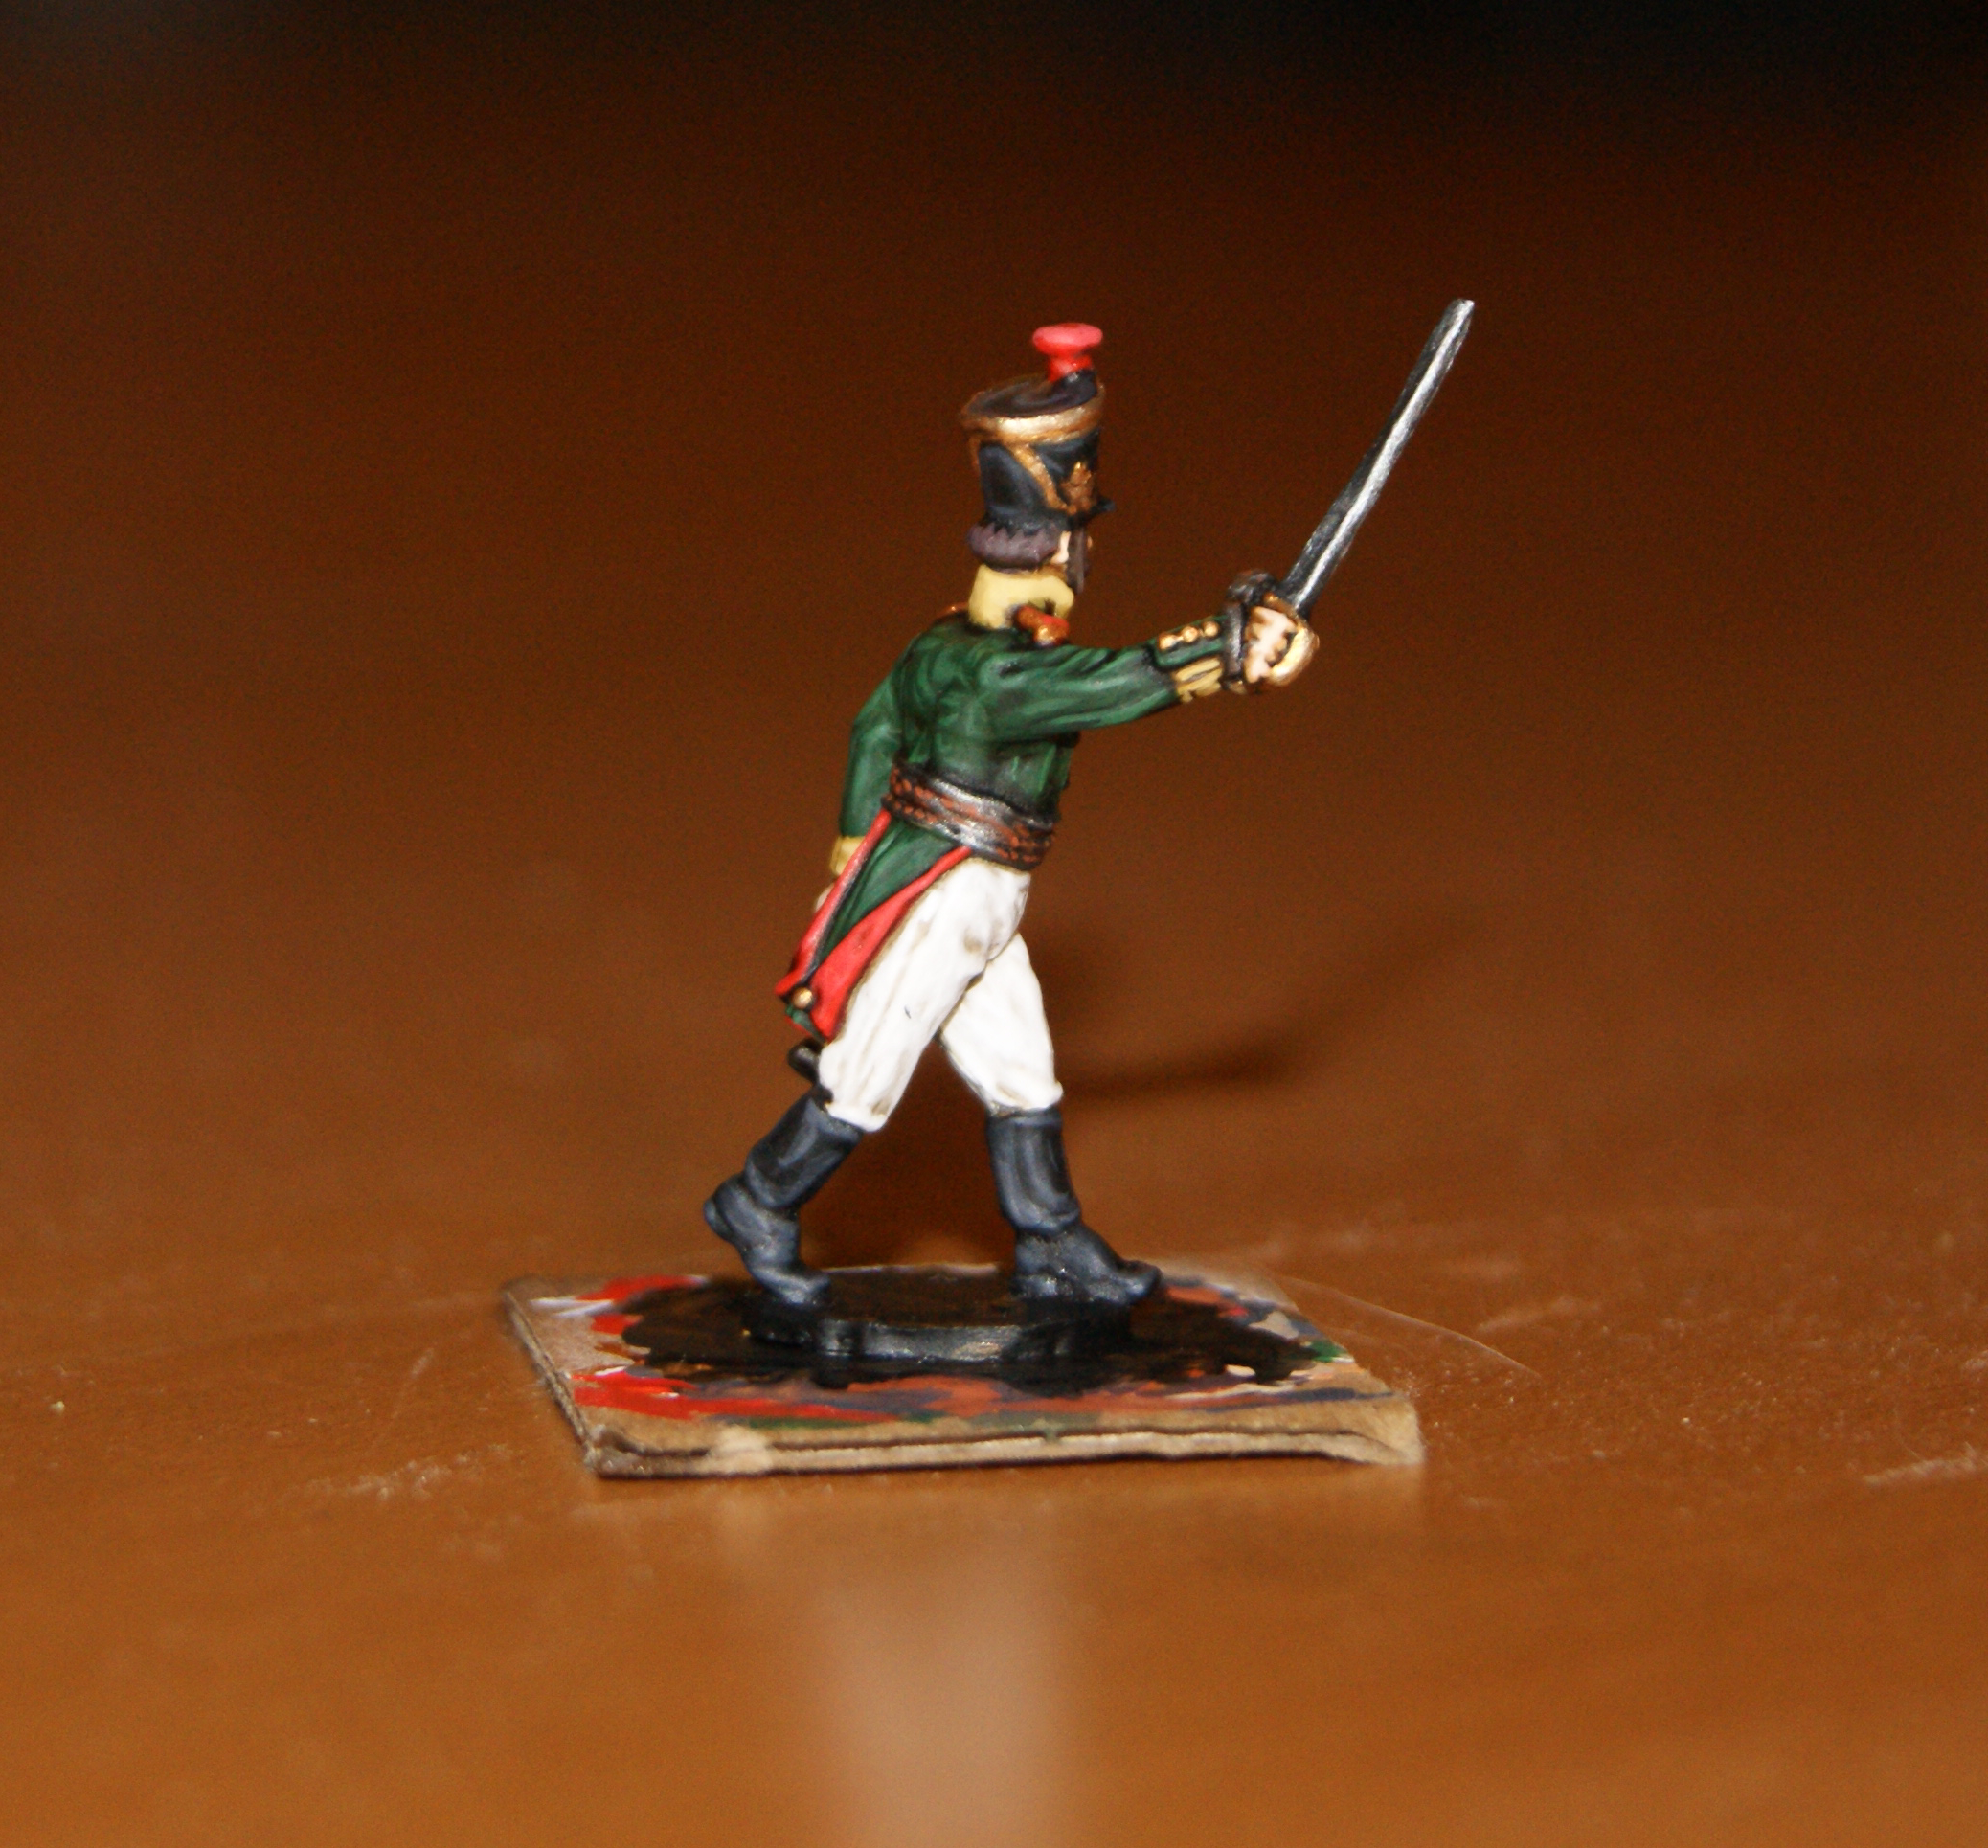
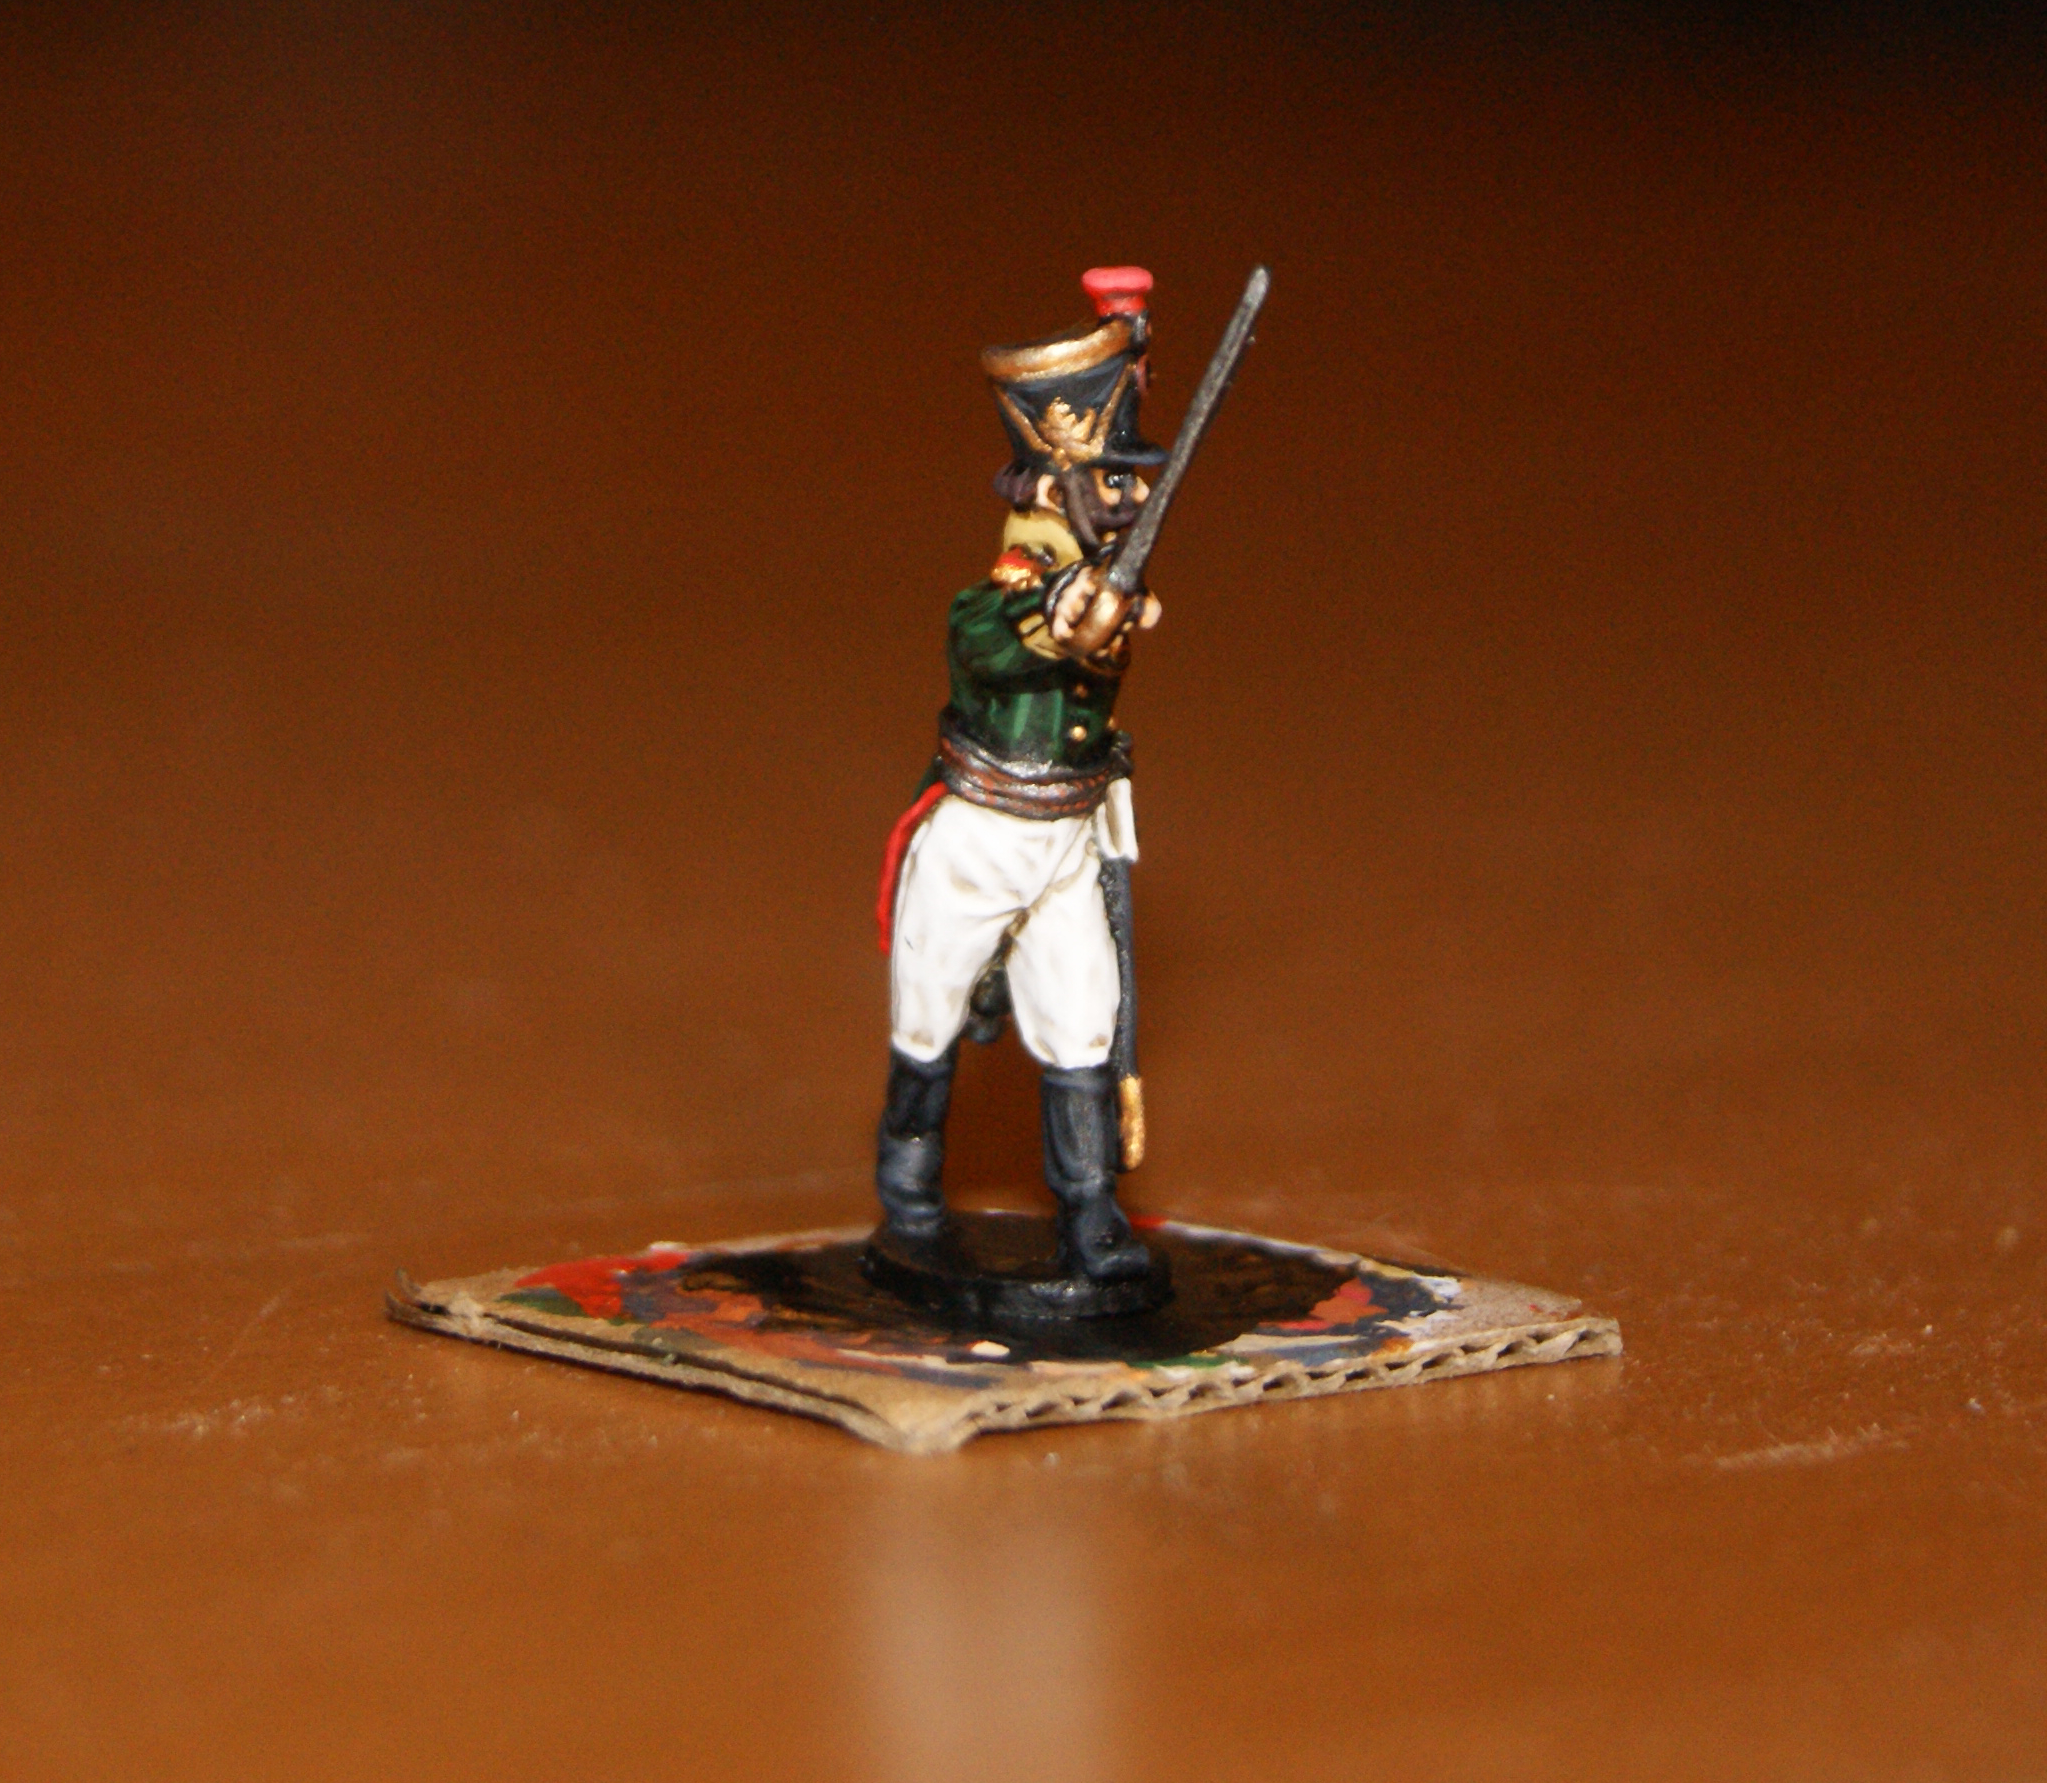
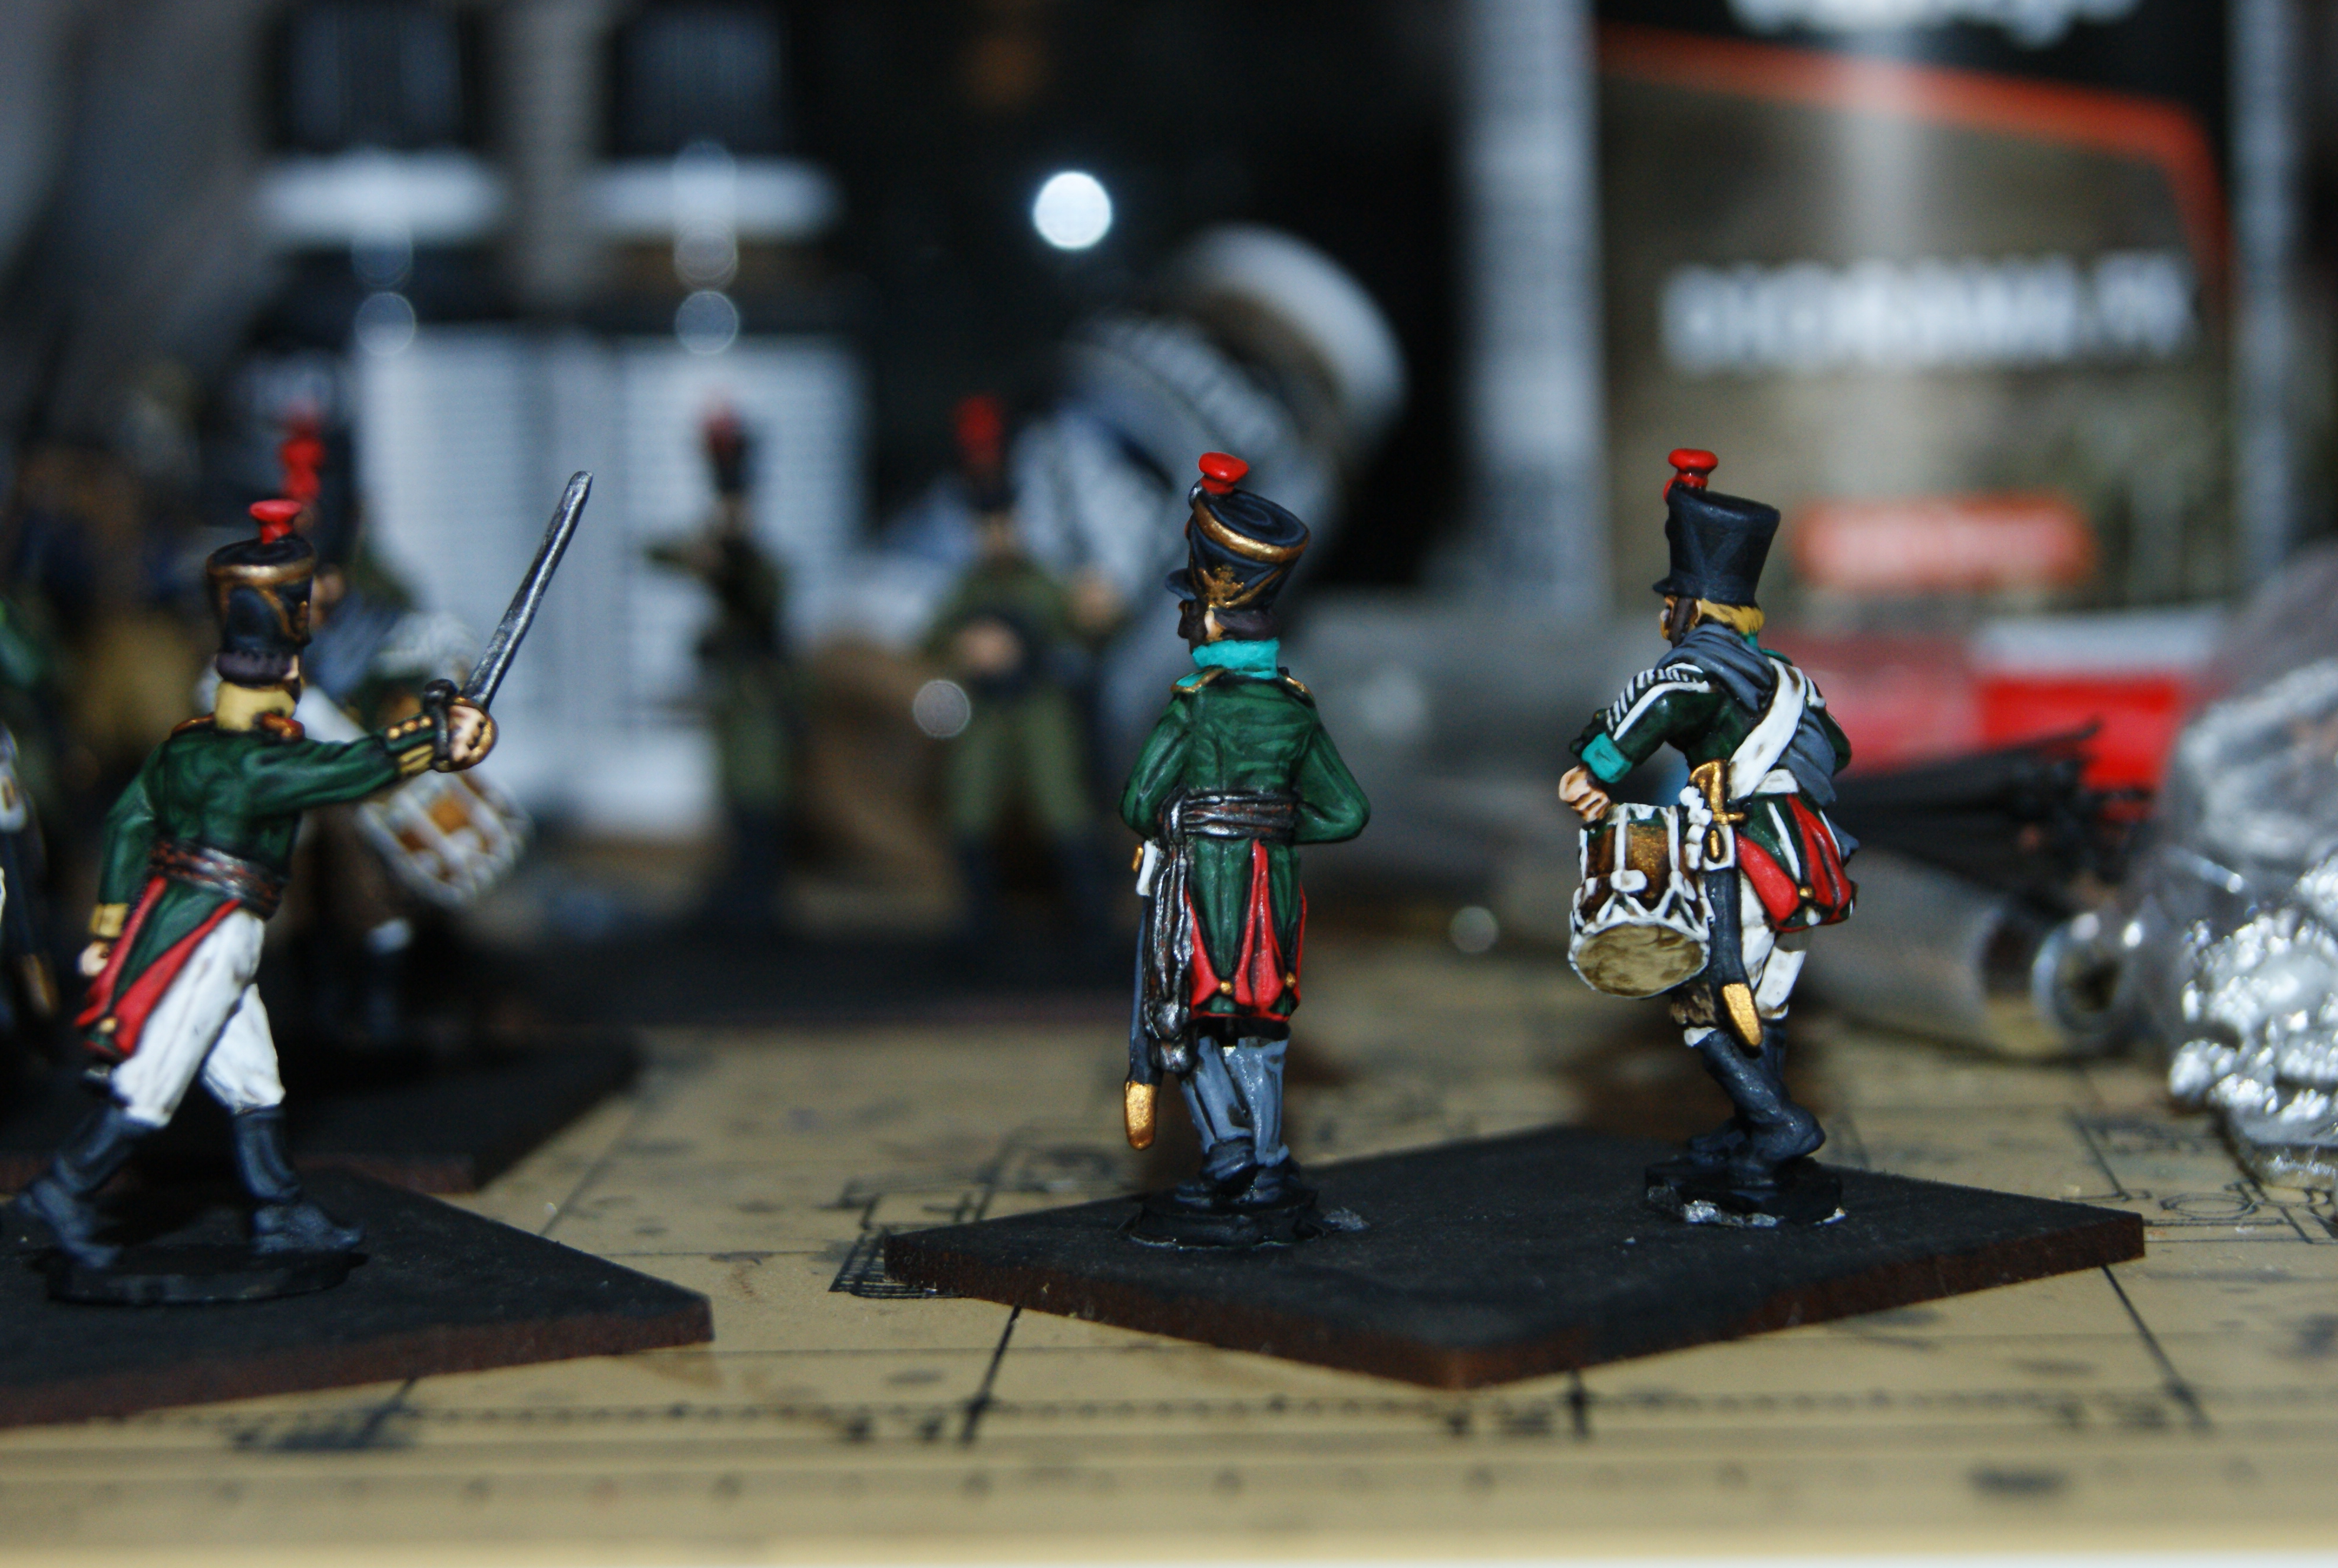
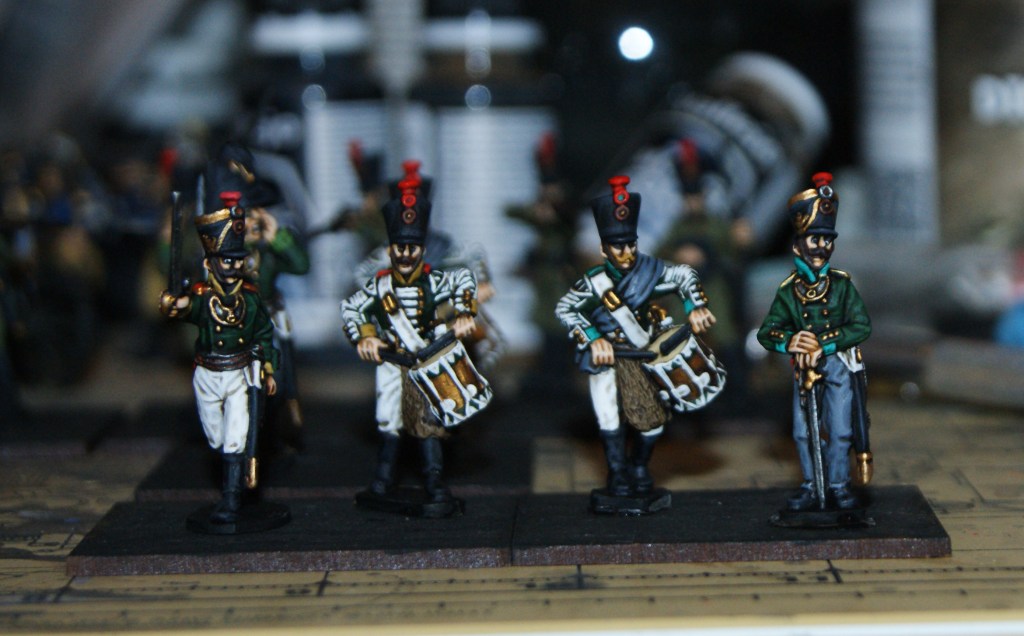
Ive done very little painting or any other hobby related things during the summer. But in the last couple of weeks I did find time and focus to prepare some more Swedes. These will be the command figures for the Uppland regiment, i e the two or three regular battalions for my Swedish-Finnish army of 1808, following the orders of battle here https://pancratist.com/2025/01/13/orders-of-battle-for-the-swedish-army-in-finland-summer-1808/.
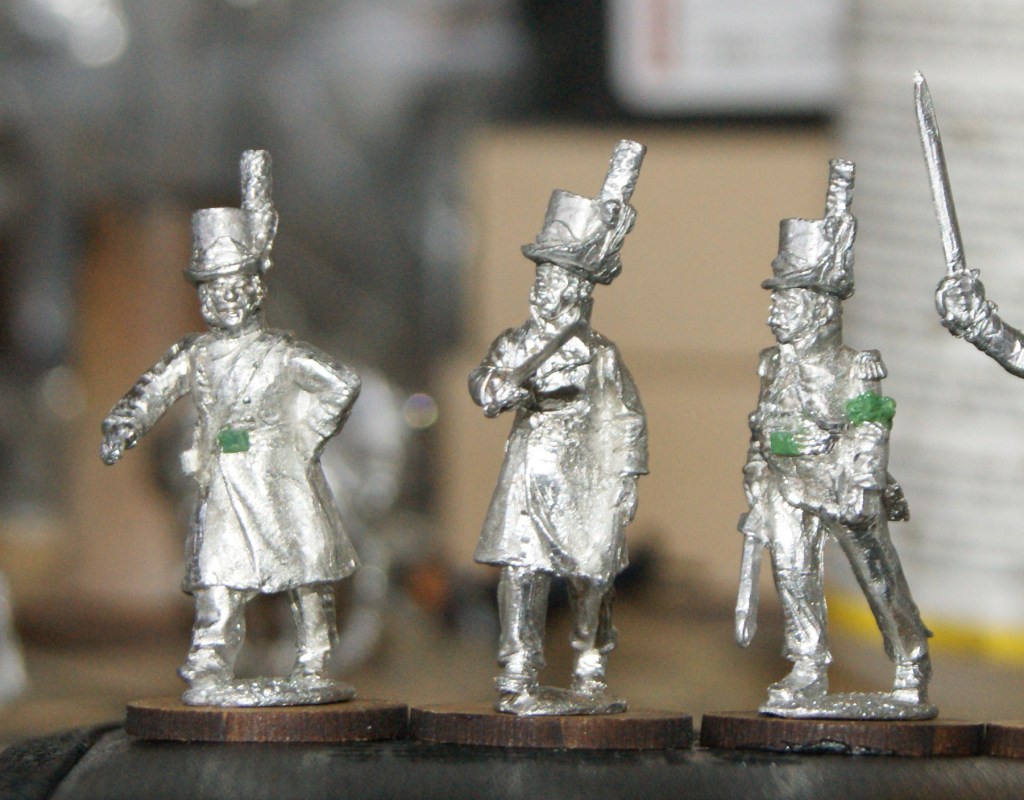
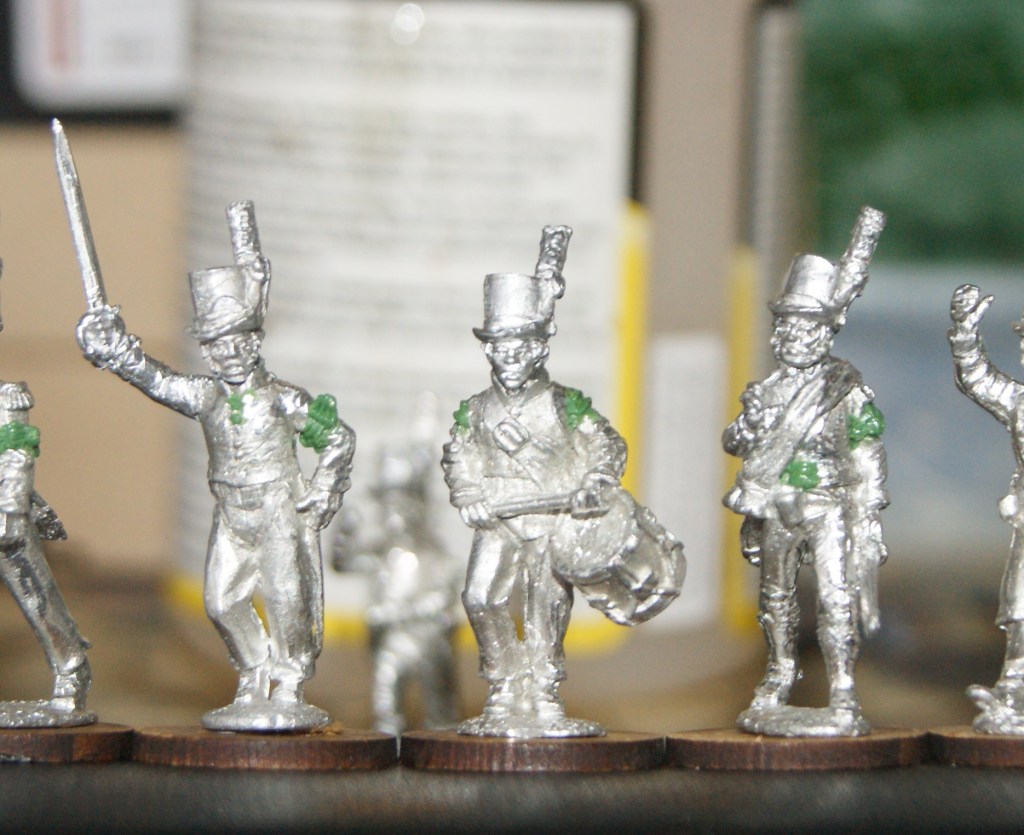
The figures are a mix of different Perry Napoleonic and Carlist war (I think) command sets. These were then altered slightly, with heads or hats exchanged and some minor details cut off and/or added in green stuff.
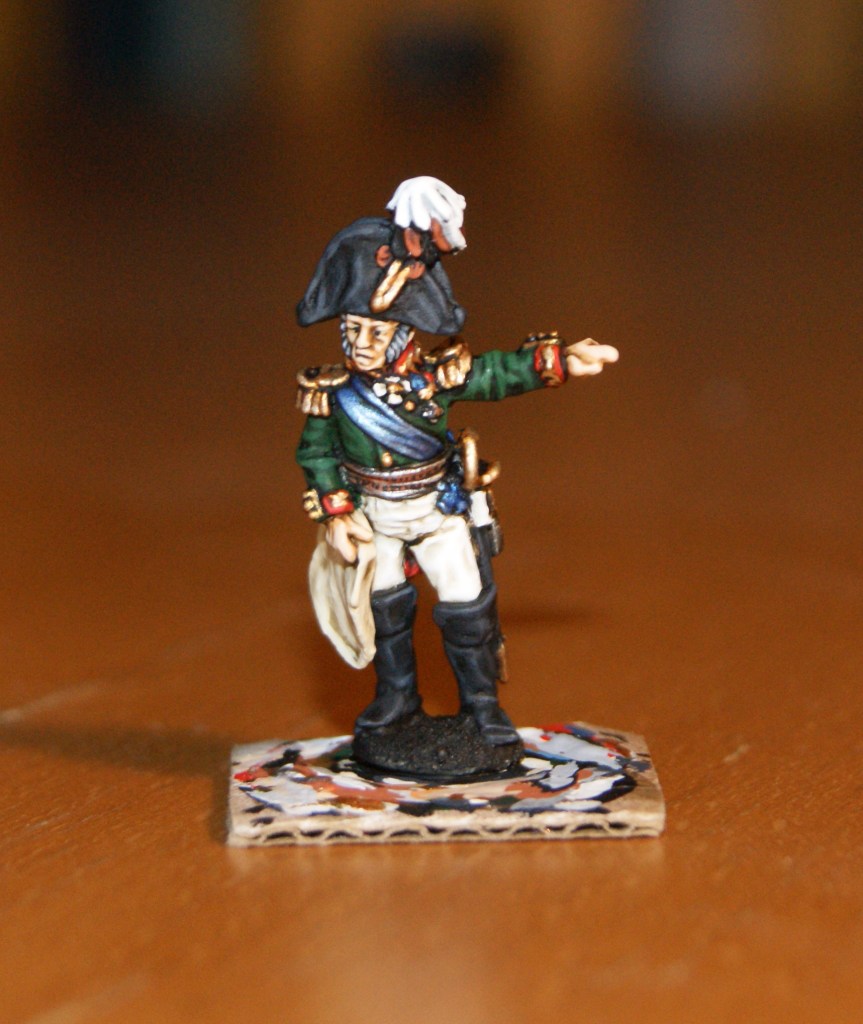
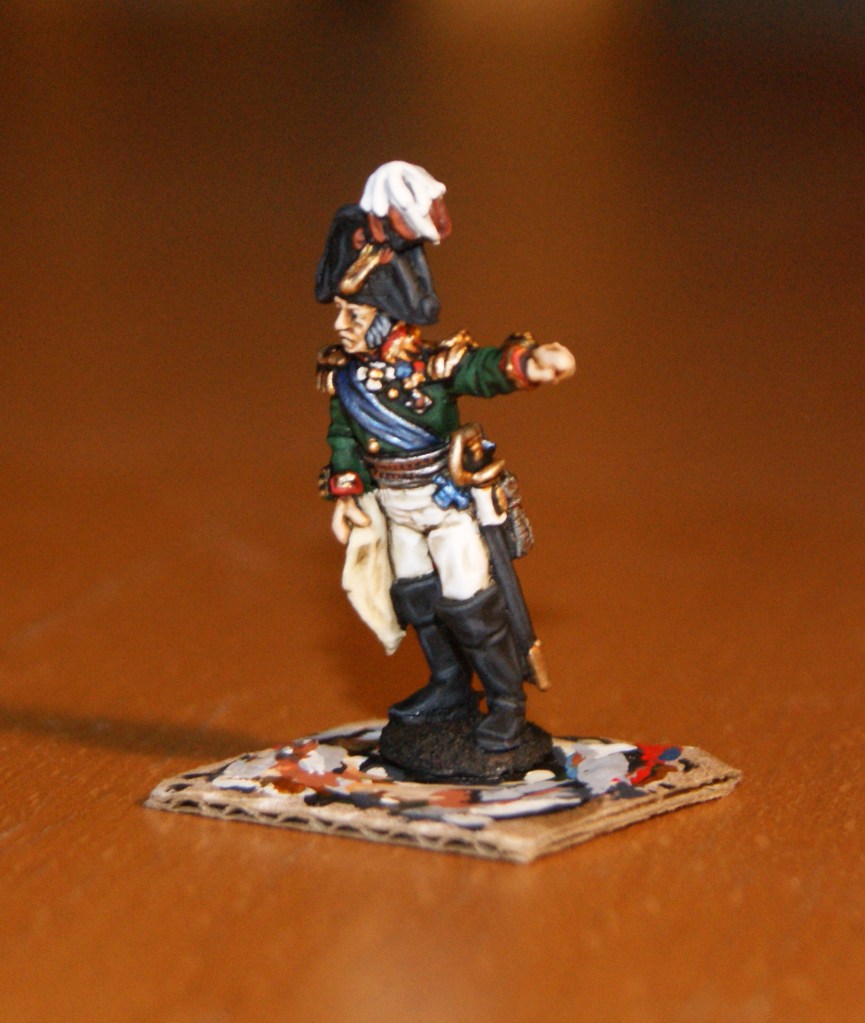
Some of the figures are wearing greatcoats. I was particularly interested to have some such figures as many officers (and NCOs) wore the “surtout” coat in Finland in 1808, and certainly in the following years as well. One thing of which I am unsure is the color of the surtout. As far as I can tell, it would have been blue, up until 1807. In 1807, the regulation color would have been grey, but this was then changed again to blue in 1809. I would therefore regard it as most likely that the coats were blue. An interesting contemporary depiction of the battle of Ratan in August of 1809 shows a number of officers and men in various variants of dress, including surtouts. I would guess that some of these men are artillerymen (Svea artillery had all-blue uniforms, including blue facings). Some of the officers may be wearing a new form of greatcoat that I believe was coming into use in 1809. But it still gives a good idea, incidentally it also seems to show some men wearing an early form of shako, which was not regulation at this time, but was allowed and must have been worn on an individual basis.
Detail of the painting depicting the battle of Ratan, 1809. It was painted by Carl Gustaf Gillberg (1774–1855), who was himself an officer of the engineers and as such an experienced military artist. He also made many miniature portraits of officers, and not least the official uniform plates fot the 1802 and 1807 uniforms. That, it seems, would make this painting an excellent source. Too bad the men are not shown in greater detail!
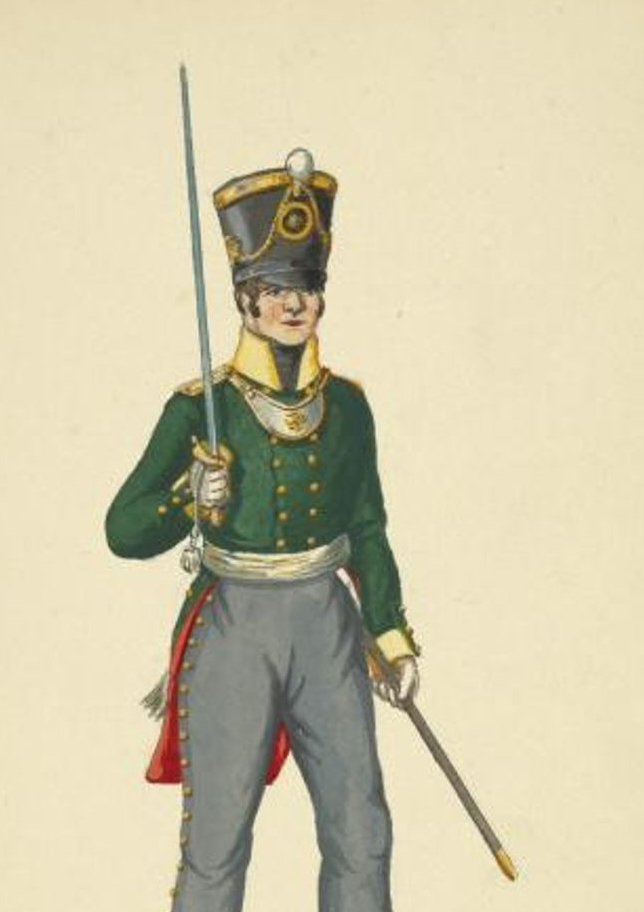
We know that Uppland still wore their old blue uniform jackets in Finland. Coattails and cuffs were yellow with white piping and the collar was all white. I dont know whether or not the surtout had yellow/white facings like the jackets, but that would seem to be logical. There is at least one preserved surtout (of an older model) that I have seen, and its does indeed have a facing color that matches the uniform jacket.
In the summer of 1809, Uppland may have had new grey uniforms, and they did participate in the war in Northern Sweden. However, they did not partake in any significant fighting. At the battle of Sävar, they were detached from the main force at some distance from the field.
Im looking forward to painting these. The figures in surtout should be very easy to paint. However, how well the conversions actually work will only show once they are finished.
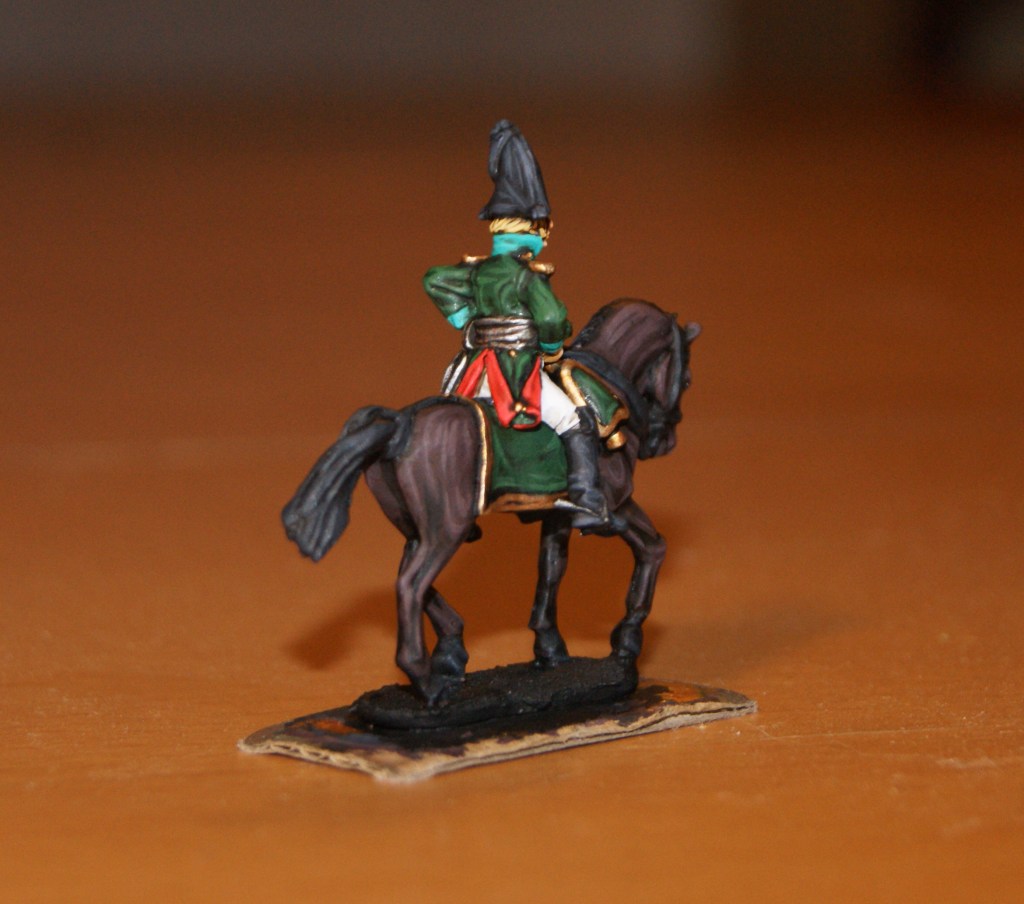
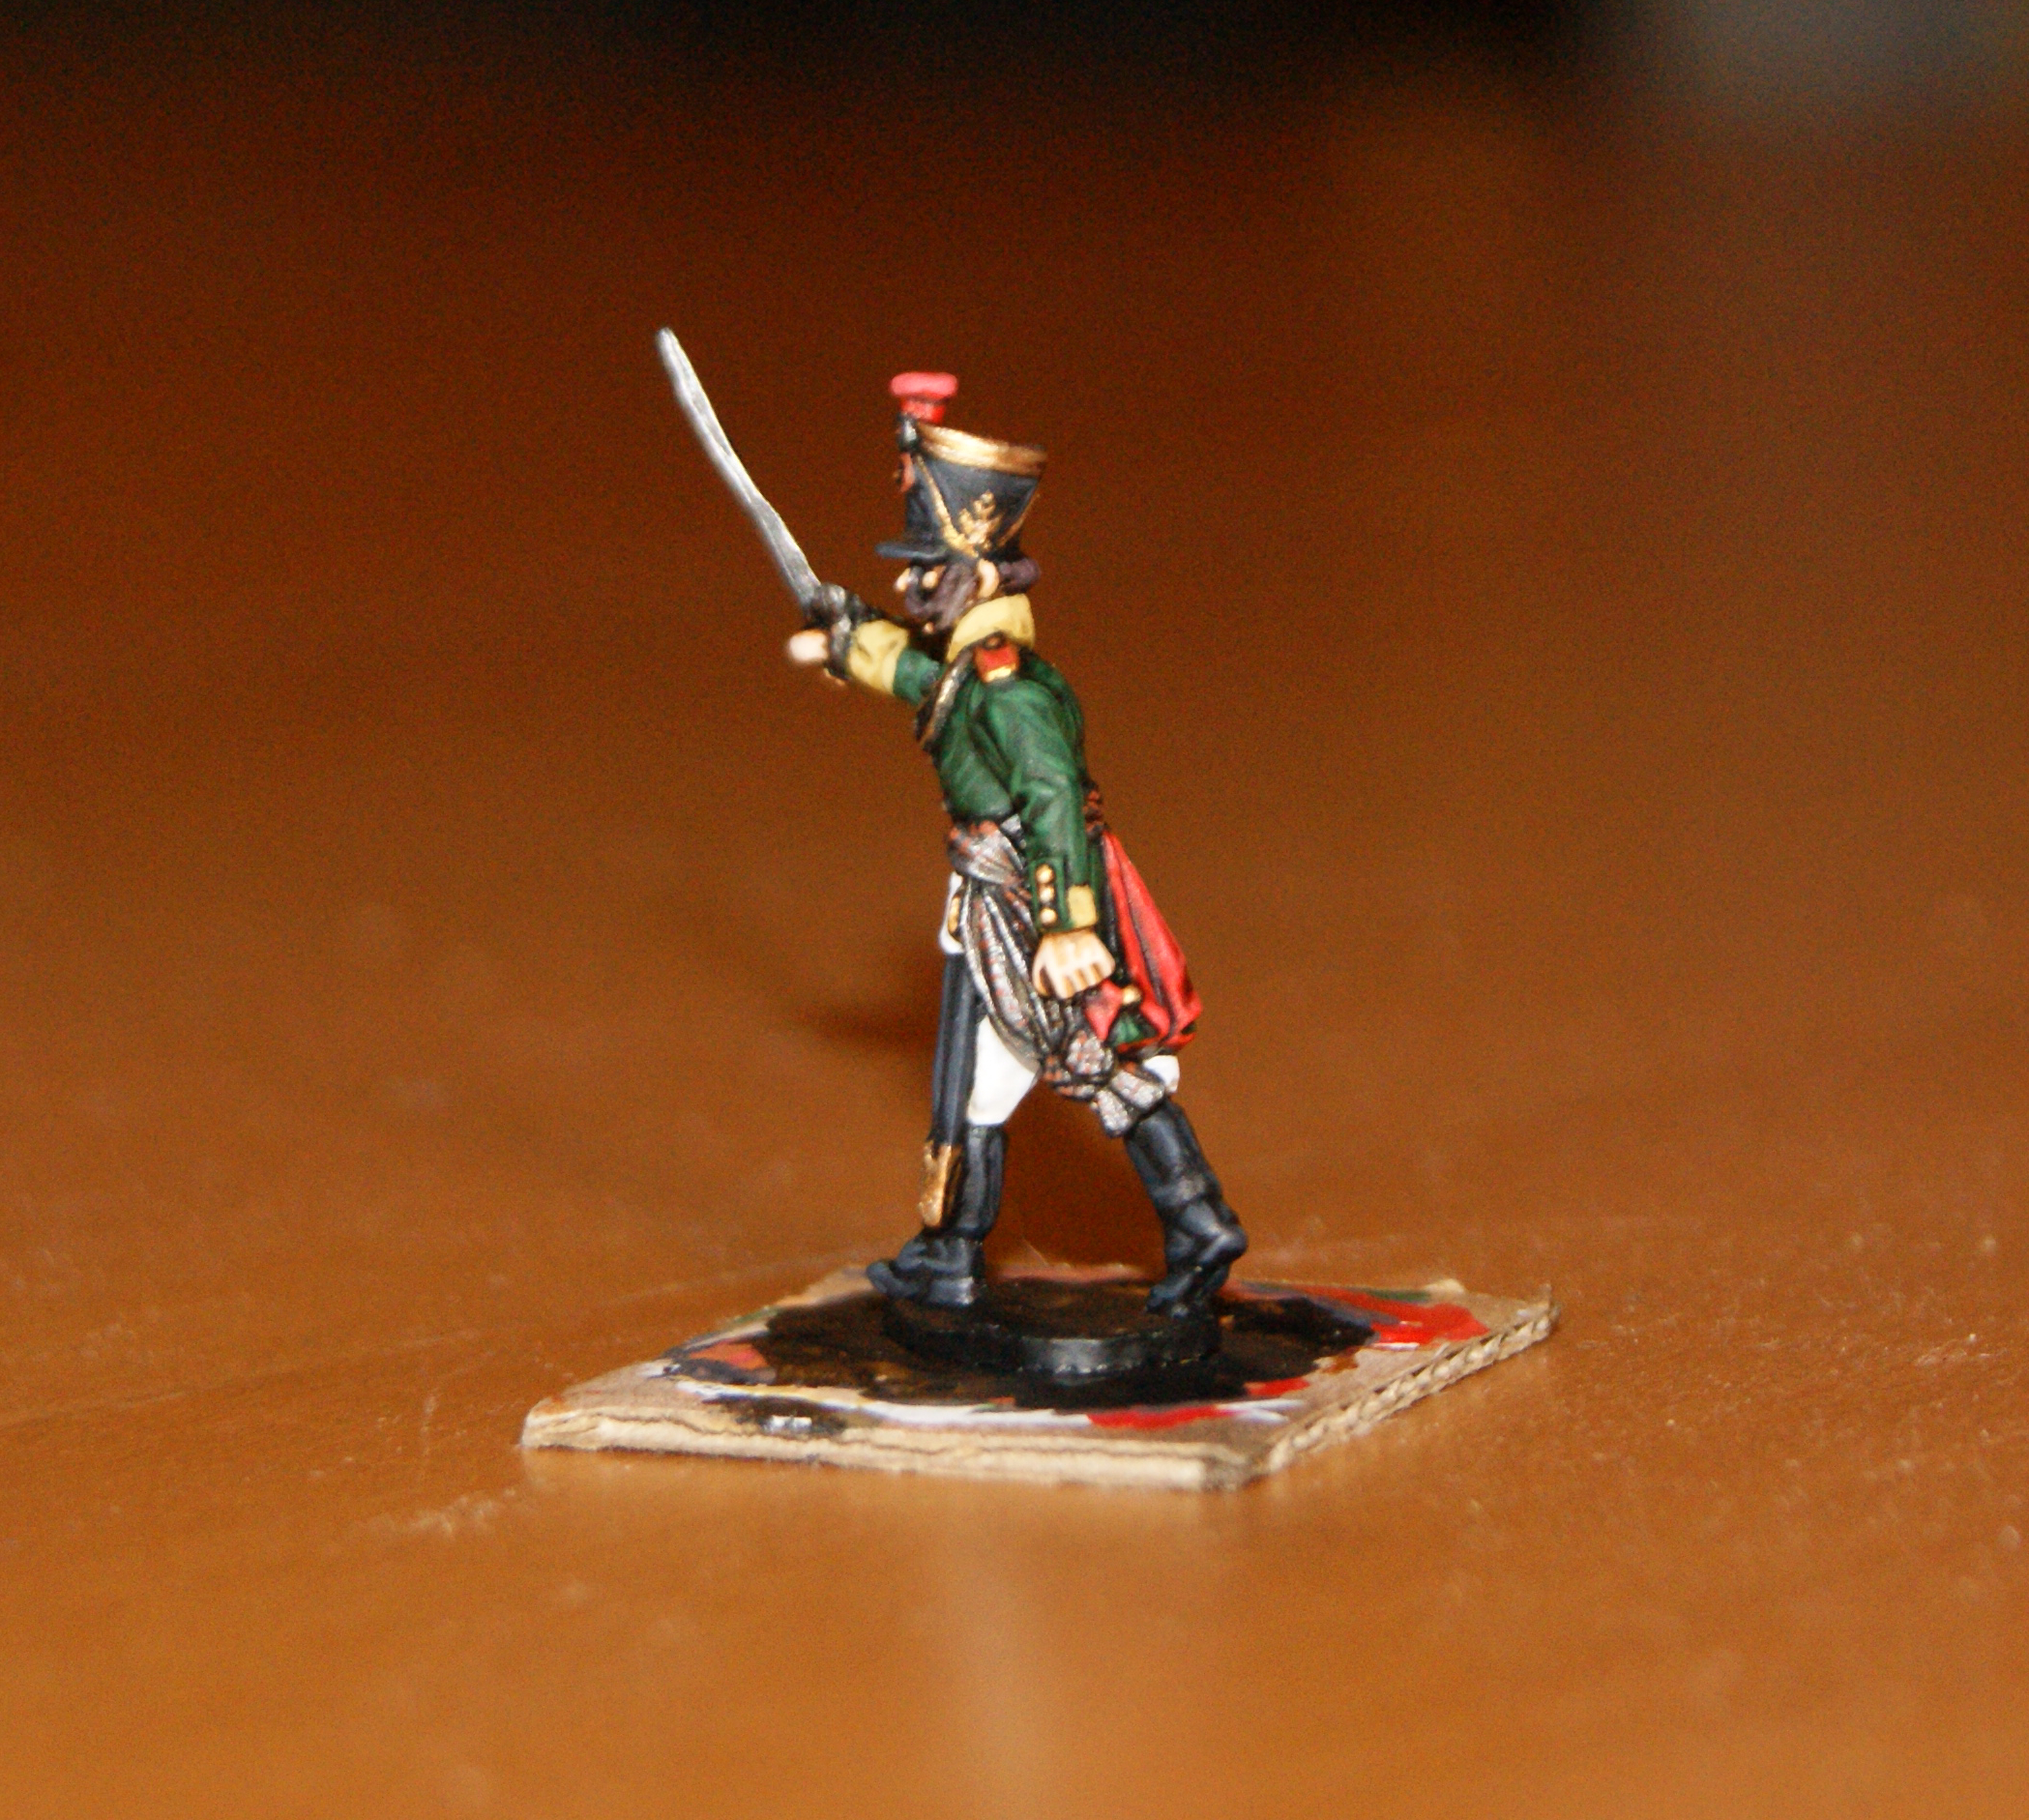
I added some higher quality pictures of the figures, shot with a proper camera. In part, it also reveals some slight mistakes I made on these back in the day…
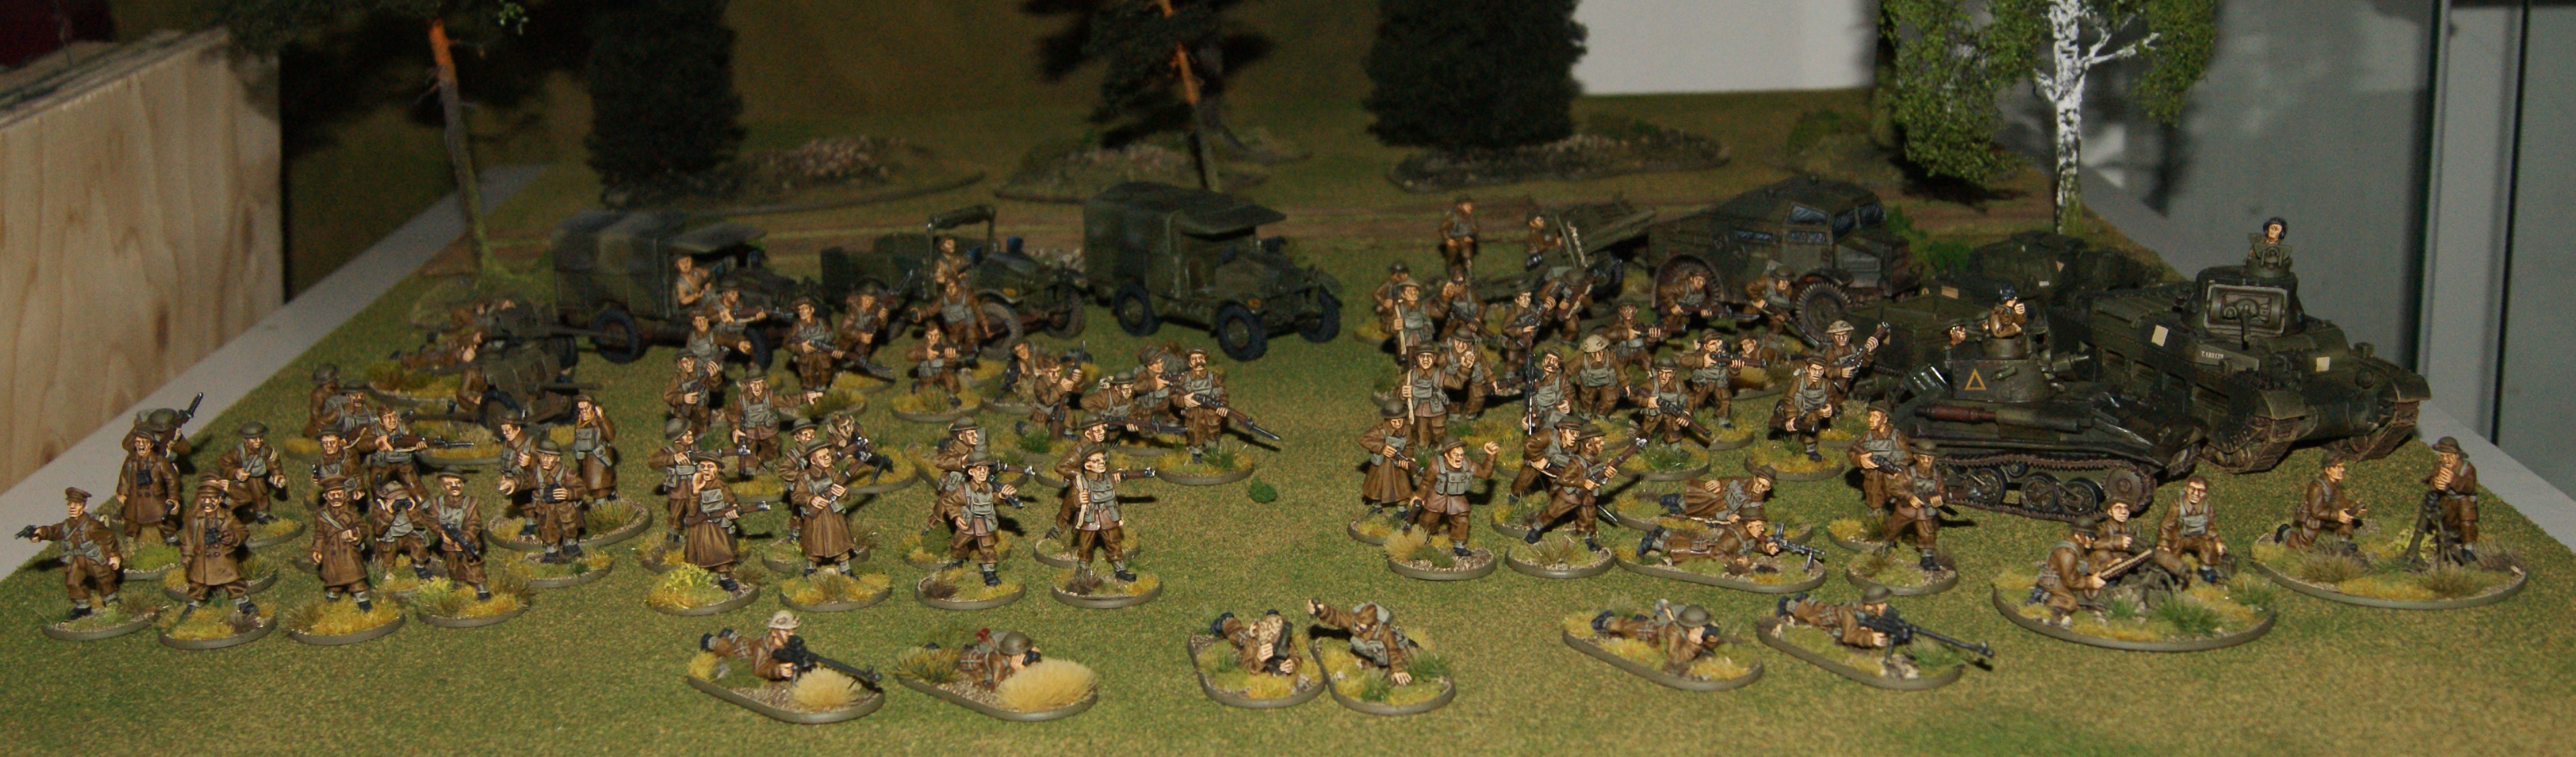
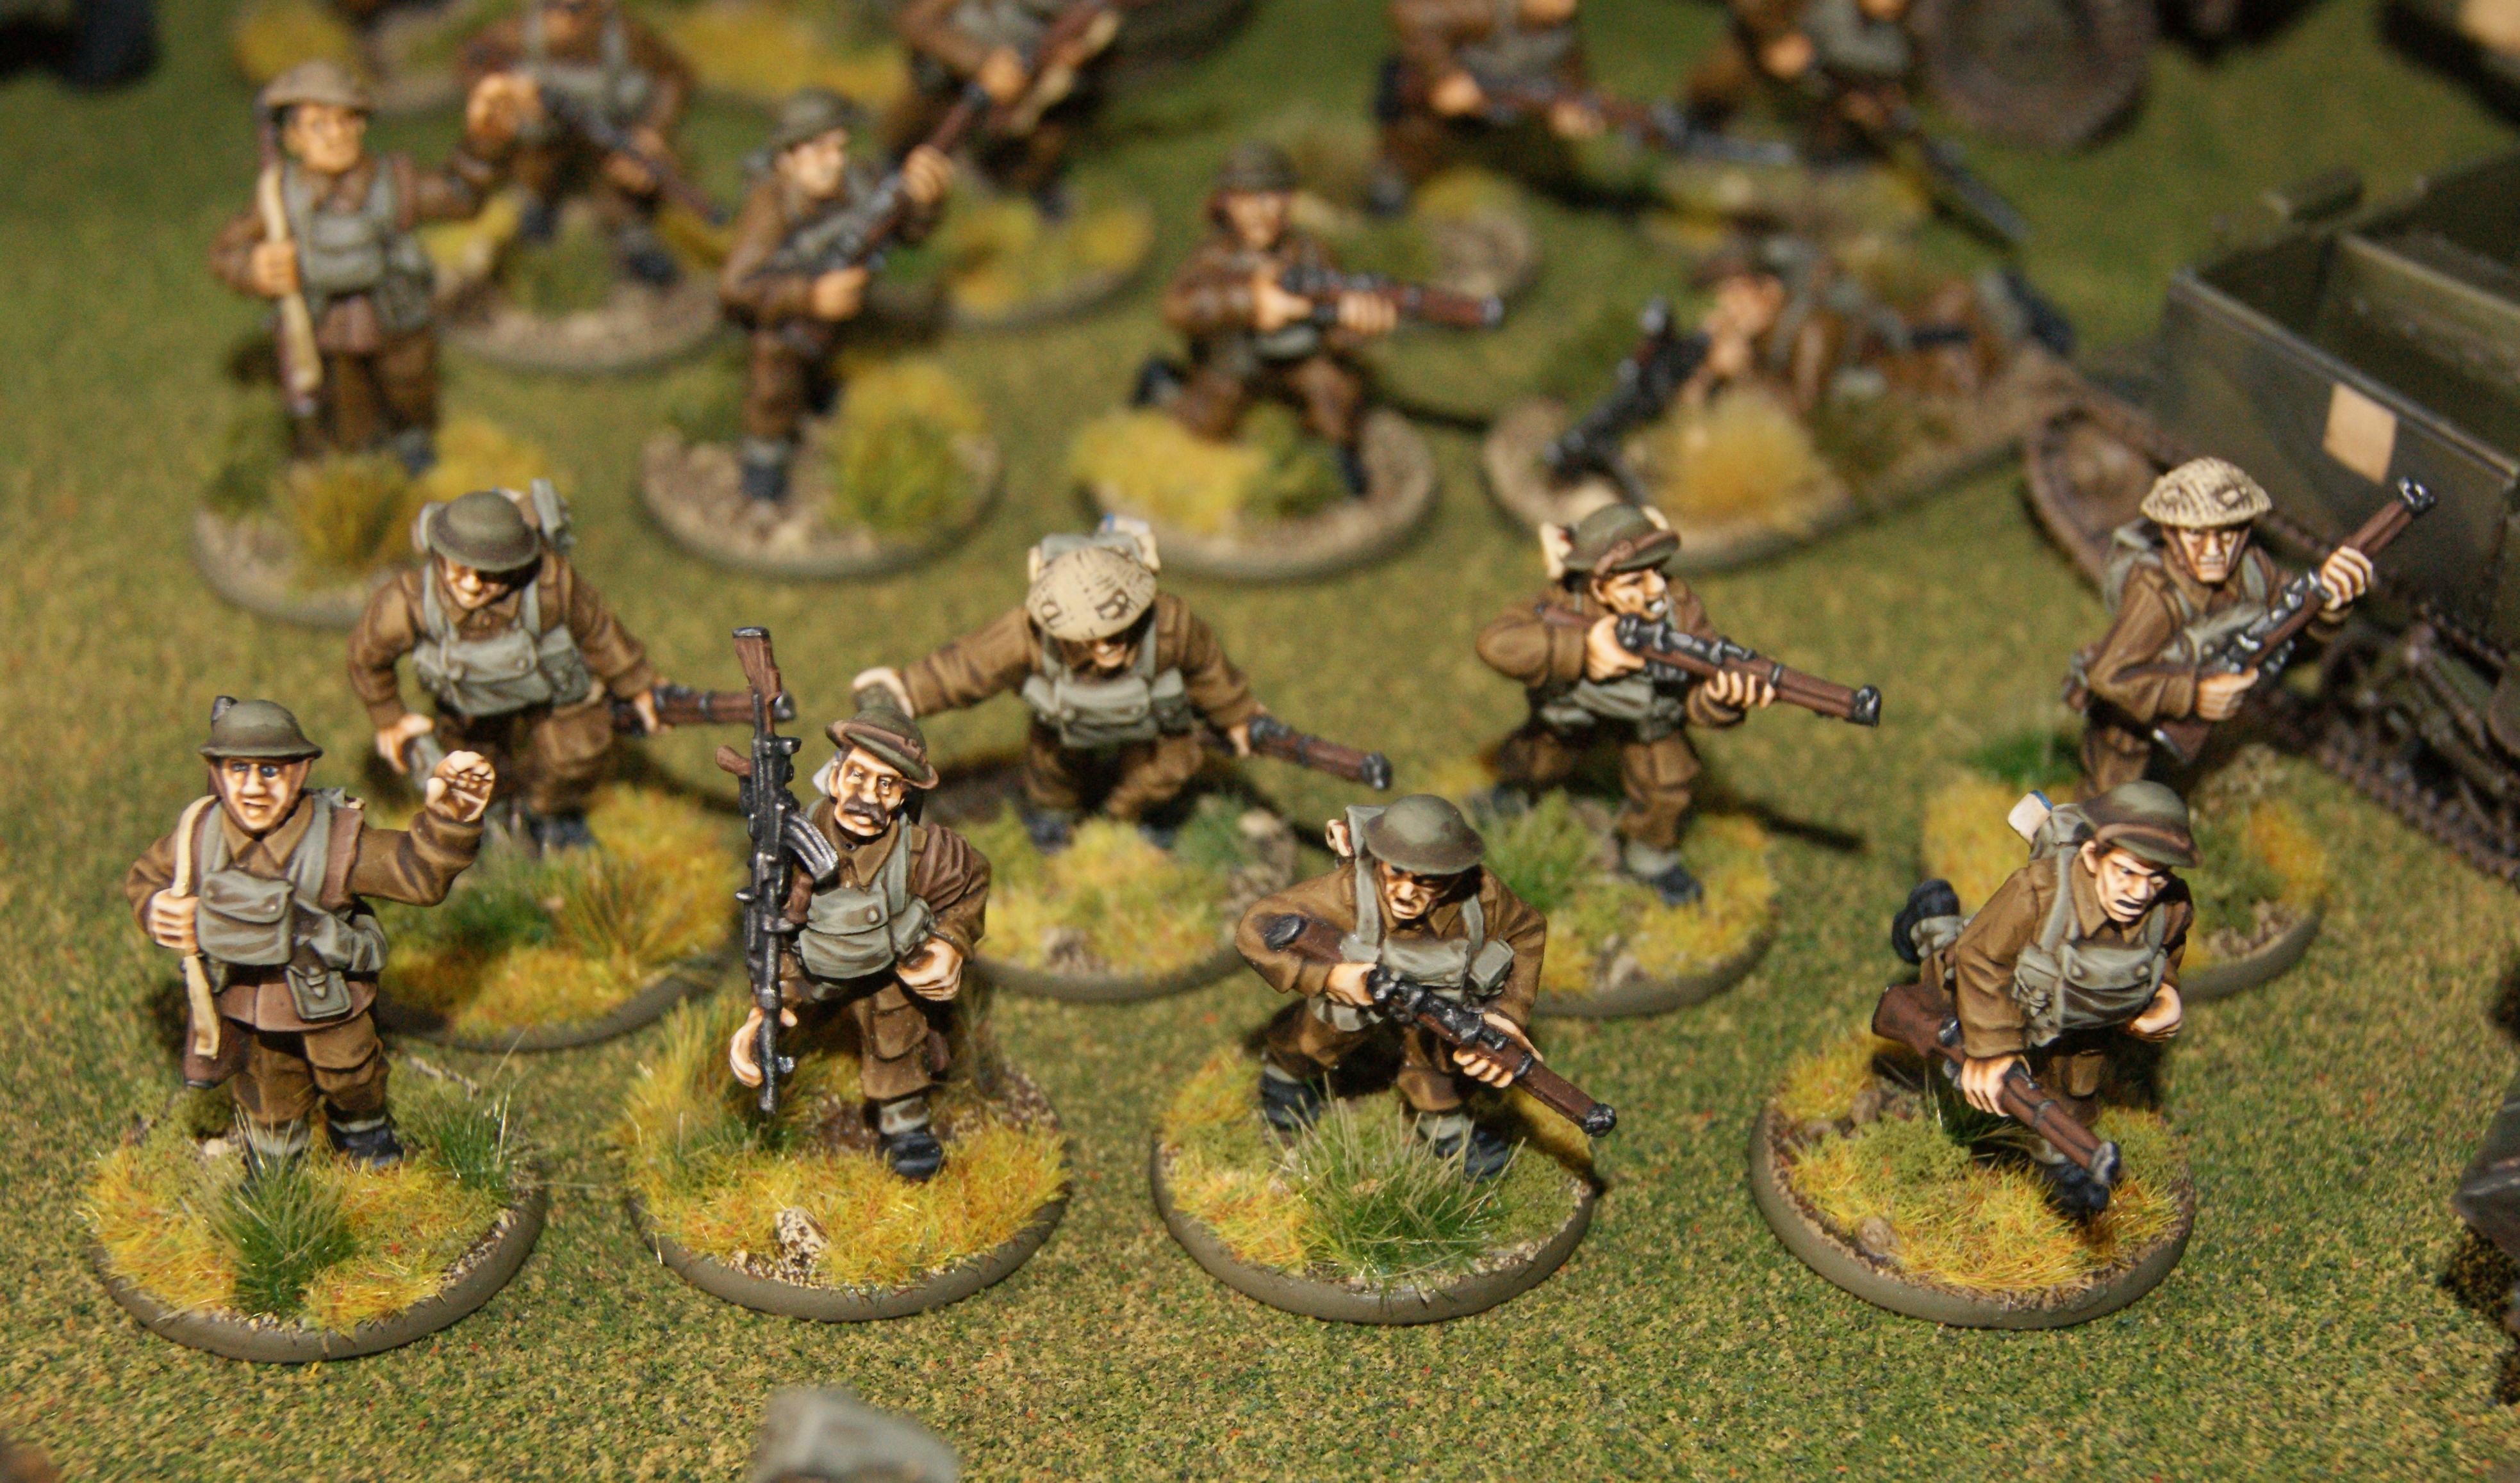
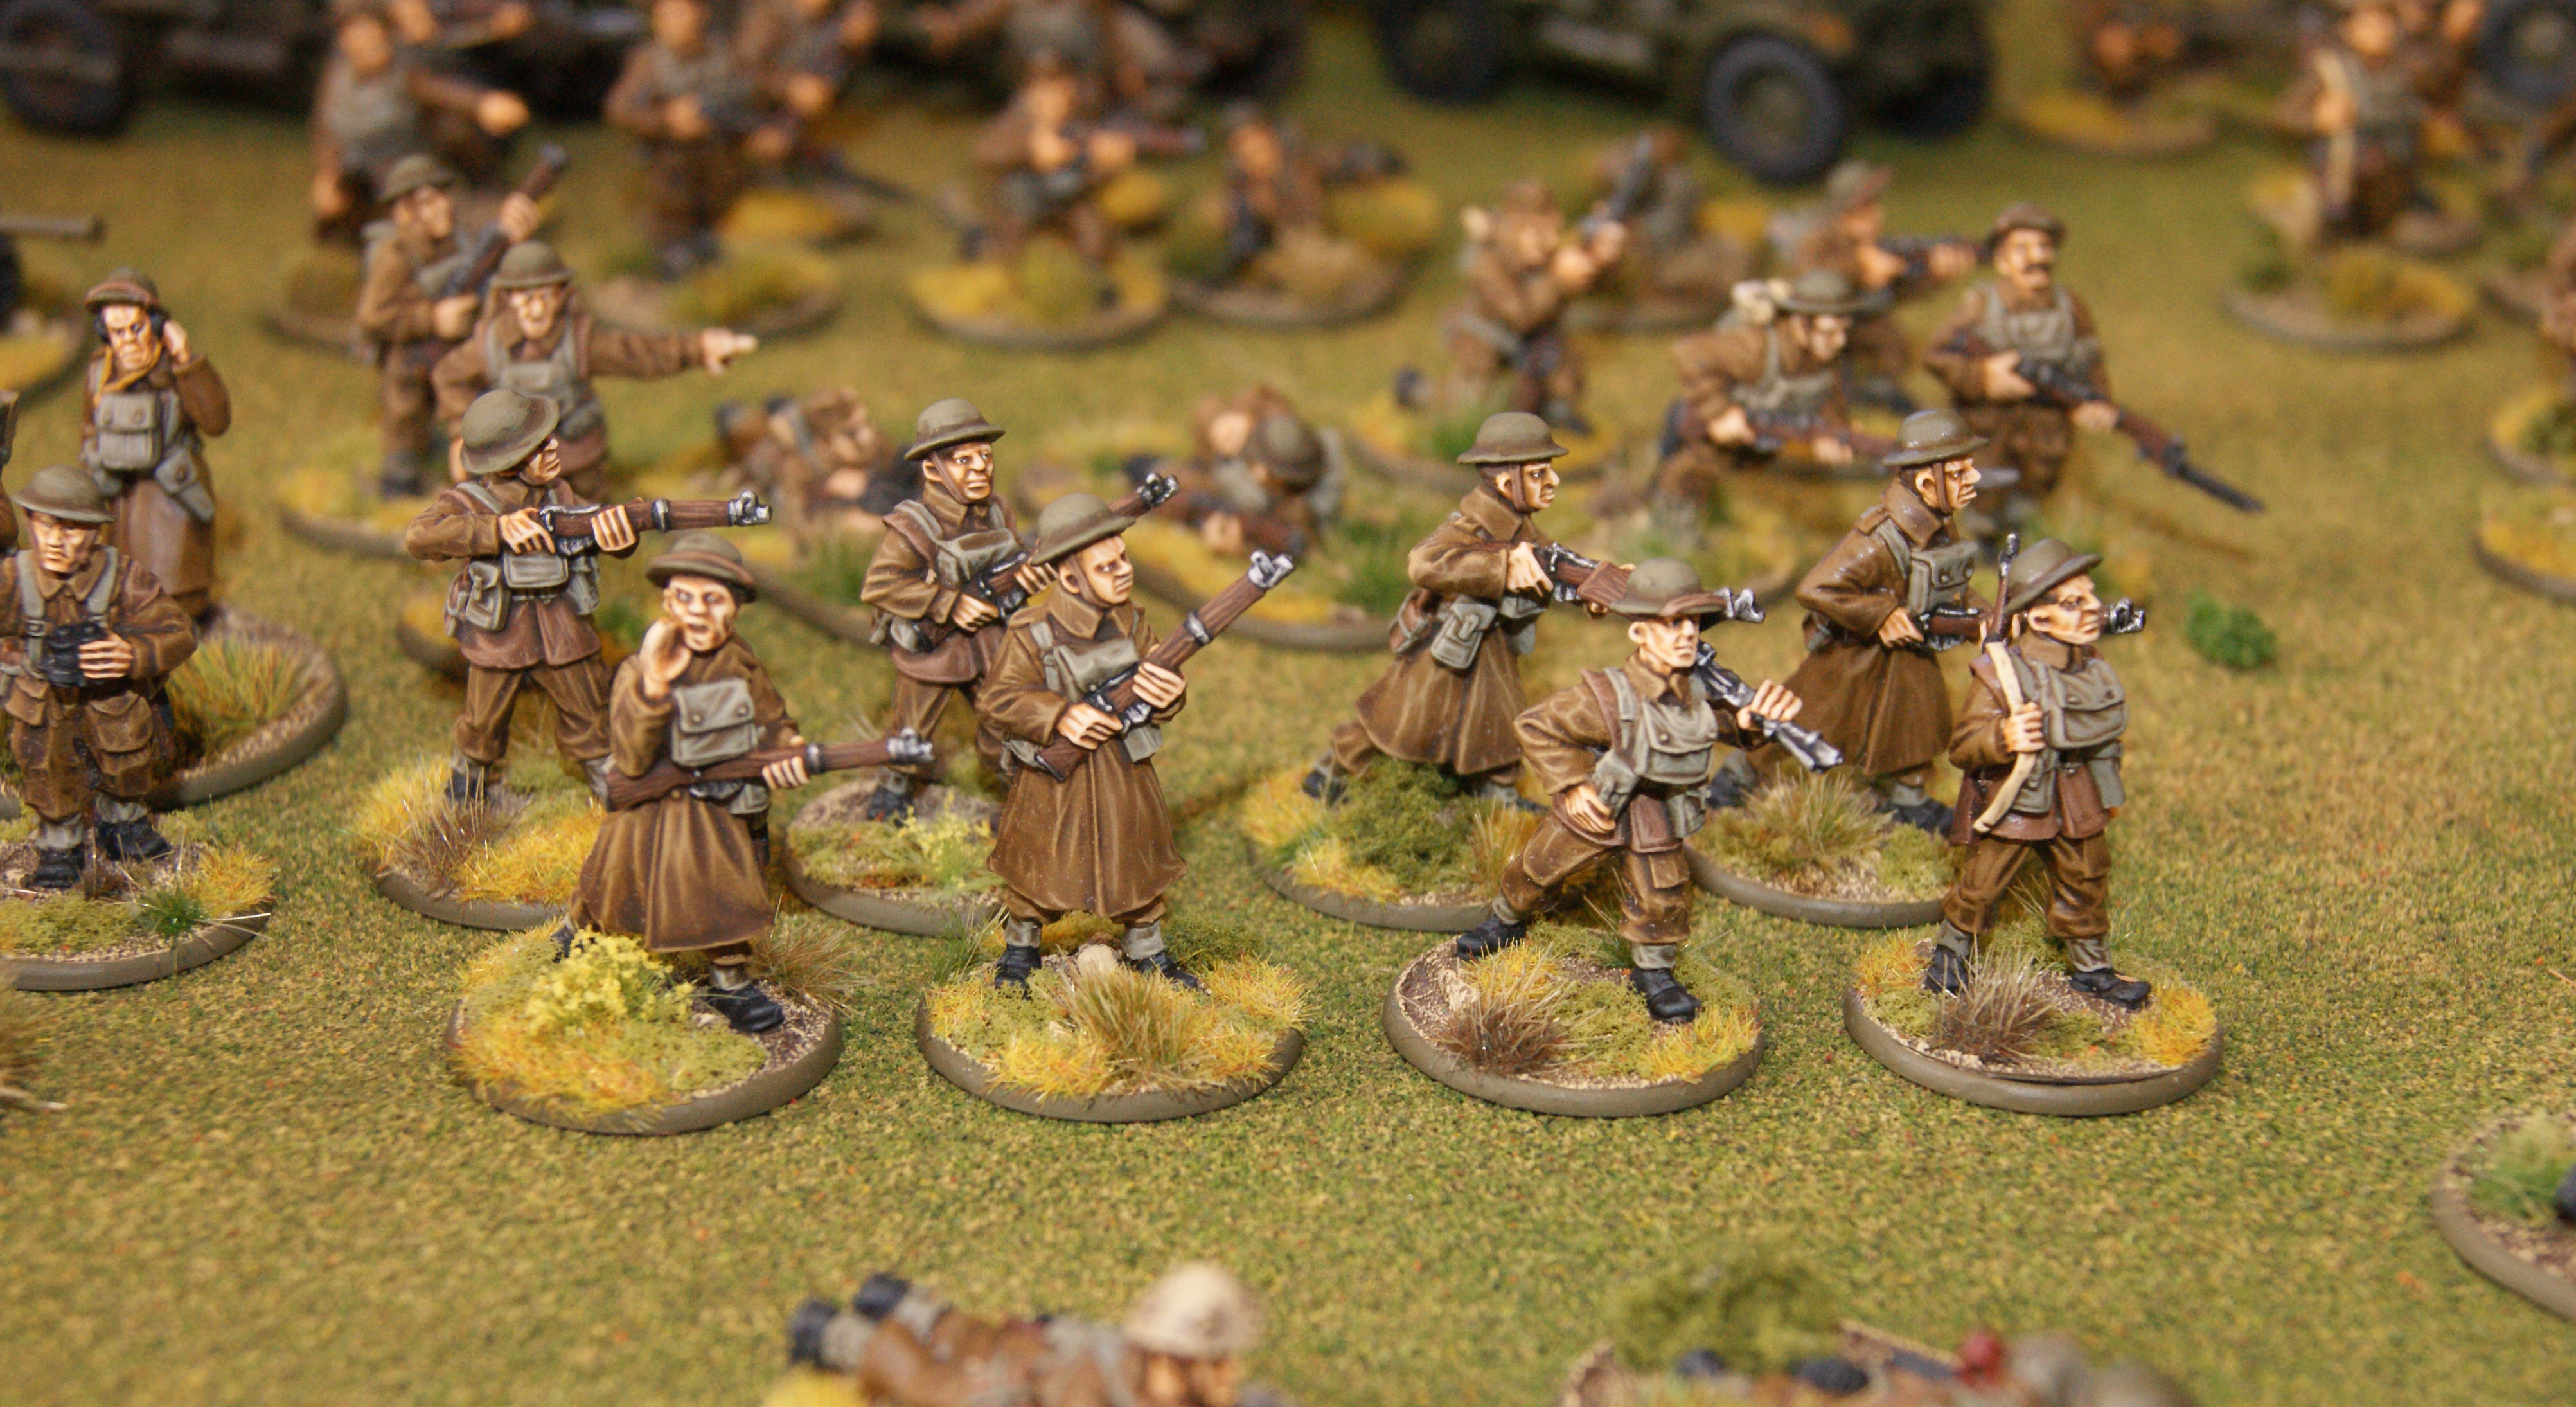
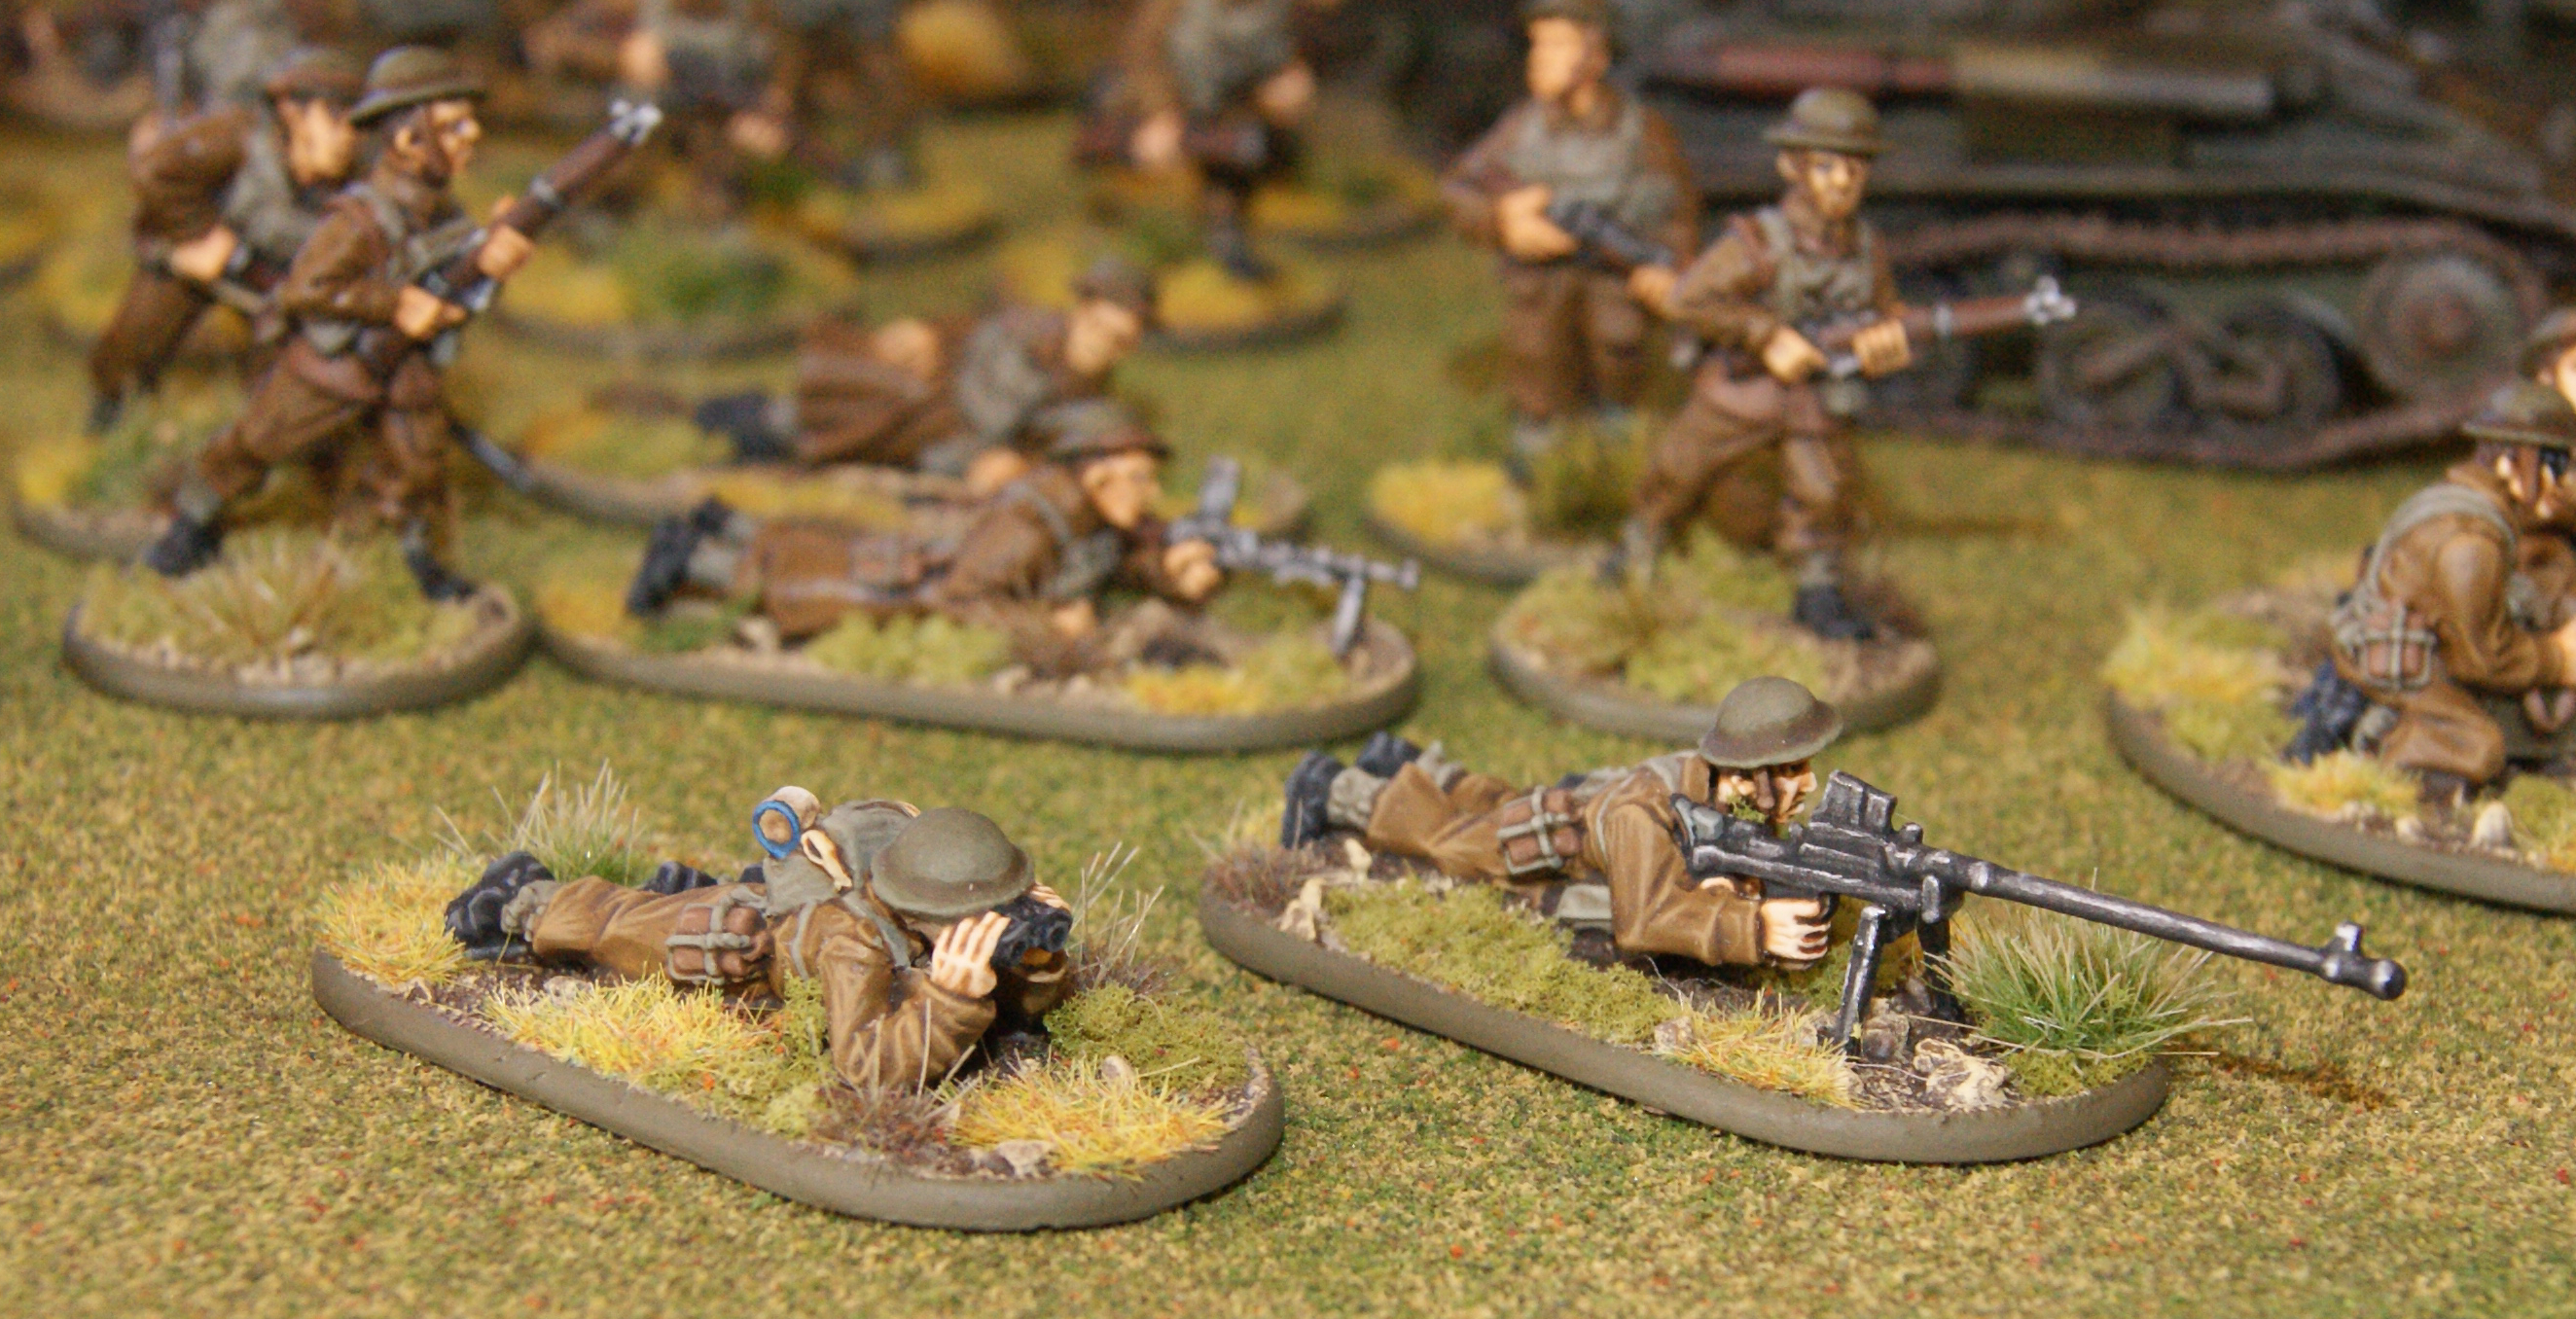
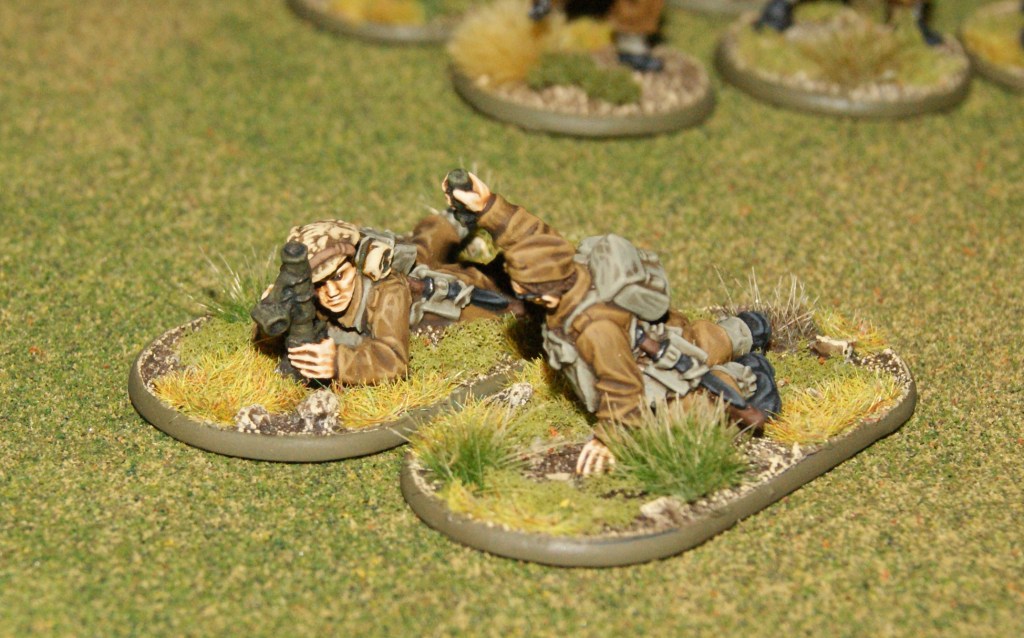
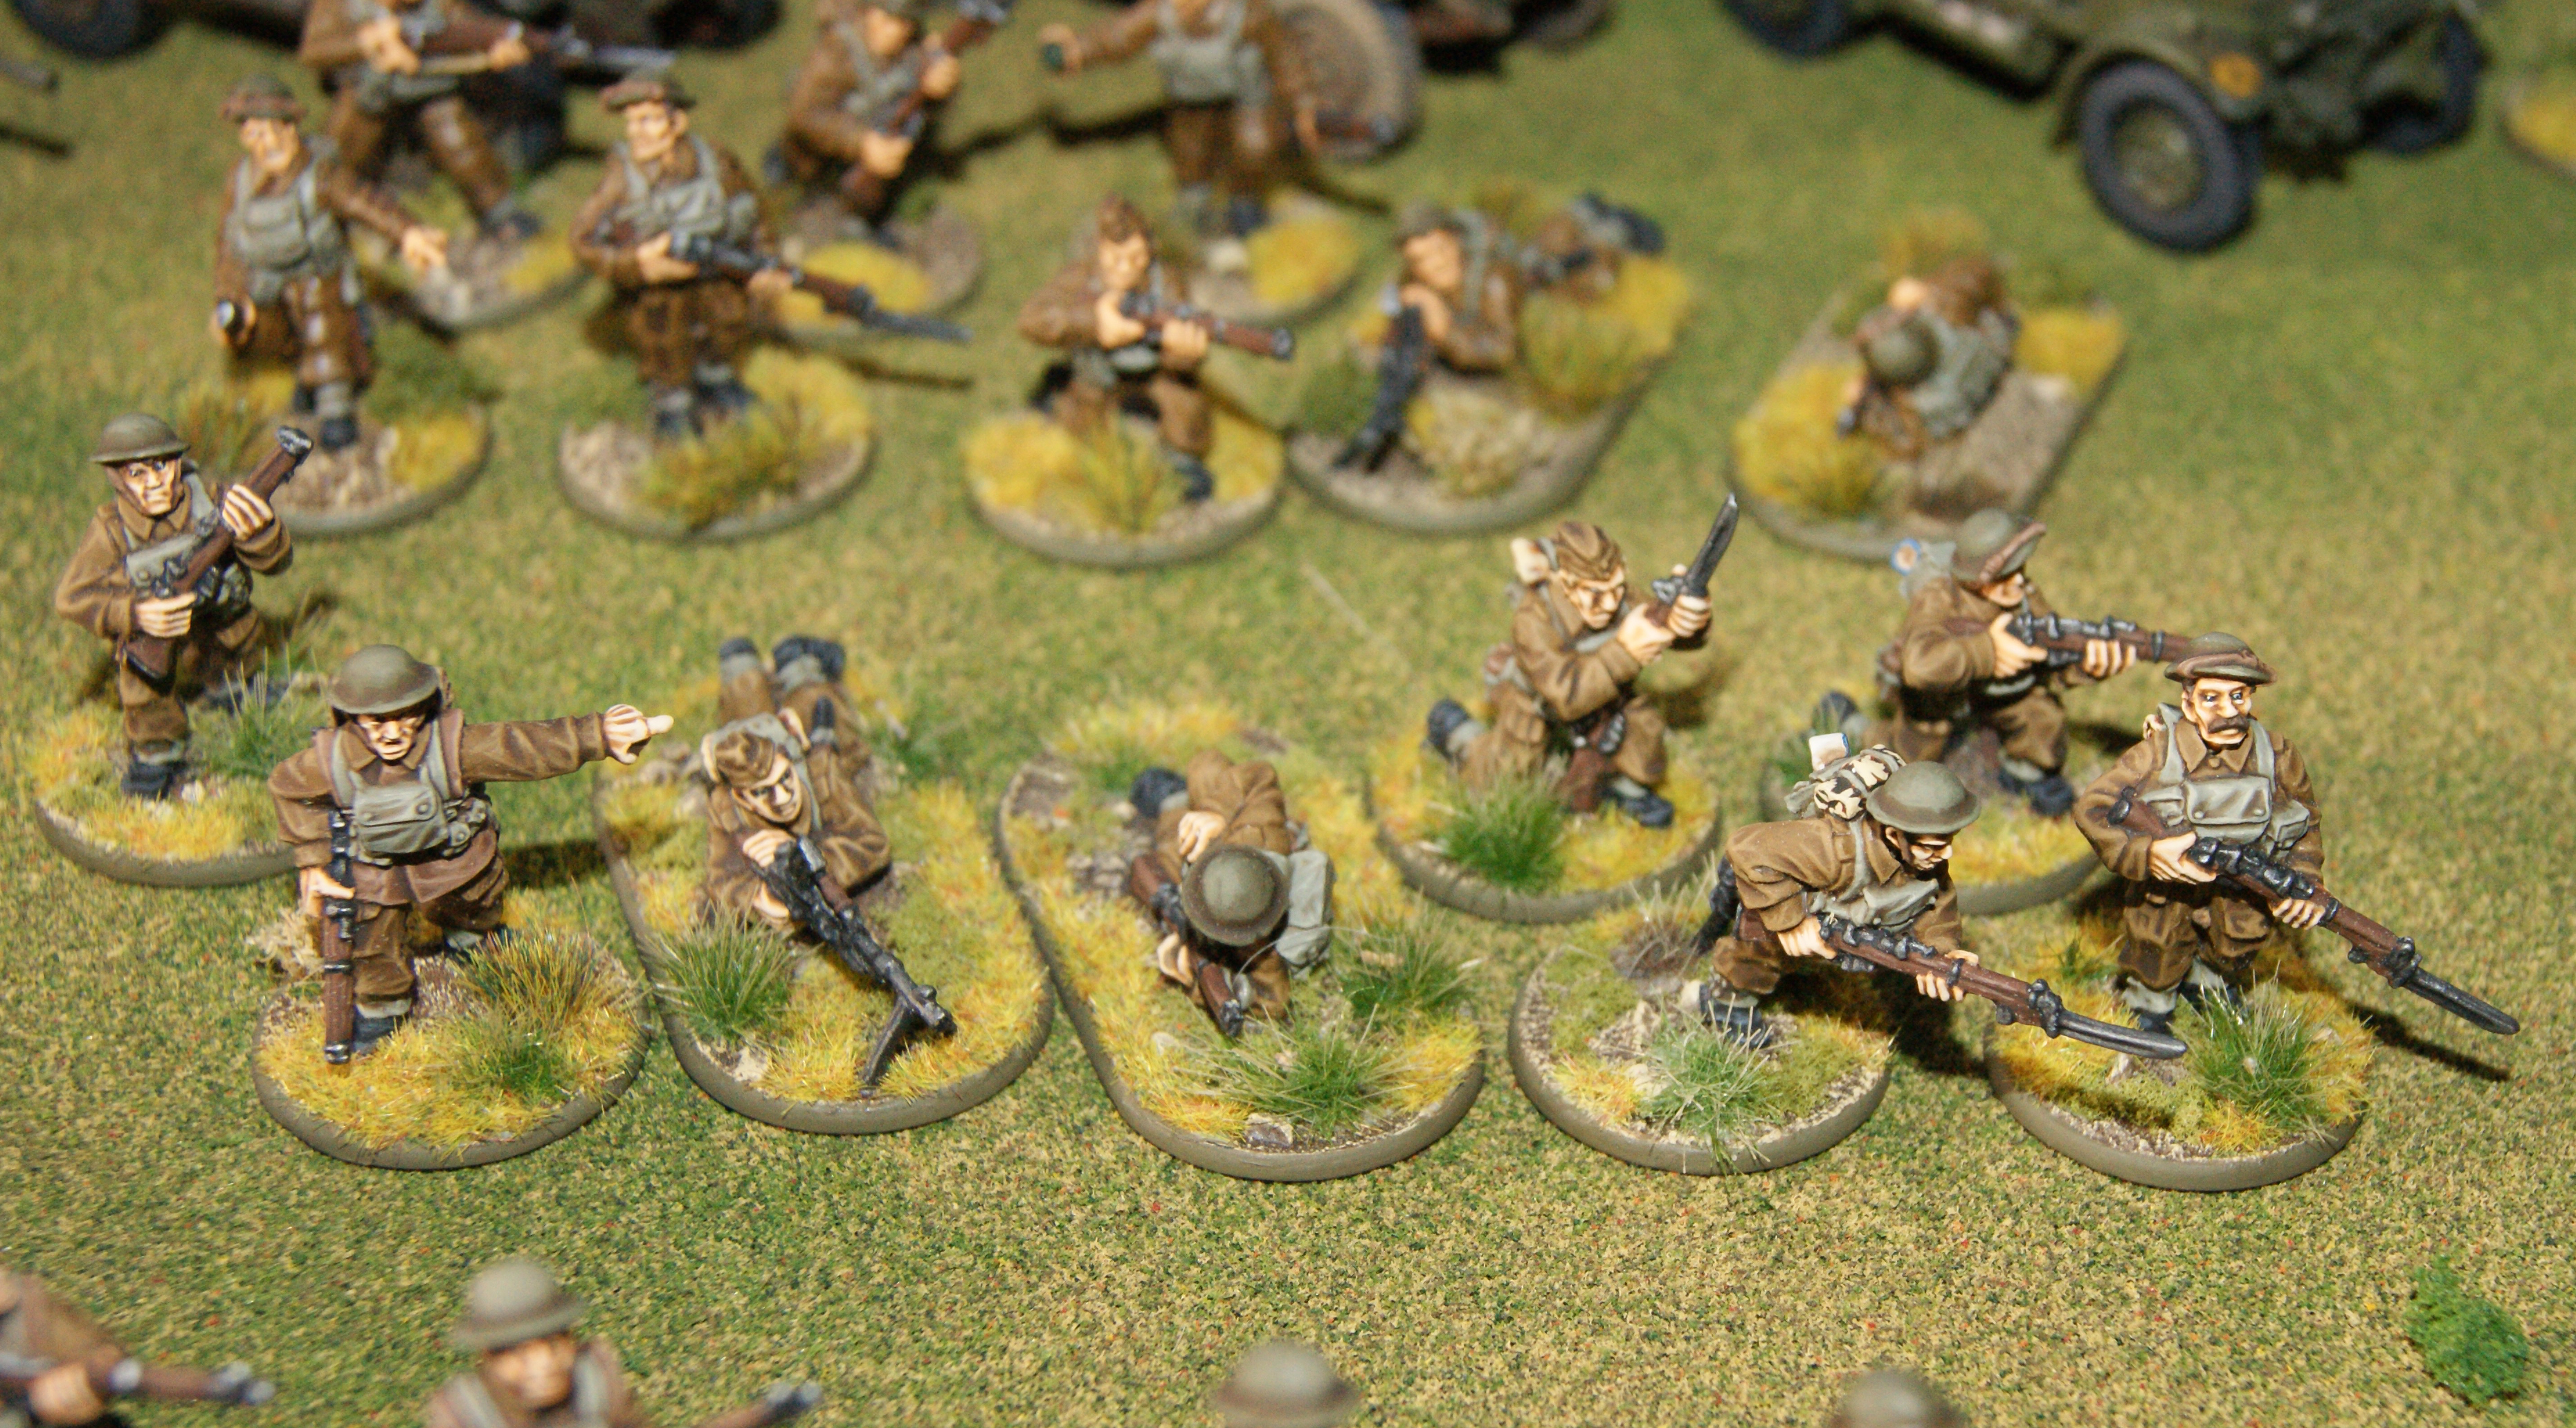
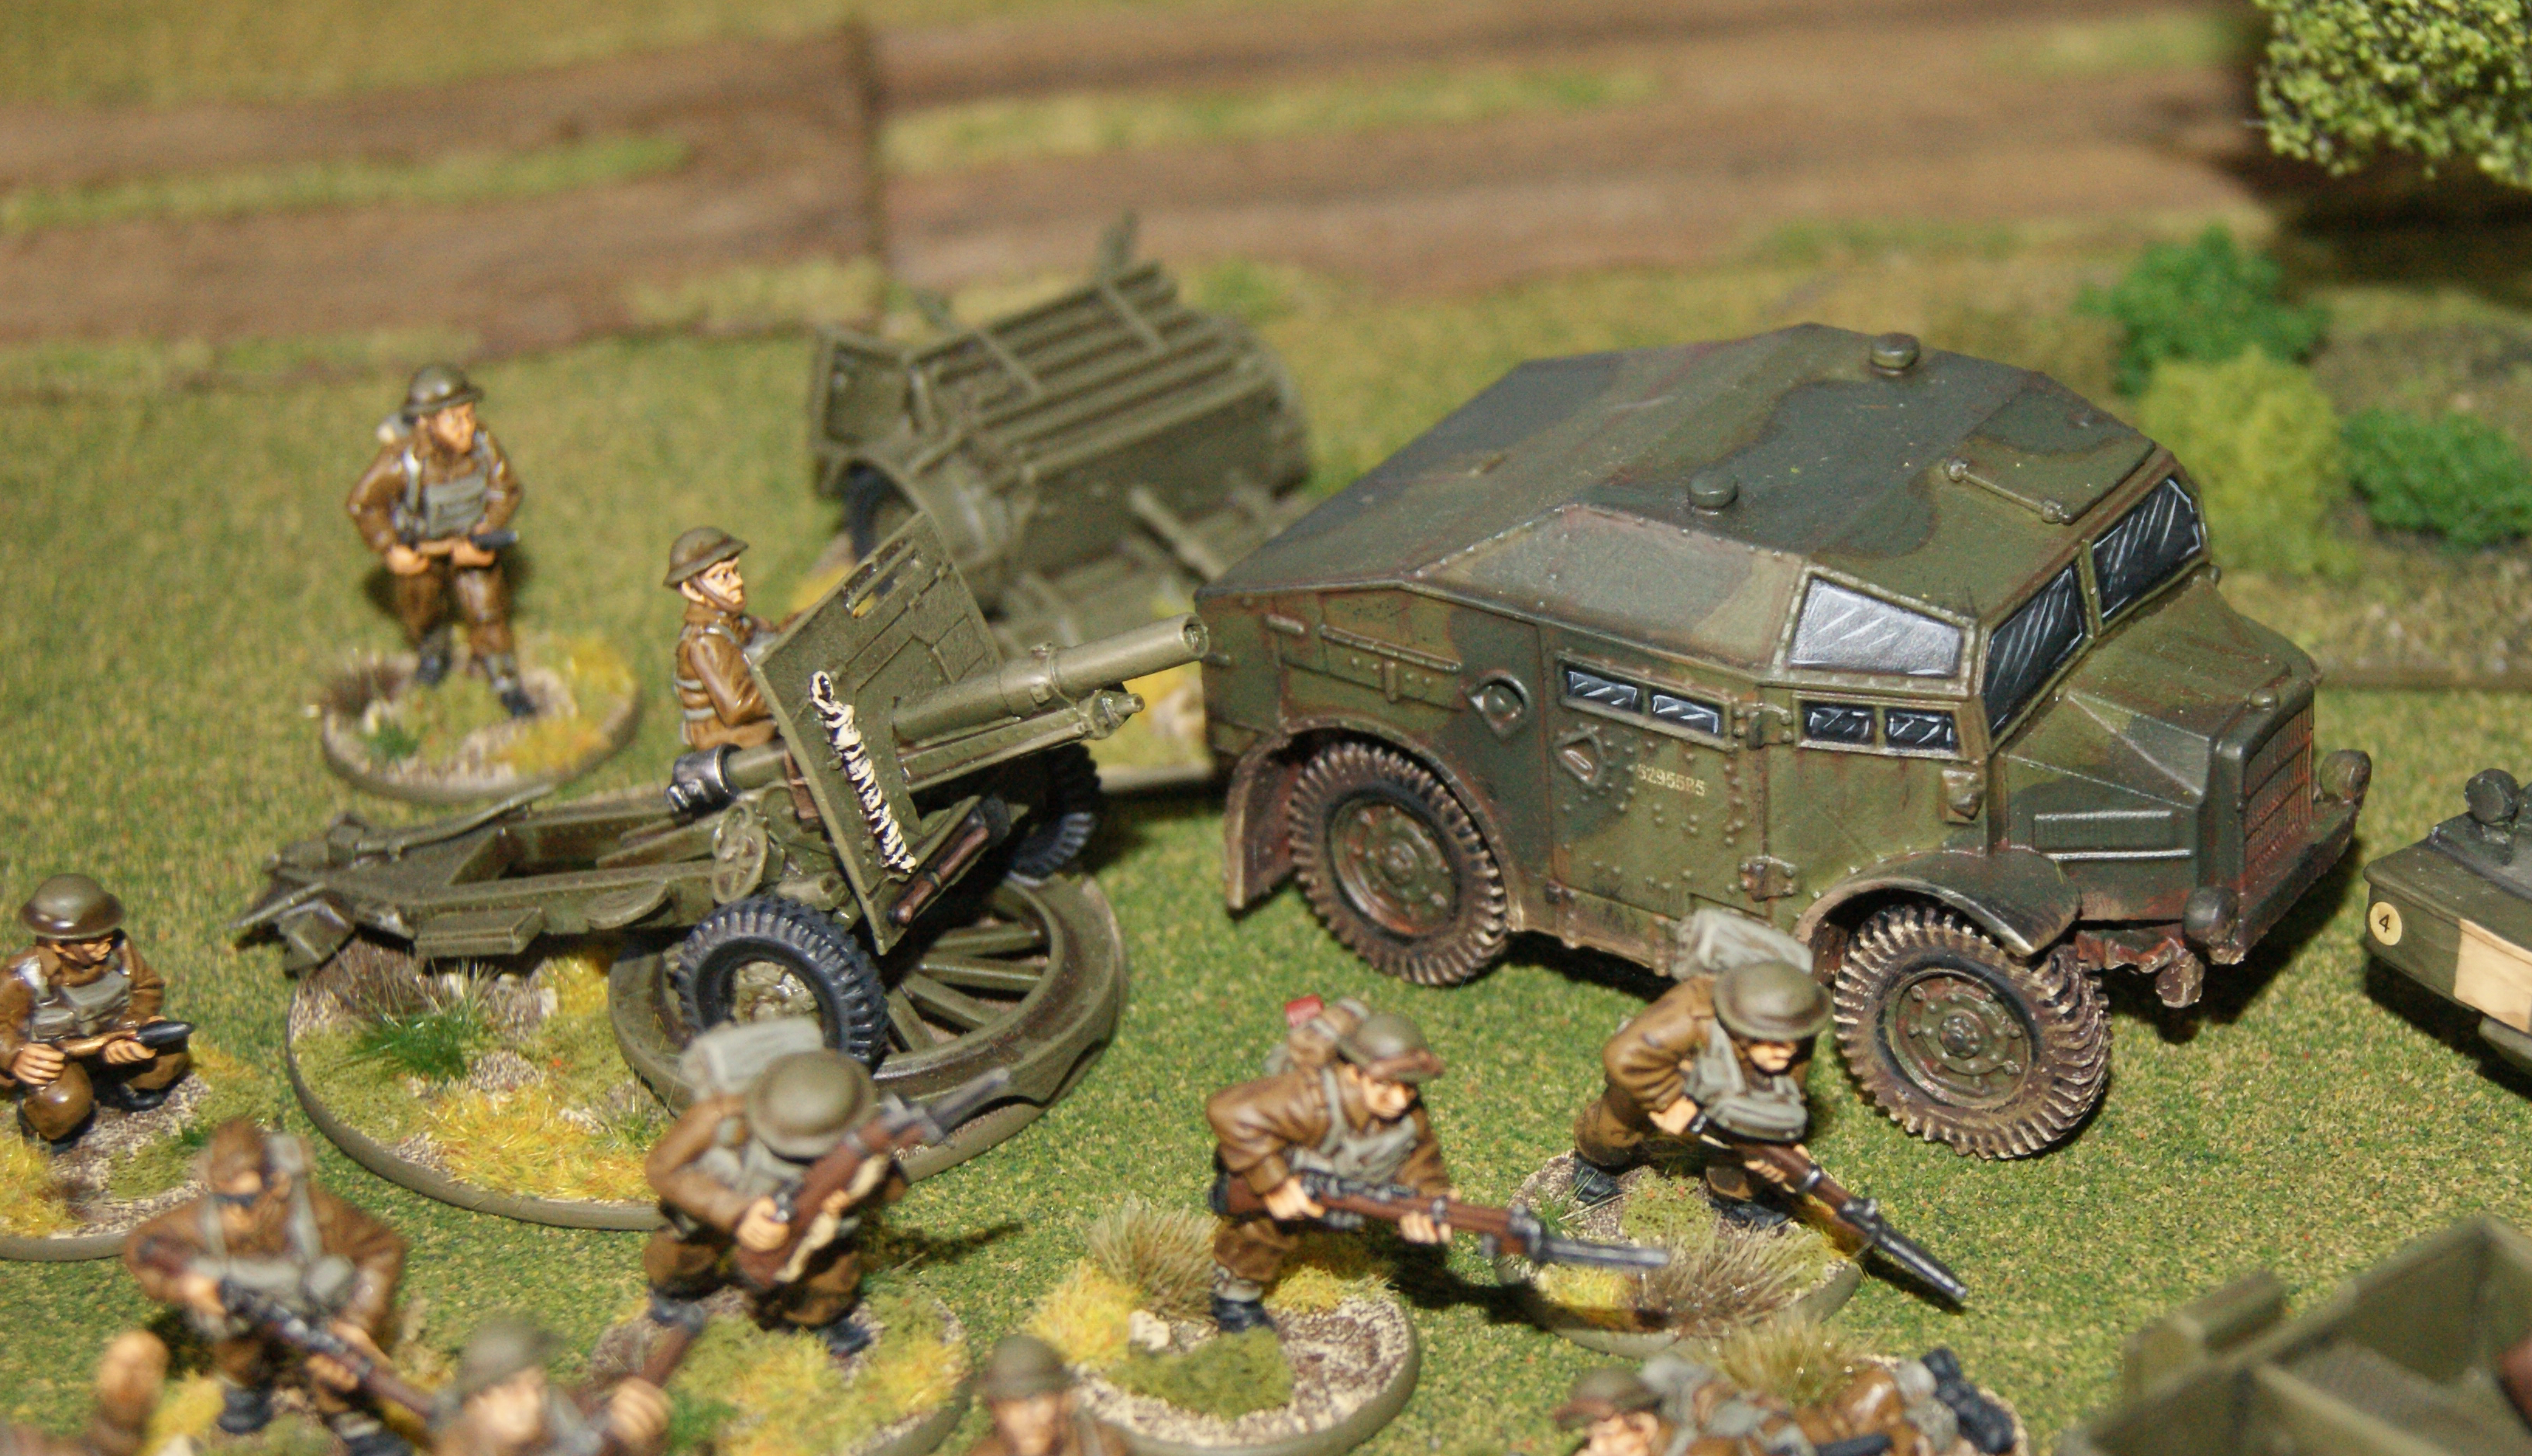
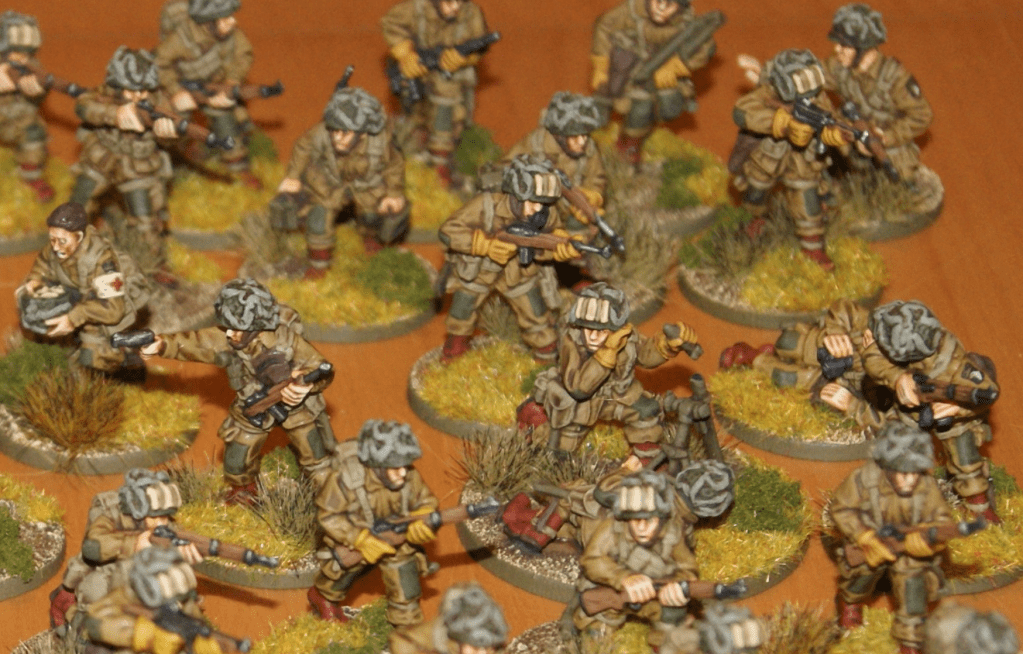
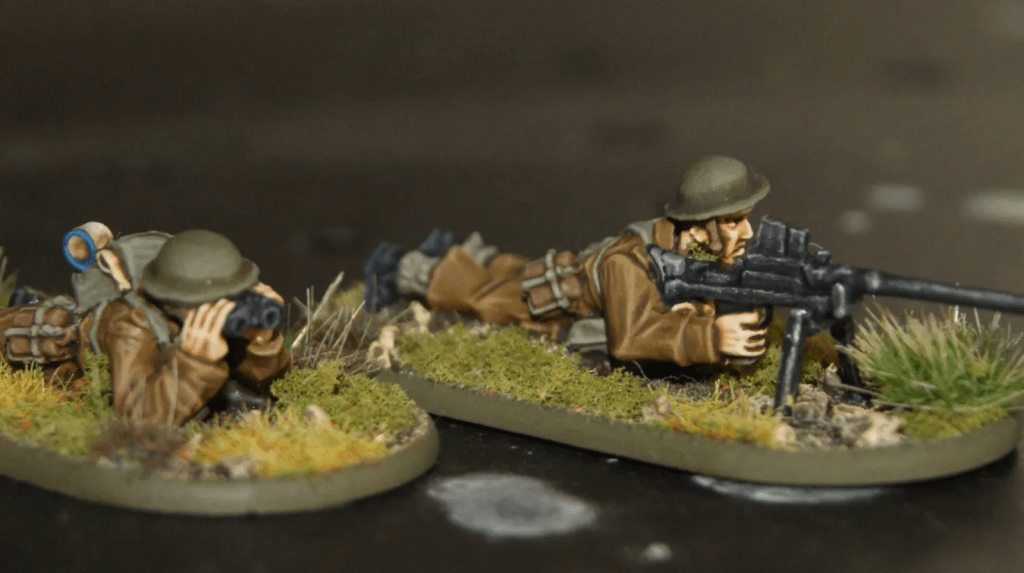
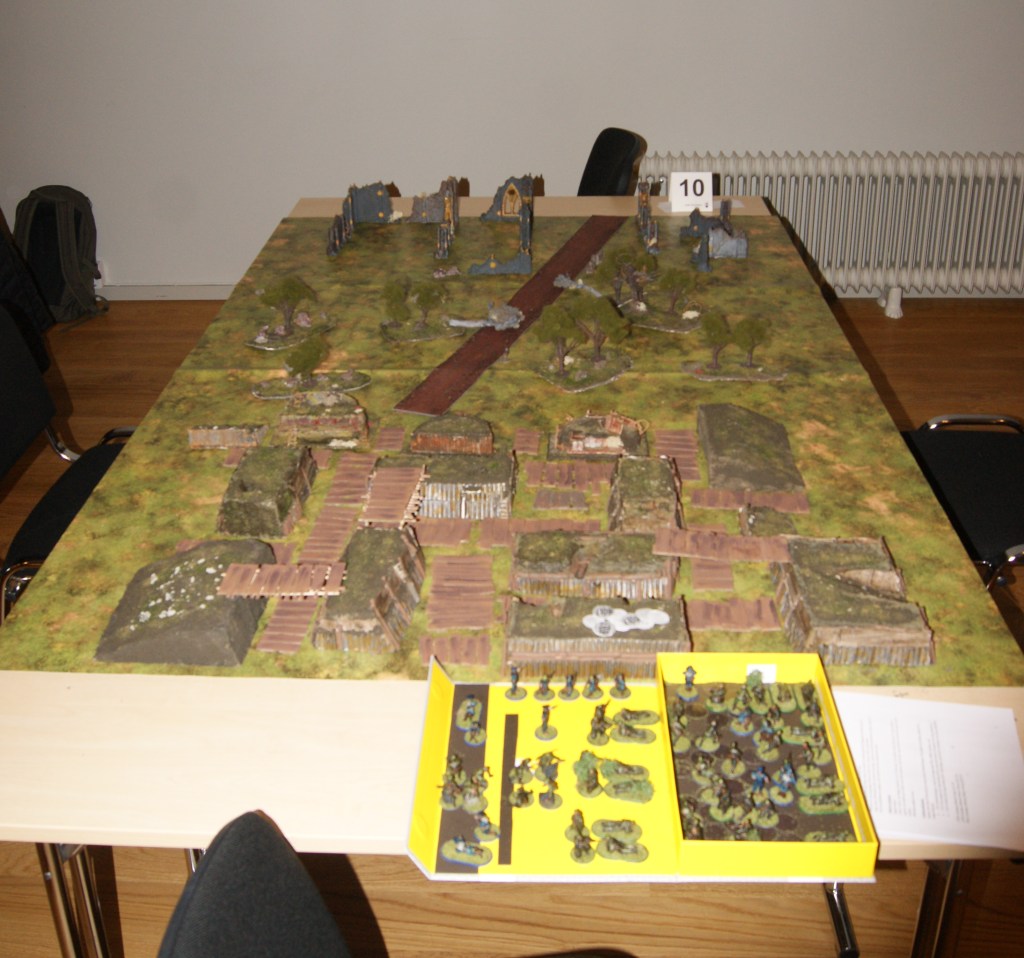
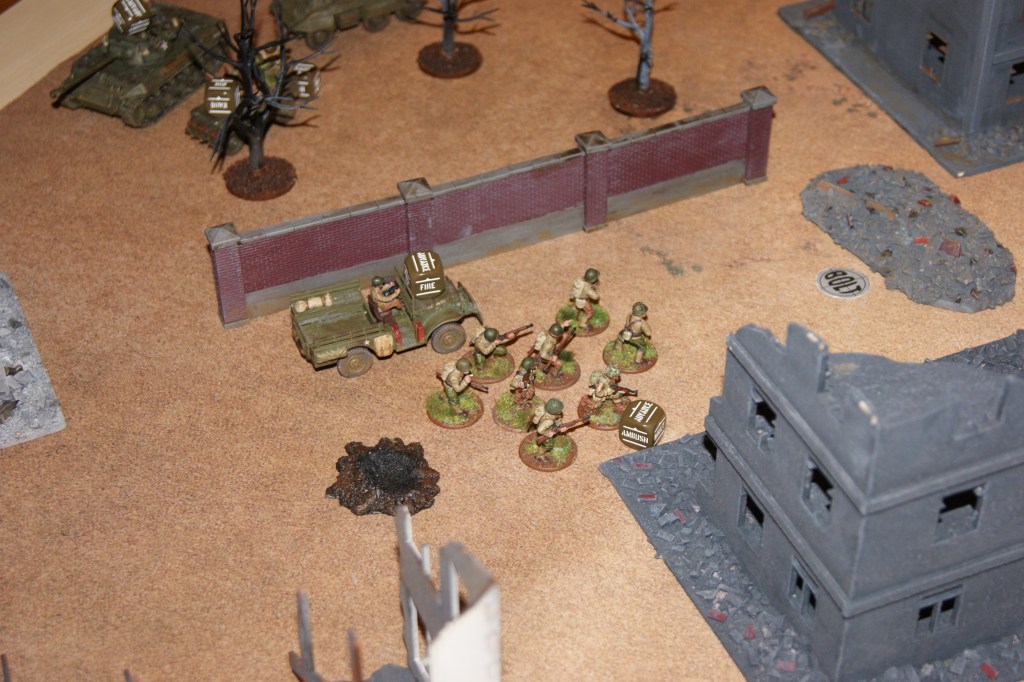
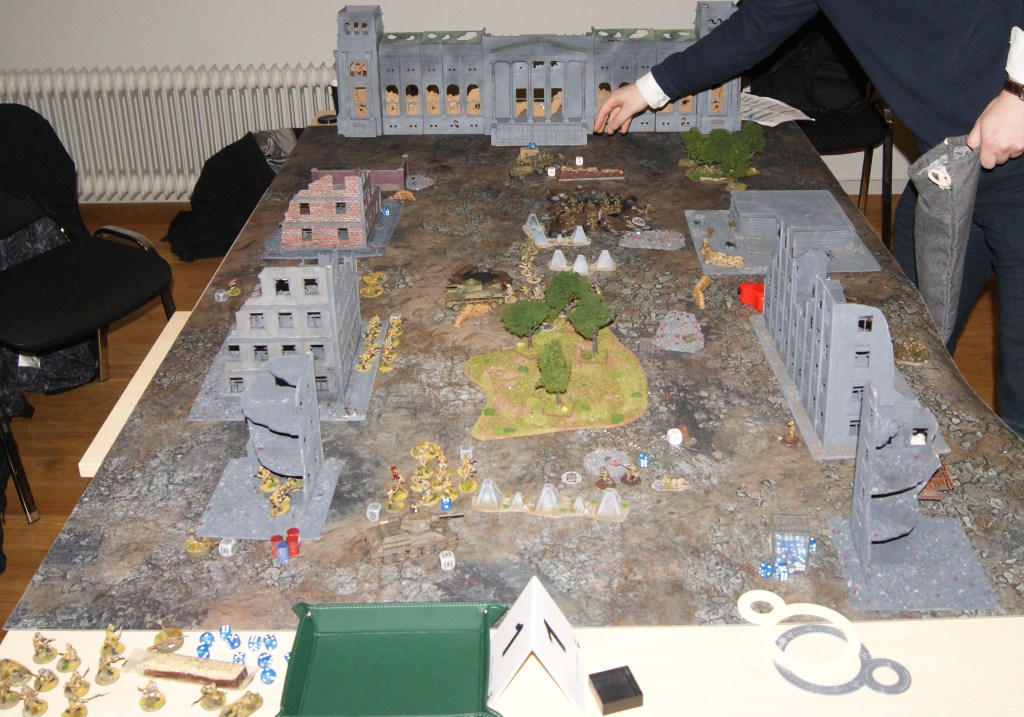
Having somewhat come back to Bolt Action thanks to a recent tournament, I dug up my old British figures. The miniatures are mostly Warlord Games old metal BEF. Alongside them are a couple of squads and officers by Gorgon Studios, plus a few West Wind figures. The tanks, 25–pounder and trucks are by Warlord, the Dingo and Quad are Blitzkrieg/Perry models, and the 25mm AT guns are, well some other brands that I cant remember (their crew are by Warlord and West Wind). Some officers and NCO:s, gun crew etc, are conversions to provide variety.
Ive posted some pictures of these a very long time ago, but never on the whole lot together. So I thought Id bring them out for that reason if nothing else. I also wanted to have a look at what I have that can be used for a tournament army. Mind you, the idea is not to make a winning list, because I would hardly know how to do that. I was more interested in putting together a fun list to include as many of my favourite models as possible. And in an early war army, the units are relatively cheap, so that I can include quite a lot. In the tournament earlier this year they used 500 and 1000 point lists, so that one plays some matches at 500 and some at 1000 pts, but so that the smaller force should be included in the larger.
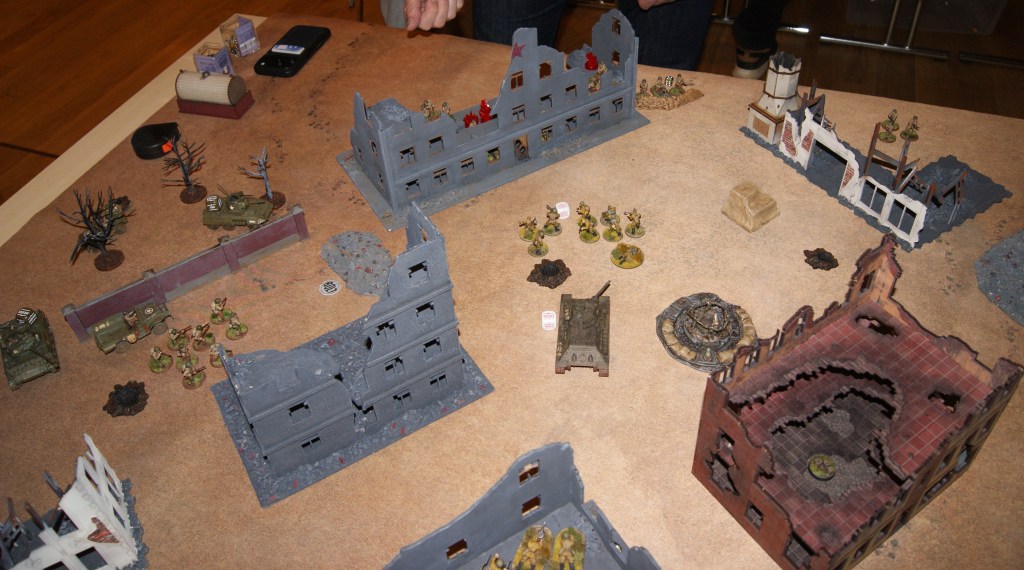
Now, as can be seen, my British force is easily large enough for a 1000 pt game (in total, more than 1500). I will be happy to use either all of the six 8-man squads or 4-5 squads of 10 men. I have the impression that few people bring large numbers of large rifle squads to tournaments. It would therefore be interesting to try an army such as this. The support options are mostly cheap, so one can afford a lot of infantry. And seeing as many tournament lists seem to include light tanks, AT rifles and light AT guns may not be a bad choice. On the other hand, if I happen to come across that one guy who actually did bring his Tiger I, I suppose Ill have to just take the hits and concentrate on grabbing objectives…
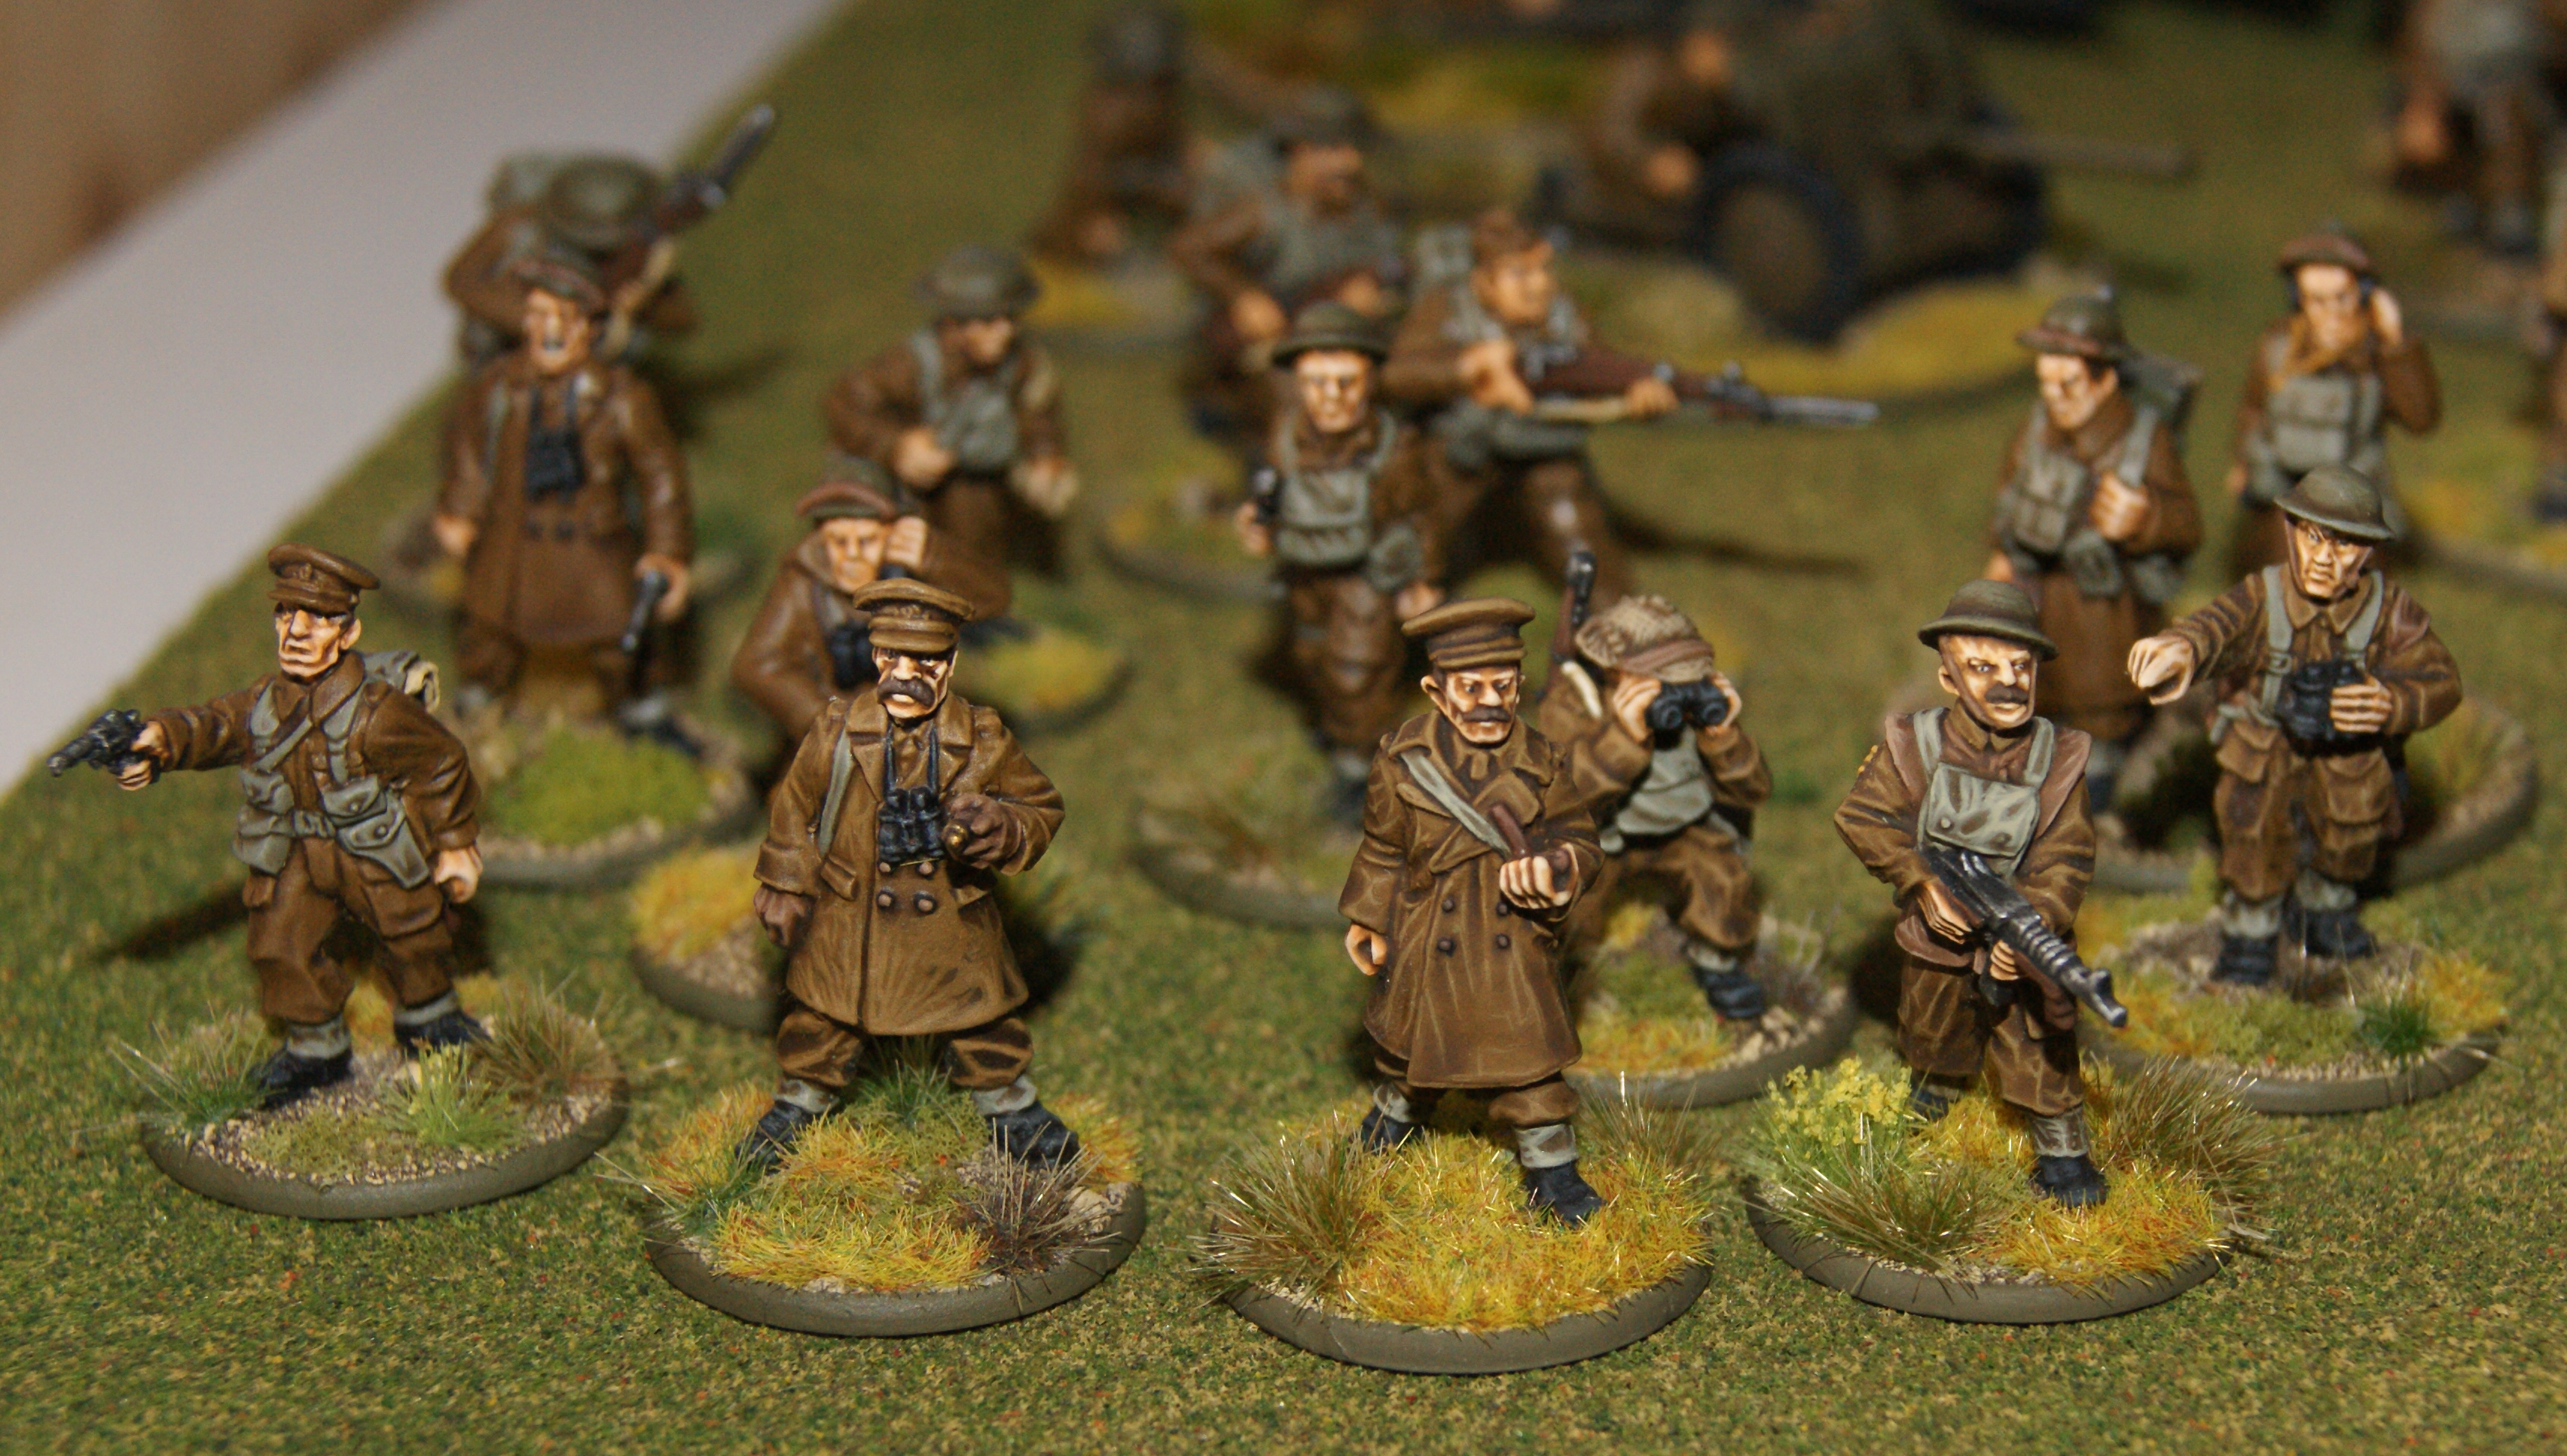
One of the differences from earlier editions of BA is that version 3 mostly builds armies using several smaller platoons than a single “reinforced platoon” in 1st and 2d eds. Luckily, I have painted a large number of officers with various assistants. These will be more than enough for 3, 4 or even 5 platoon HQ:s.
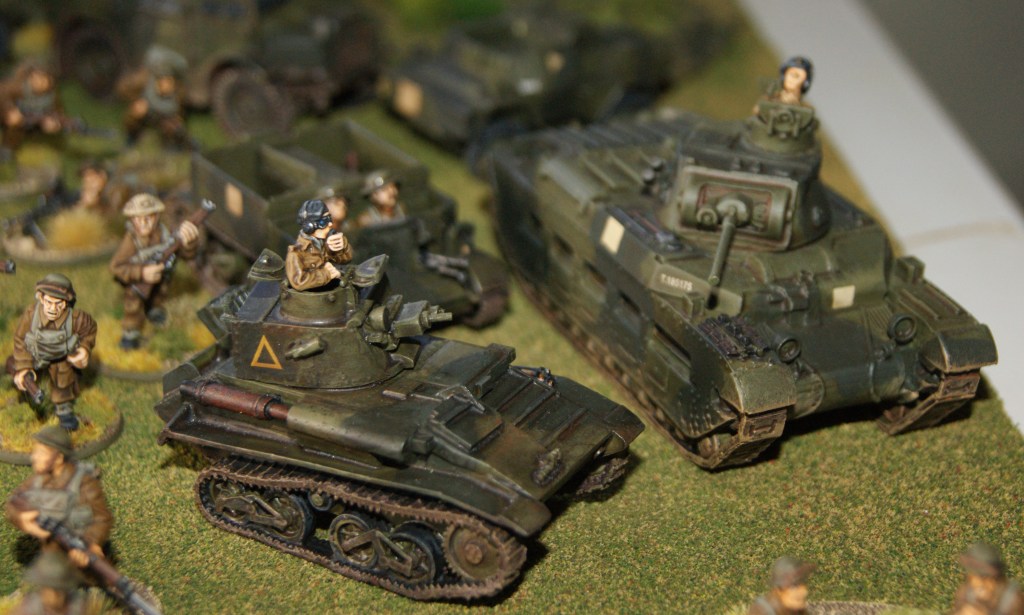
In terms of an army list, it is tempting to go for a pure infantry army, with the artillery pieces as support. However, the problem with that is that it will make for a very large number of order dice, especially at 1000 pts. I think the limit was set at 18 dice in the tournament this spring, and it would probably be close to that. But 18 order dice will make for a very slow game and I would hesitate to put my opponents through that. It seems a bit silly when there is a time limit to the game. For that reason, the Matilda ought to be a nice thing to include; it would also provide some AT capability.
I remember well how the light tank mk6 performed some heroic feats in our games some years ago. I dont know if it was a particularly effective unit, it was probably more down to lucky dice. It is a very neat little tank, although it was never much more than a reconnaissance vehicle. Surely it has to be included, even though it has suffered from the latest rules changes with the vehicle mounted mg being a pretty useless weapon now. This particular tank has a coaxial hmg and mmg. In game terms, the two weapons have the same number of dice in the current edition. This means that there will never be any point in using the mmg, as it would always be worse than the hmg. The Dingo and carrier have been nerfed in a similar way, firing only 2 dice from the lmg… Weirdly this also means that the carrier is in effect a better armoured car than the Dingo – which was in fact a great armoured car, in use long after the war.
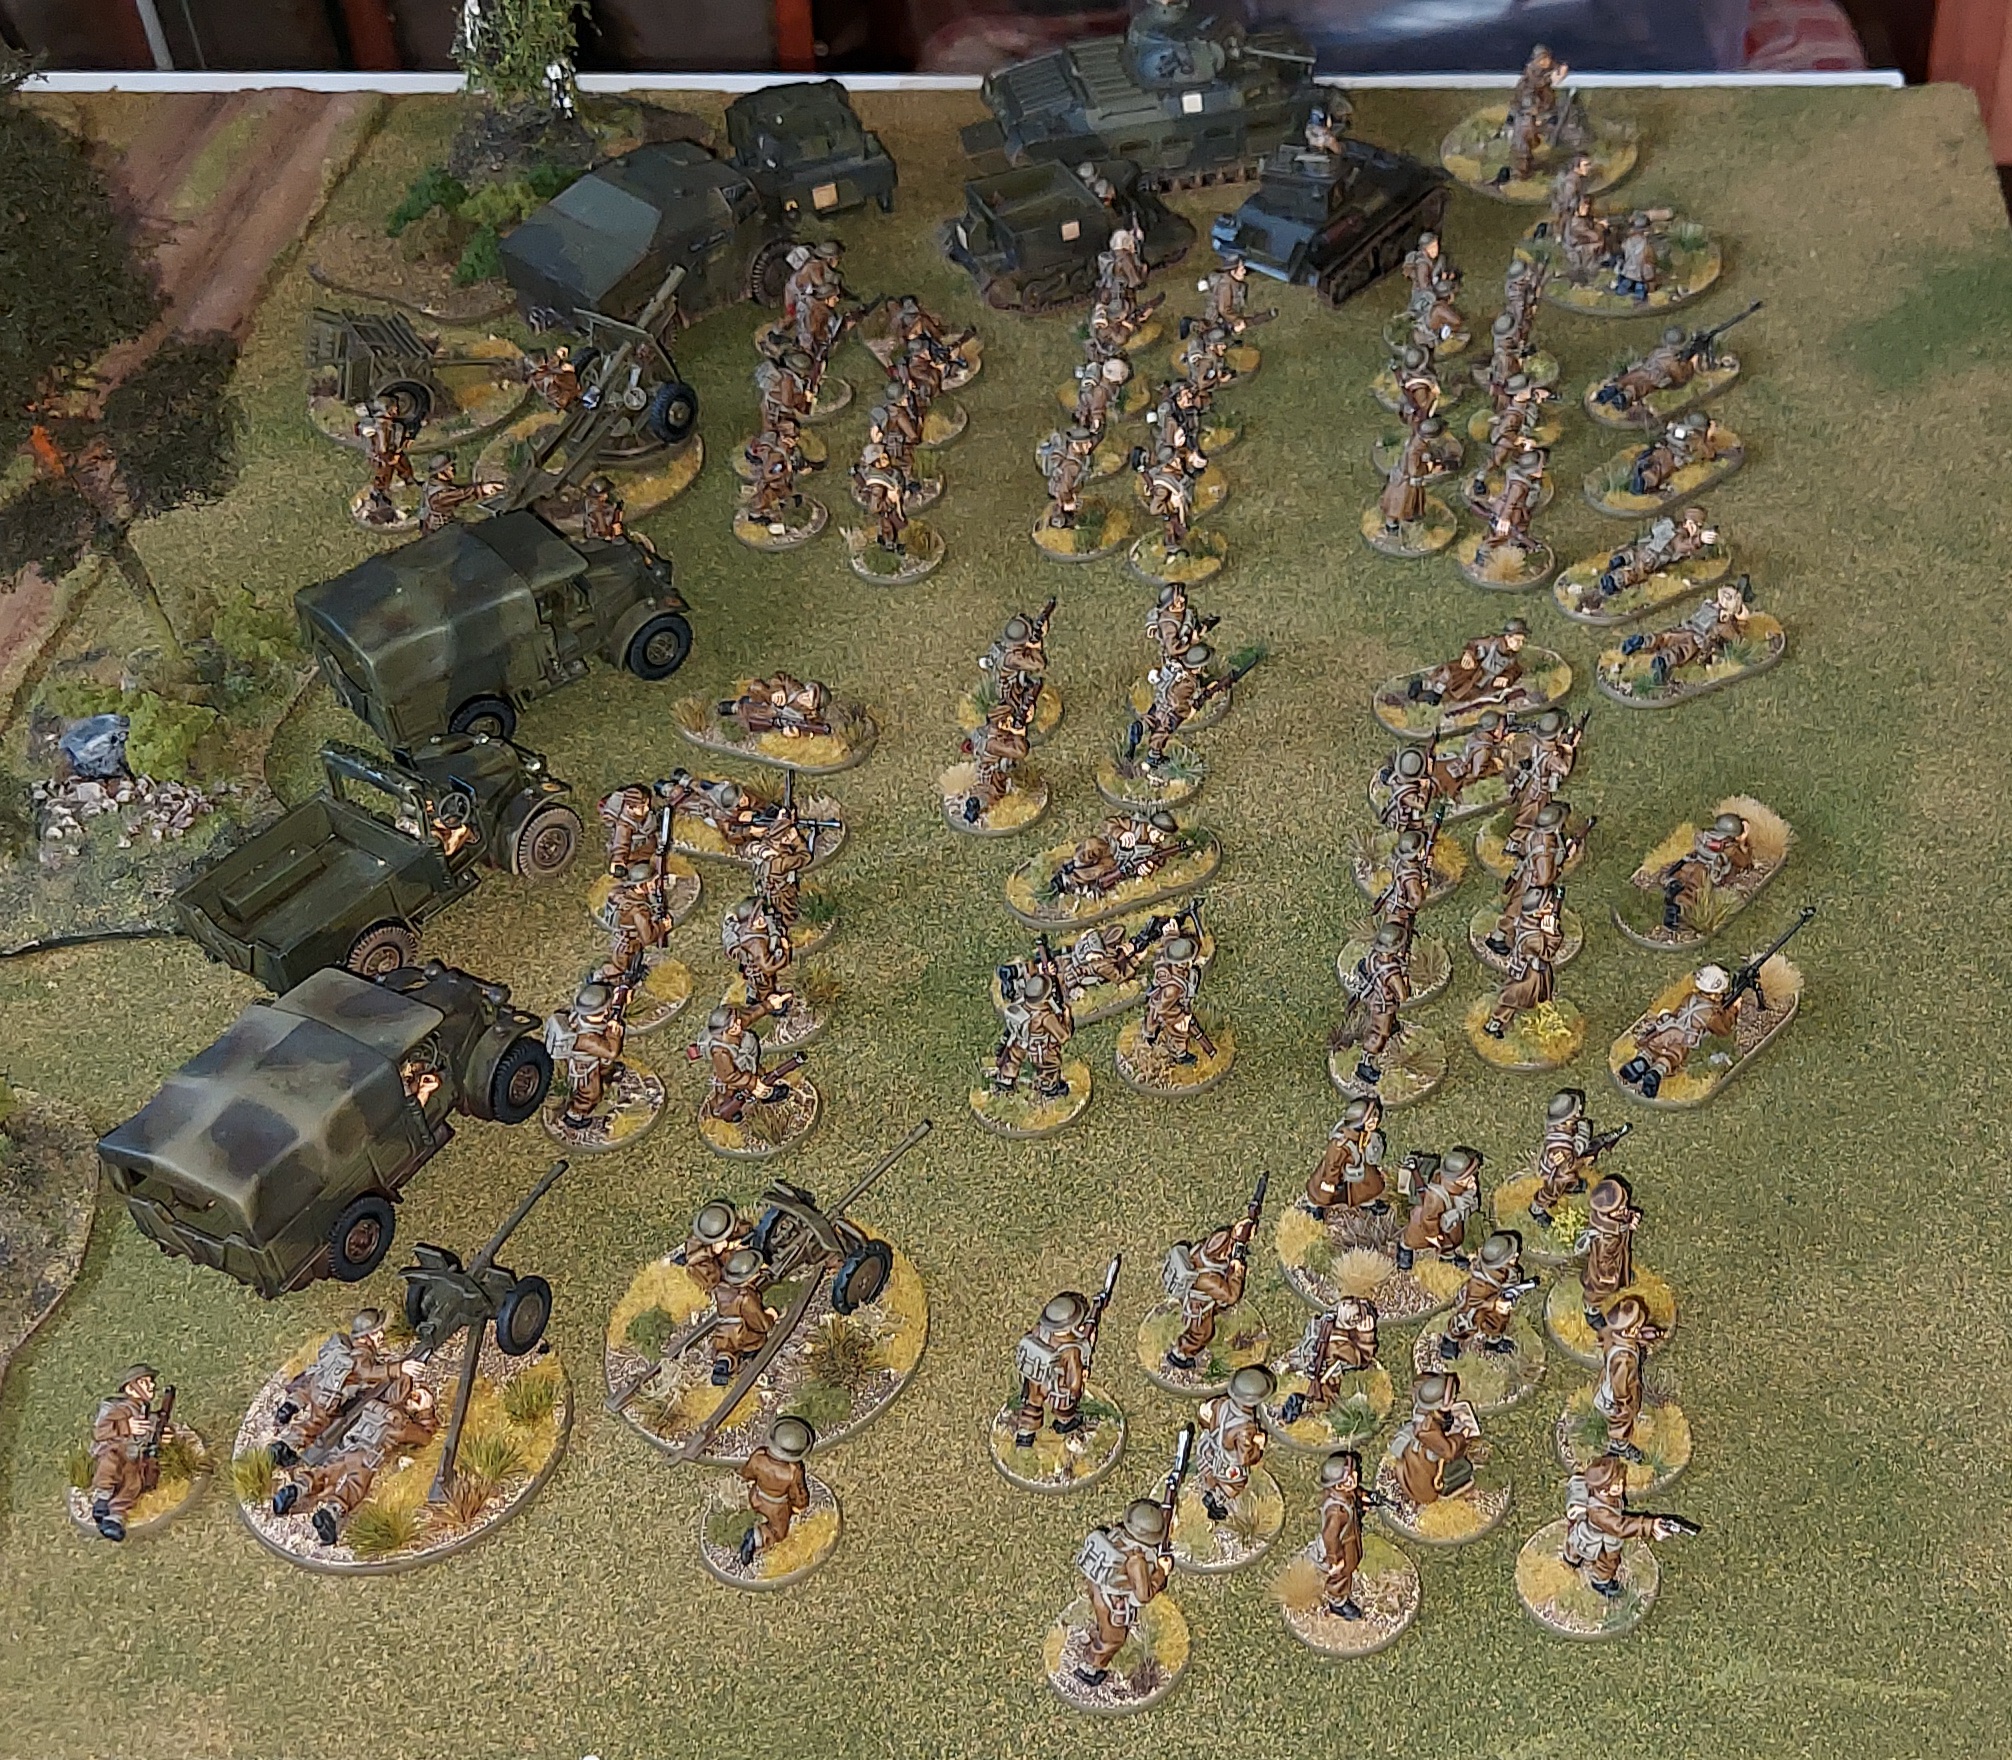
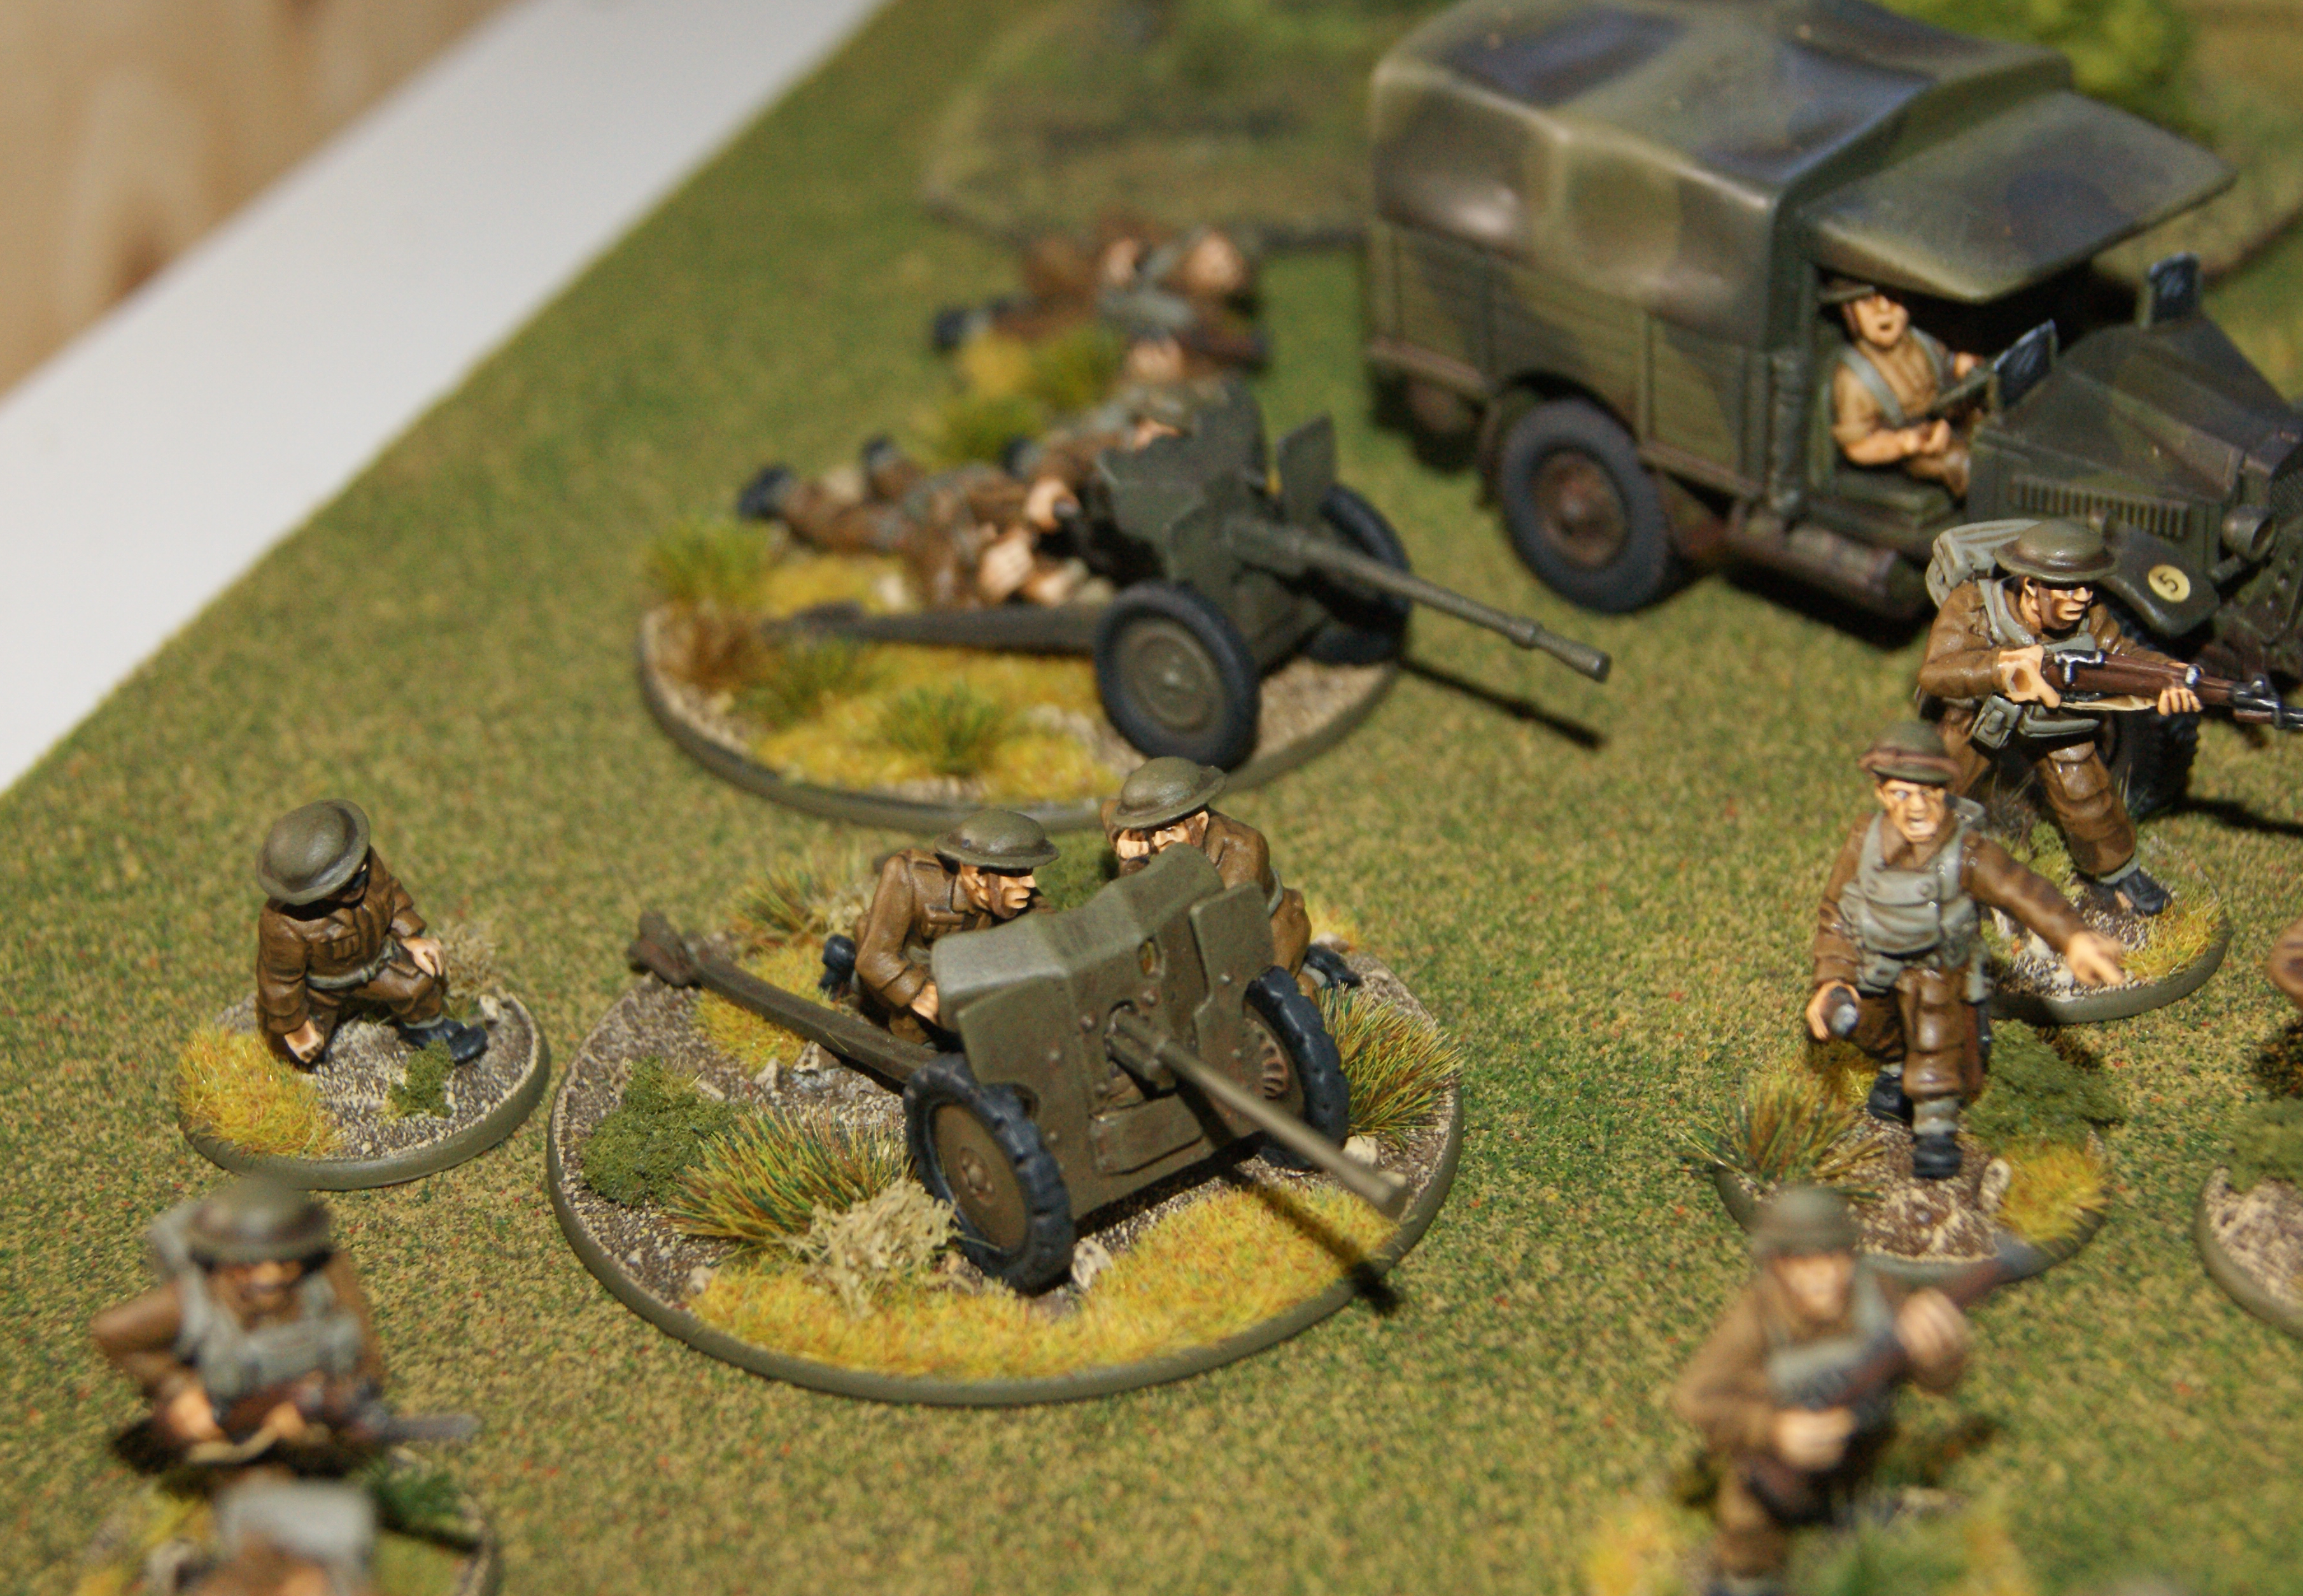
The 25-pounder is a nice model, but I dont really like having that kind of artillery piece in a 28mm game, unless it is an objective or something. Also, the AT-shell, which is included in the BA rules, was not used until after the fall of France, which is what this army has been painted for. So, Ill go for the Hotchkiss 25mms instead. They are included under the same entry in the rules as the 2-pounder, which is a bit weird. The 2-pounder has its characteristic platform mounting, which even has a special rule. It therefore costs an extra 5 pts compared to a standard light AT gun.
Also, the tow trucks for the 25mms are more expensive than the Morris Quad, which tows the 25-pounder. All of this means that including the two Hotchkiss guns (which are historically accurate for France and Norway) will cost me an extra 26 points! In fact, a 25-pounder with tow will cost only 2 pts more, even though it is an equally effective AT gun in game terms, while in addition delivering a much better HE round. It can be hoped that these oddities may be corrected in a FAQ sometime in the future. Until then, Ill just have to pay the extra points for historical accuracy!
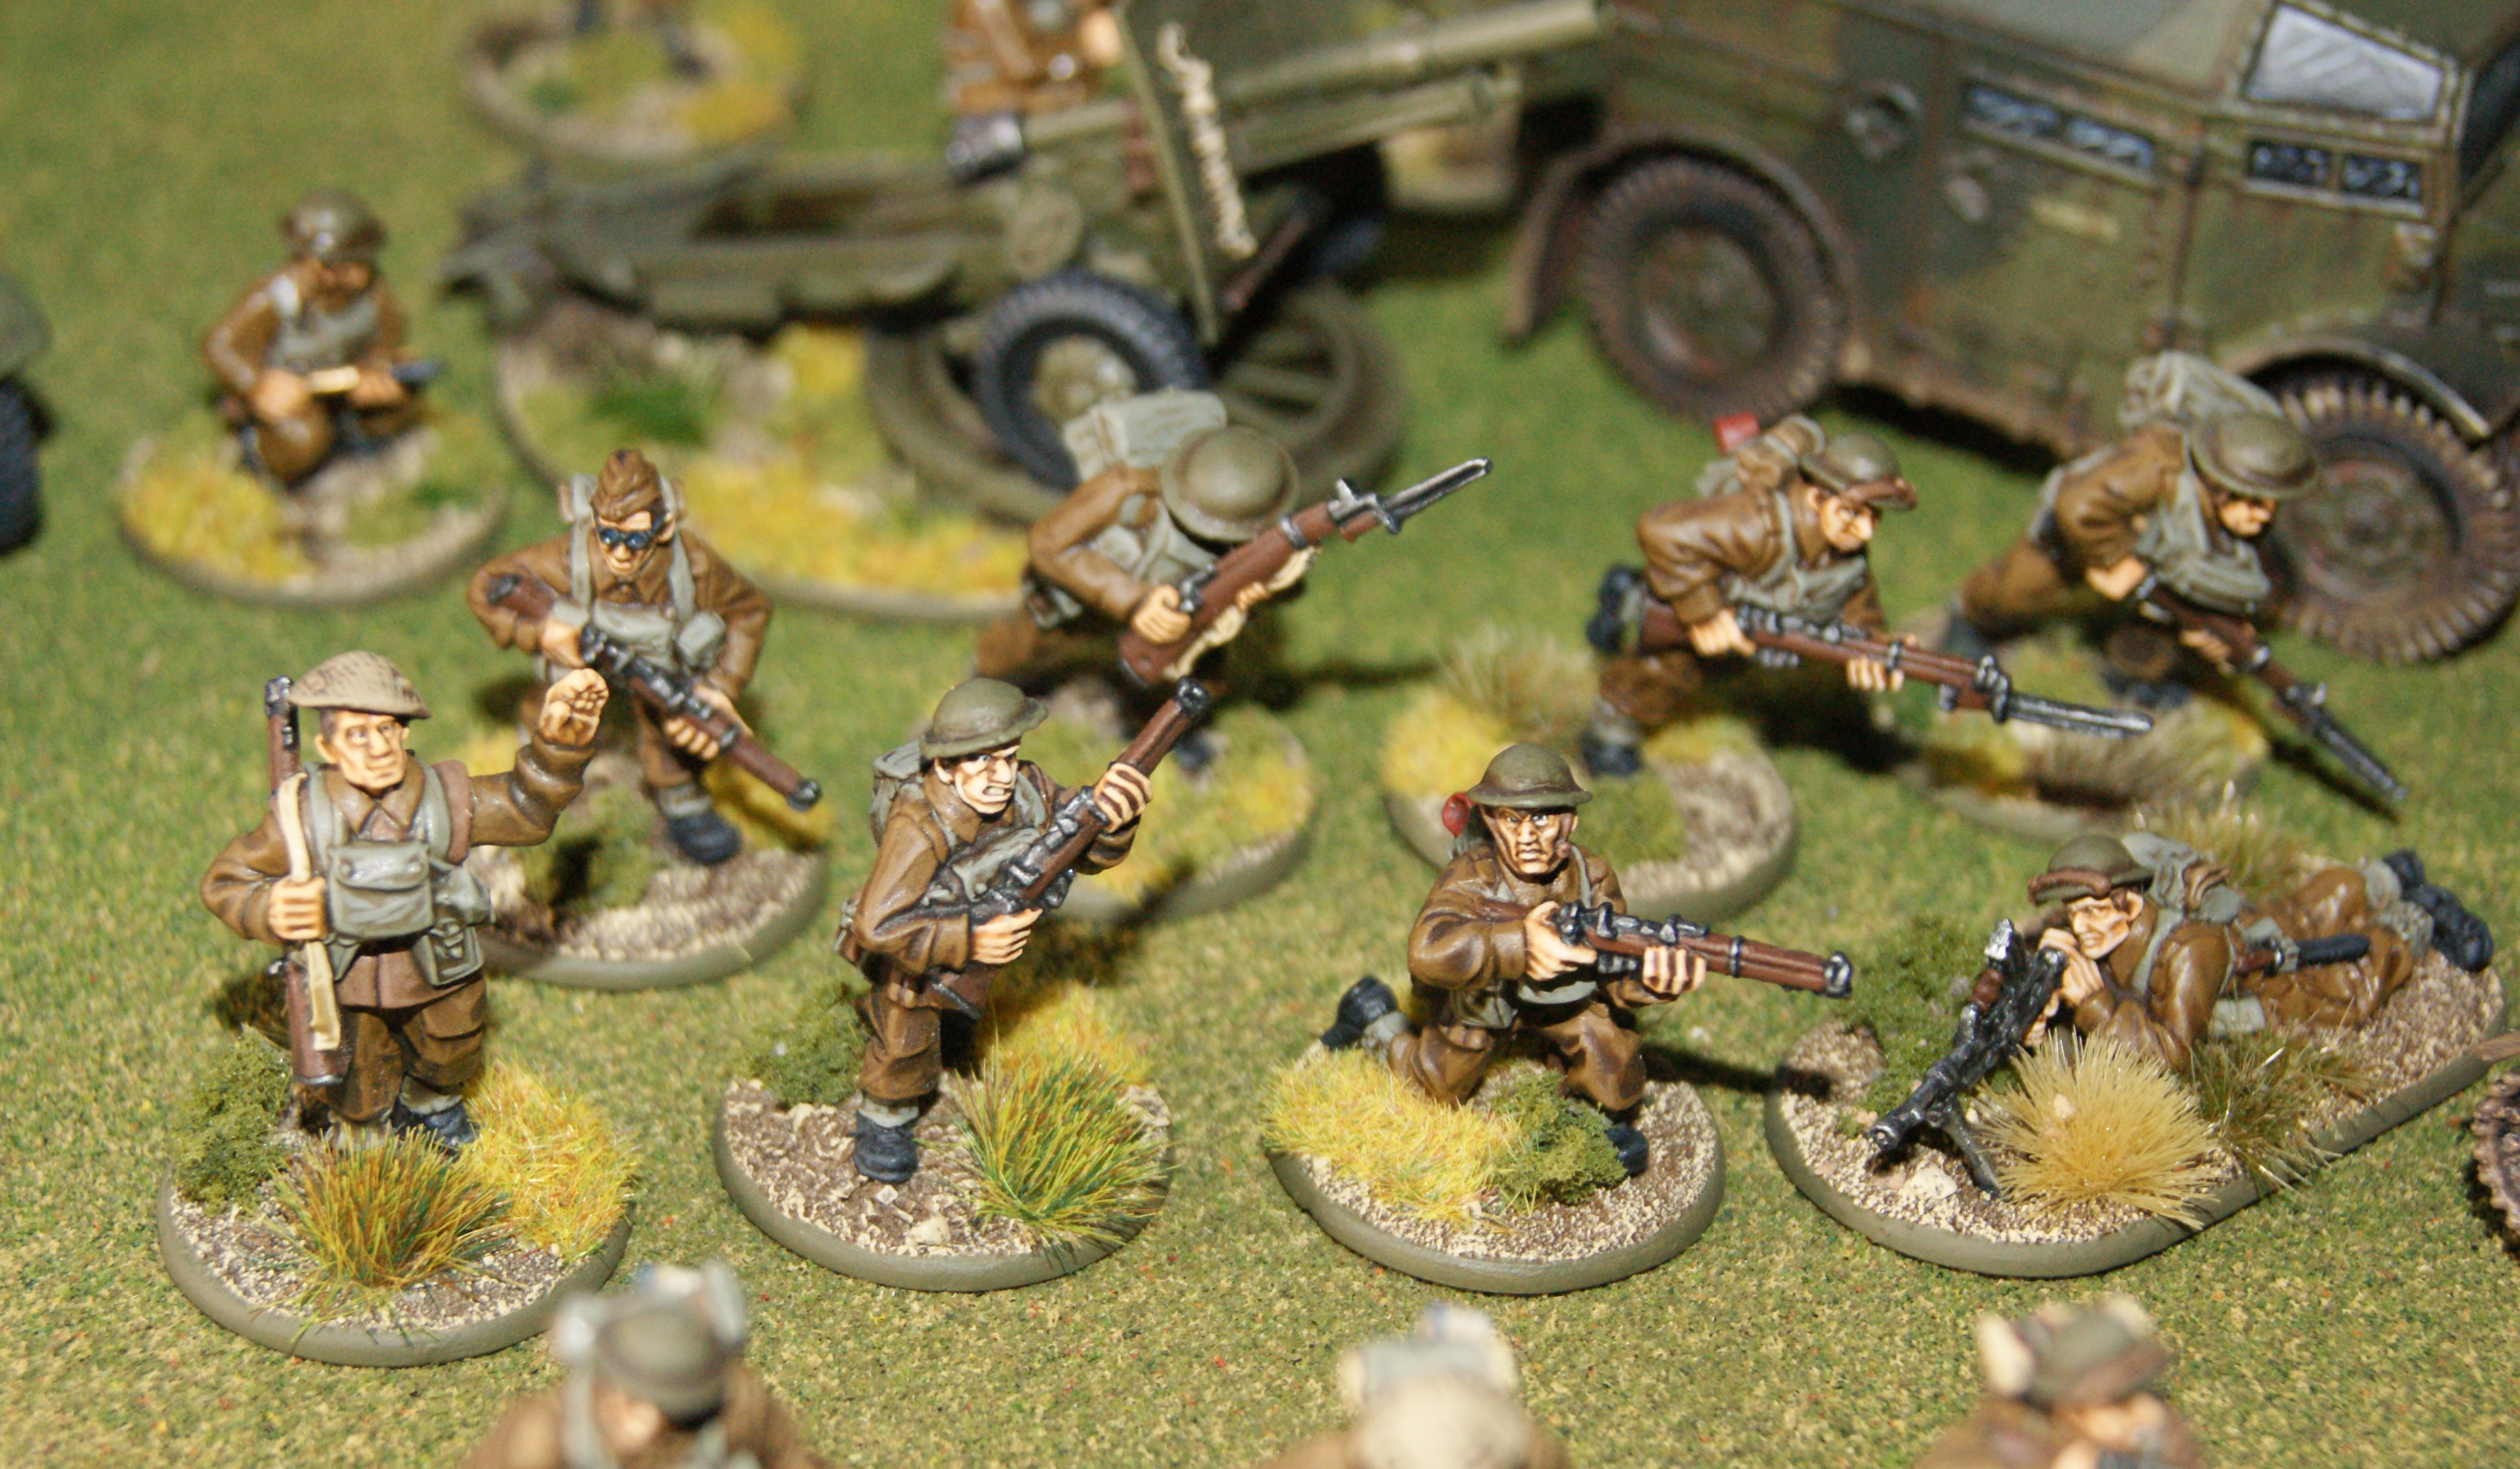
Most of these figures were painted almost ten years ago. They have seen quite a bit of play and some of them are slightly chipped, pieces have broken off and been glued back in place etc. Still, I was pleased to see that the vast majority were in very good condition. There are one or two pieces that arent quite finished, such as the Dingo, which also lacks crew figures (I wonder were they might be…?). About half of the figures seem like they could use a better matt varnish. I seem to remember using a spray varnish on some of them, which probably was less effective than the brush-on variety. About half of the figures have been painted to a higher standard (with an additional final highlight), whilst the rest have a more basic paint-job.
As readers of this blog will probably have picked up, I have been a fan of Warlord Games’s Bolt Action rules for a long time. The first edition of this game was what I started with when I first came back to wargaming around ten years ago. It was also the first time I had really tried miniature wargaming in a historical setting. I liked the game right away, but I have to admit, I have always been a figure painter first and a gamer second. So for me the visual look of the game was a big part of the appeal. And the Bolt Action rules books have always looked fantastic, and the new edition does not disappoint in that regard, that is for sure.
Soon after having played a few games of 1st ed. Bolt Action, I realized that this game was much better than some of the sci-fi and fantasy games I had played as a teenager. What I liked about it was the basic mechanic: the drawing of dice from the bag, which creates a tension and dynamic type of game. Also, the fact that stats for individual units were extremely simple speeded game play up a great deal. The rules were quite transparent. Indeed they were so transparent that it was very easy to work out for yourself what sort of stats a unit would have from the historical facts: a light tank with an AT gun and two machine guns was, in game terms, exactly that, a light tank with an AT gun and two machine guns. For me, the game could have worked just as well without nation-specific army lists or army books. The relatively few special rules for individual units just bogged the rules down – in my opinion.
The third edition of Bolt Action was released in late 2024 and most of the army books for the new edition have now been published as well. If it hadnt been for the fact that I happened to participate in a tournament recently, I might not have even bothered with the new edition – I was happy enough with the old versions that I already have. But, as I was going to play by them, I needed to get a rule book and get acquainted with the rules. There have been quite a few changes since 2nd ed.: more, I think, than there were between 1st and 2nd ed.
Now, first of all, I want to say that the game is still very much the same as it has been. The basic mechanic is the same and it has that fast game play and excitement, as well as the simplicity (in the positive sense) that I liked. However… There are some changes that I dont like, and some that seem rather pointless. There are several reviews of the new rules out there already, so there is no need to go into every last detail. Ill just point to the things that I found most conspicuous.
The thing that bugs me the most is a change in the way tanks and armoured vehicles work. There is a back story to this which is not apparent just from reading the rules themselves. Bolt Action is a popular game, one of the most popular games in the historical genre in fact. This means that BA also has an active tournament scene going on, not just in the UK, but even here in Sweden, where I live. This is of course a great thing, as it makes it a lot easier for people to get together and play, especially for those who may live in areas where there arent many players.
However, tournaments in BA have apparently come to resemble some other games, in which the construction of lists to maximise your chances of winning have become an important part. OK, so no harm in that, people play the way they like and I am sure different events are organized differently. In tournament lists it has become common (I dont know how common exactly?) to bring one or more cheap early-war light tanks which feature multiple machine guns. A similar choice is anti-aircraft guns or mgs in multiple mounts, sometimes mounted on a truck or half-track. Now, as BA is a historical game, it has to be kept in mind that light tanks with multiple mgs were not successful: they were too vulnerable to light AT-guns and all those mgs were of no use, rather the opposite. One mg in the hull and one in the turret was the most common solution, because that was sufficient to get the job done. As for AA guns and mgs, these were used, you guessed it, for anti-aircraft defense and not as cheap tanks. There were of course instances where AA guns were used against ground targets, but they were hardly designed for that. They had a much higher profile than, for example AT guns or even tanks, while also often being entirely unprotected. That means that they would have been very exposed if within machine gun range of the enemy. I think this is well known and rather obvious. I should add that this would hardly be a problem in a game between friends, who would stick to reasonably historical forces, where light tanks would only be used as recce vehicles in the late war. AA guns would be higher level support units at some distance from the front lines, in most cases; probably not relevant to a skirmish game at all really.
Anyway, one can still see that there was a problem here. That is where I and the designers of BA agree. It was sensible that something would be changed. Where I dont agree is in how the change was made. In third ed. BA, vehicle mounted mgs have simply had their shots halved (compared to their man handled equivalents), across the board. This obviously has a massive impact on the game, and that became pretty clear as soon as I tried the new rules. Normal tanks have become very bad at fighting infantry, even infantry that is out in the open. We should add to this the fact that even relatively powerful tank guns, like the 76mm gun in the T34 and KV tanks, are very weak in BA. A 76mm gun is exactly as effective as a 50mm mortar, i.e., not very effective. This is in itself quite ridiculous. I suspect that this has gone partly unnoticed by the designers and many players, as Soviets are still not played as much as other nations (they are relatively popular here in Sweden though). Because it just happens to be the case that the American and British 75mm guns, which as far as I know were almost identical in performance historically, have a special rule making them significantly more powerful. So, for British and American players the impact of the rule will not be as noticeable – they can always use the high explosive round to combat infantry, which is also what they were intended and used for.
But for other tanks this rules change will have frankly bizarre effects. Just do the maths: a T34 driving up to point blank range in front of a squad of infantry in the open, will at most kill 6 soldiers, that is, if you score hits with every roll to hit and roll successfully with every roll to damage. That has never happened to me in a game as far as I can remember, but then again, I am a notoriously poor dice roller. However, I think that you get the point. This is not a good rules change and it unbalances the game overall. Incidentally, it also does not really address the problem with multiple mg tanks, because they will still be as effective in a relative sense, i.e., a historically useless tank such as the T28 will be a very interesting choice on account of its multiple mgs and howitzer compared to the T34s normal arrangement of two mgs and a 76mm gun. One of the best tanks of the war, therefore, is one of the worst choices one could make for the points paid. Of course in real life the 76mm fired the same HE round as the 76mm ZIS-3 field gun (a howitzer in BA terms) – which makes the whole thing just obviously wrong. Of course the HE thing was there already in 1st ed., its just gotten even worse now with the mgs as well!
OK, so maybe I have gotten a little bit too hung up on this detail. And yes, I like the idea of bringing a classic force of T34s and tank riders to a BA tournament, so I am a bit biased. However, there is more. Another thing that bugs me is the new platoon structure, i.e. the way the army list is built. Now, again, there has always been a bit of a problem here, in that ww2 wargames at the 28mm skirmish scale are bound to be based around a single infantry platoon, but everyone still wants to have some fun stuff like tanks, armored cars, AT guns etc, in the game as well. Problem is, most heavy weapons were organised in separate units of their own. Having your rifle platoon supported by a single tank or a single AT gun is therefore somewhat odd. (Although one might also argue that heavy weapons were sometimes spread out along a fair bit of front line, so that this perhaps isnt so strange after all…)
In earlier versions, the basic element of a BA force was the ”reinforced platoon”. That was a pretty flexible unit, consisting of a minimum of an officer and two infantry squads. Added to that were different support choices, which were limited, so that you could often have just one of each typ, be it AT gun or tank or whatever. This did not exactly mirror real life organisation, but for the basic infantry platoon I suppose it worked. In a supplement, the option of fielding armored platoons was added, so that you could also field groups of tanks instead of just one.
Now, in the new edition the reinforced platoon is gone, and instead we have more restricted infantry and armored platoons, supplemented by three other types of platoon: recce, artillery and heavy weapons platoons. In practice this means that you will likely be fielding several smaller platoons rather than just one large one. And now you can have a platoon of artillery pieces just like you can field a platoon of tanks. In principle, I think that this is a reasonble move. However, there are some things that dont work so well. Maybe these are just oversights on the part of the designers, I dont know. Again, I am talking as a Soviet player. For example, if I want to field a German panzergrenadier platoon, I can easily have a single platoon of infantry squads and an officer and I have the option of mounting them in armored half-tracks (SPWs) if I wanted to. Now, for the Soviet player who wants to field tank riders with his T34s it works less well. First, the tank riders cant be added to an armored platoon, so I will need two separate platoons. That means I will need both a command tank and a commanding officer of the tank riders. Now this is where I think that the designers may have simply missed something. If I have a platoon of tank riders led by an officer, the infantry squads will ride on the tanks. However, as written, the rules do not make it possible to have an officer ride on a tank! As far as I can remember, this was the case in the old versions as well. The problem only becomes more obvious now that the tank riders must be a separate platoon, which must have their own officer.
The new platoons are generally not historically ”worse” than the old ones. The heavy weapons platoons for instance include light, medium and heavy mortars as well as machine guns. All of those weapons would in most cases have been fielded in separate platoons (in separate companies). But of course, with this structure you can at least field a platoon of mgs rather than just a single one, which some may find to be more historical. In any version, it is certainly very easy to tweak the rules in any direction you want. Other games, Chain of Command comes to mind in particular, do indeed have similar problems, only they deal with them in a different way.
There are other changes to the game that I find less successful. The way ”pinning” works, for instance, has been changed both from 1st to 2nd and from 2nd to third editions. The trend has been to move away from a situation where pins had a massive impact on the game to one in which they are much less important. I dont think that this move is wise, and it makes issues such as the one mentioned above with mgs worse. In earlier versions, putting sufficient numbers of pin markers on units was a viable strategy for effectively putting them out of action. This was an appealing aspect of the game in my view, one of the strength of the system.
To be fair, I should add here that there are changes that I dont mind, or think are rather good. Anti-tank guns, for example have been given a bonus to hit when firing from a stationary position (i.e. a fire order). This is a great change and it corresponds to historical fact. It would perhaps have been even better if it did not include guns mounted in tanks, but I suppose that is debatable.
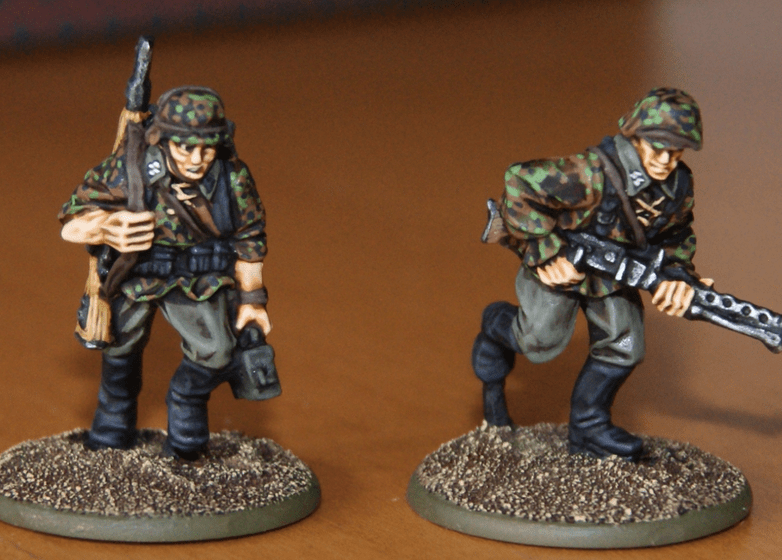
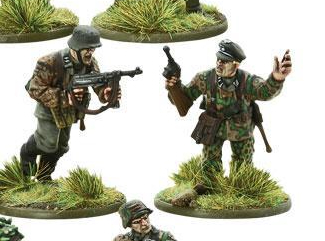
Some of the older figures from WG:s BA range. The US airborne were sculpted by Paul Hicks, but the BEF and Germans (in the middle and on the right) are by other artists (painted by myself).Some of the newer and, in my opionion, less appealing figures released for BA (not painted by me, but taken from the WG website).
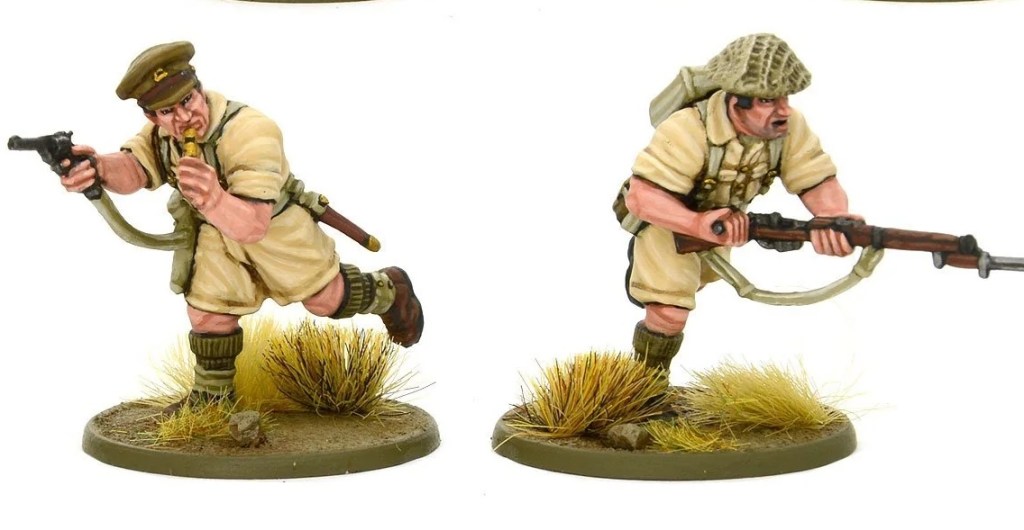
Having said all this, the changes to the rules are still not the main problem with BA v. 3. The main issue for me is the miniatures which the rules are meant to support. Warlord Games are also, after all, a producer of figures first and foremost. As I said before, I am myself a miniature painter first and gamer second. To me the decline in sculpting quality is drastic, but it has been going on for some time. Just compare the metal US airborne, BEF British, Chindits or even the older plastic sets of Soviets or Blitzkrieg Germans to the latest stuff. Among the less well made newer figures, the metal Mongolian cavalry, plastic German SS and plastic British 8th army stand out. The issue is not fine detail or quality of castings, those may well have improved. The problem is proportions, poses and the general look and feel of the figures. At first, I thought that there was some issue with plastic sets in particular. Maybe they had moved to a different method of digital sculpting or something. But, apparently there are some metal figures that are just as bad. I dont know what is going on. Some of the old stuff was acquired from smaller producers that WG took over when they went out of business, including the original Bolt Action miniatures. But that doesnt seem to explain all of it, as some miniatures that have been produced under their own name are absolutely fine. And some of the new stuff looks absolutely fine, like the NKVD for example. Anyway, judge for yourself. As always, beauty is in the eye of the beholder. But I for one would never choose the WG 8th army British over the Perry set – and the Perry set has more figures for the same price too.
Last weekend, I provided figures and terrain for a game of Black Powder at a small local gaming group. They were enthusiastic beginners and I, who was supposed to demonstrate and teach the rules, hadnt played for a long time. Consequently, our grasp of the rules, especially close combats, was somewhat shaky at times. However, all four players were happy to try and, I think, became very much interested in delving deeper into Napoleonic gaming. The guys are experienced wargamers after all, having playing many other games such as for example Bolt Action before. It was not long before they understood the main mechanisms of play and things moved on at a good pace.
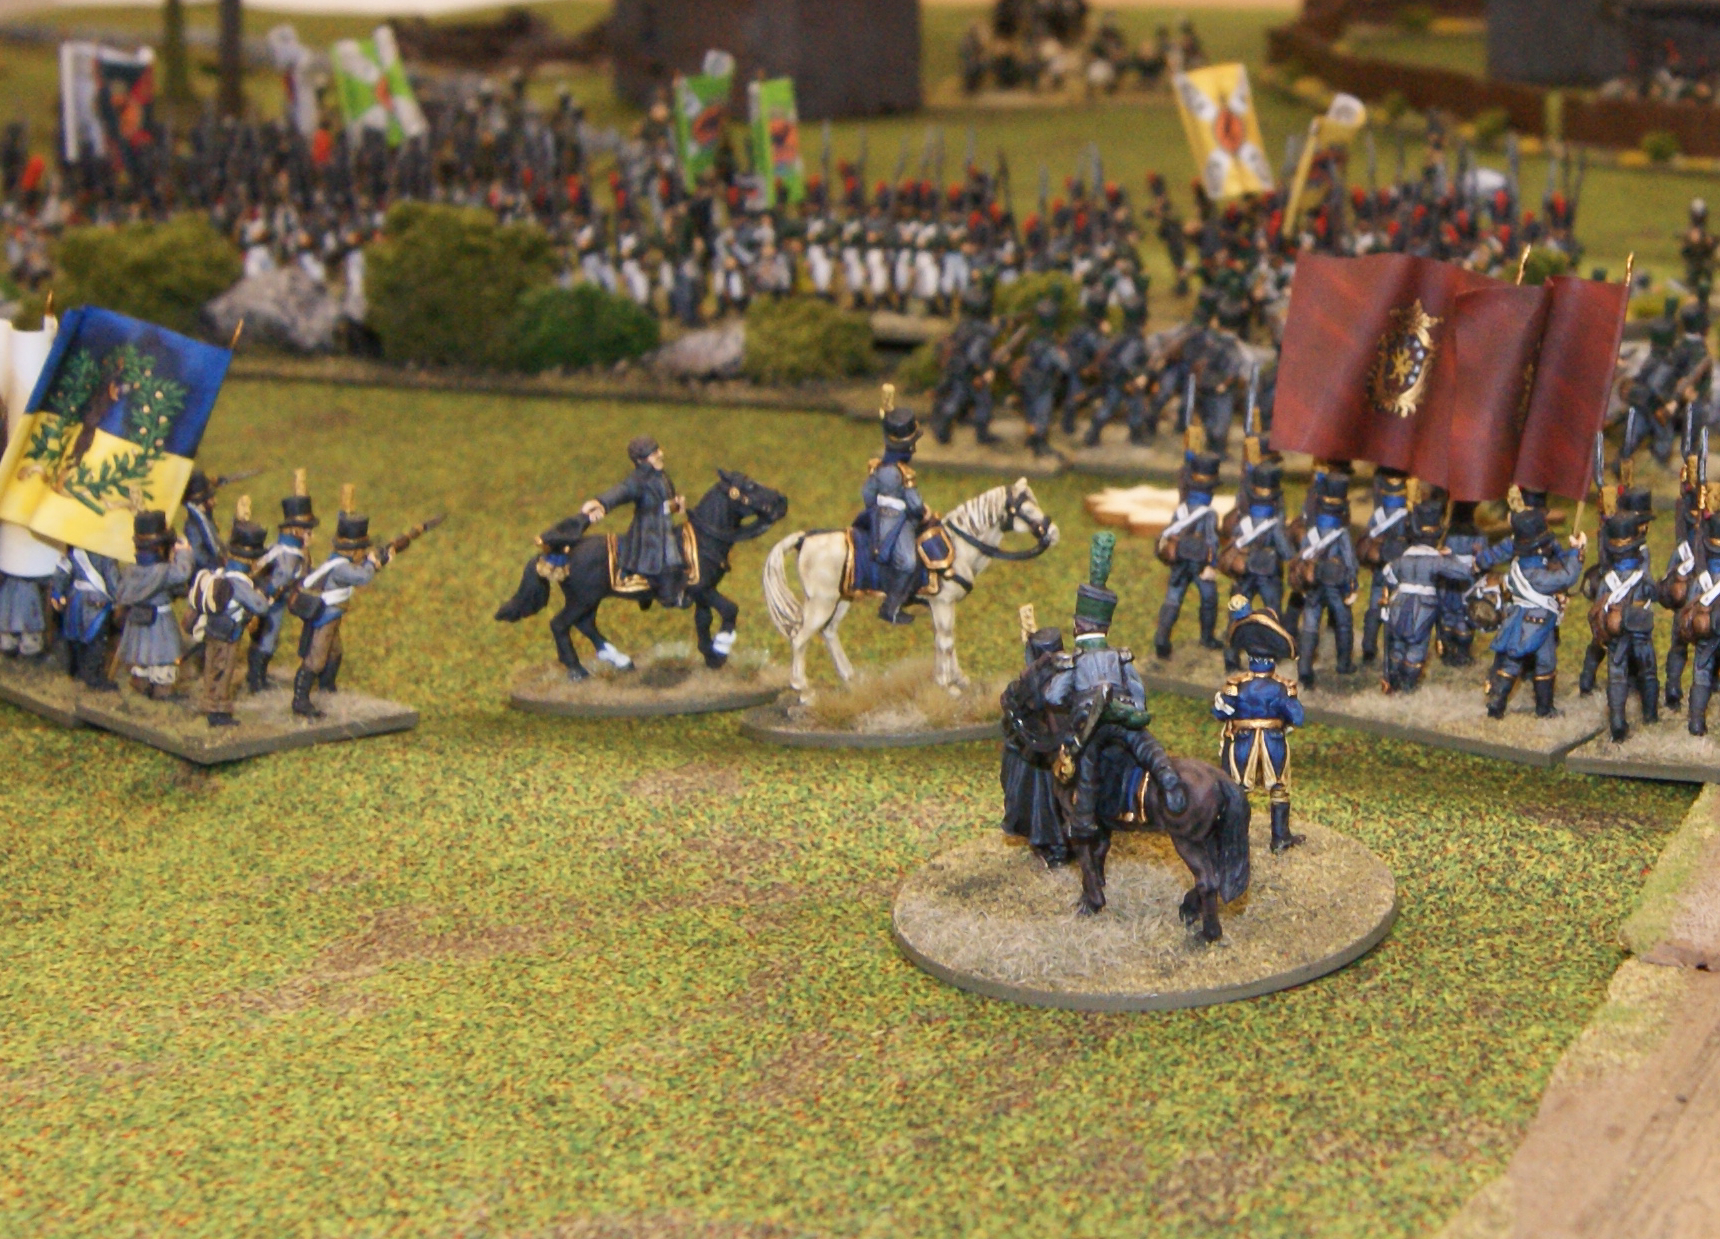
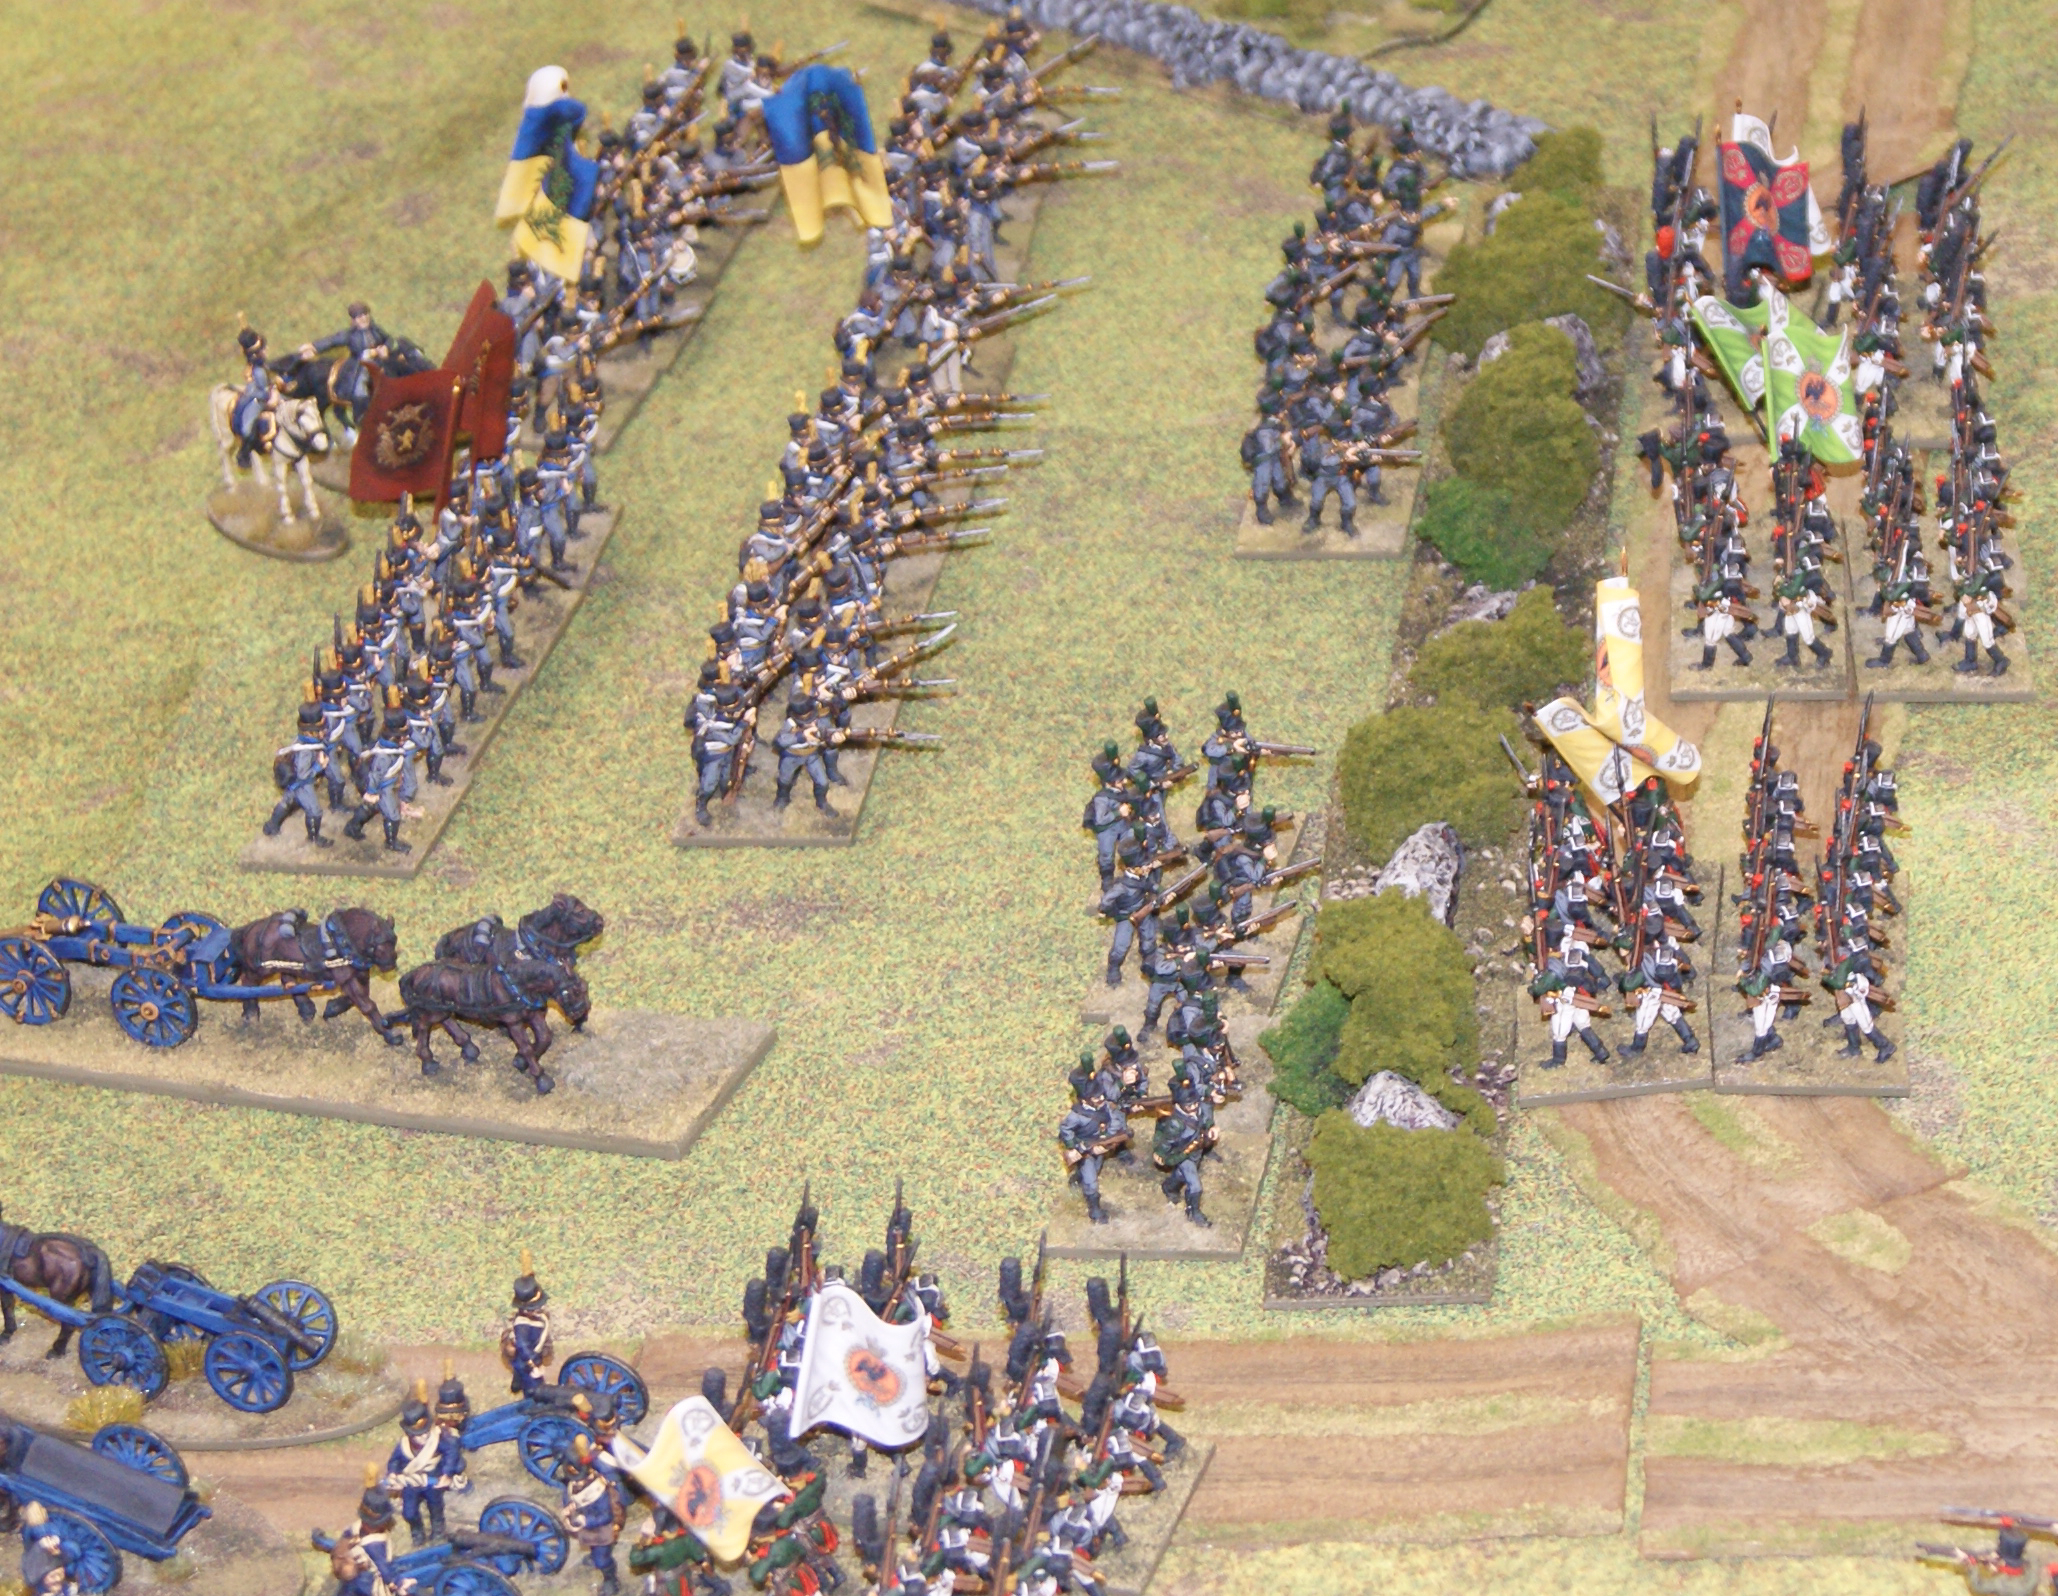
The game featured three brigades on each side, with the Russian army facing the Swedish army of Finland. Each brigade consisted of four battalions of infantry and a battery of 6- or 3-pounder artillery. I had recently finished enough artillery for both armies to have three batteries of two pieces each, including limbers. Each side also had two units of light cavalry, but these were kept outside of the brigades, acting independently. Infantry units consisted of 20–24 men, 16 for the jägers. The cavalry units were 9 men strong. All in all, the armies consisted of almost exactly 300 figures each.
Being fond of painting generals and colonels, I had enough commanders to have each brigade led by two mounted officers (generals and/or colonels) and each army led by an HQ vignette. In this way, each side represented roughly a complete division, which I was very happy about. The only small detail missing was drivers for one of the limber teams on the Swedish/Finnish side. The brigades correspond roughly to actual orders of battle, but the game was not based on any one particular historical scenario.
The brigades consisted of a mix of infantry and jägers. The Russians had five jäger battalions and the Finns had three. However, the Finnish jägers were equipped with rifled muskets, while the Russian jägers counted as having standard muskets, which probably evened things out. Special rules were minimized. Line infantry had standard stats, with no special rules and consequently identical on both sides. Jägers were given the skirmish and sharpshooters special rules to distinguish them. All cavalry had identical stats apart from the cossacks who counted as having lances, with a bonus for a first charge.
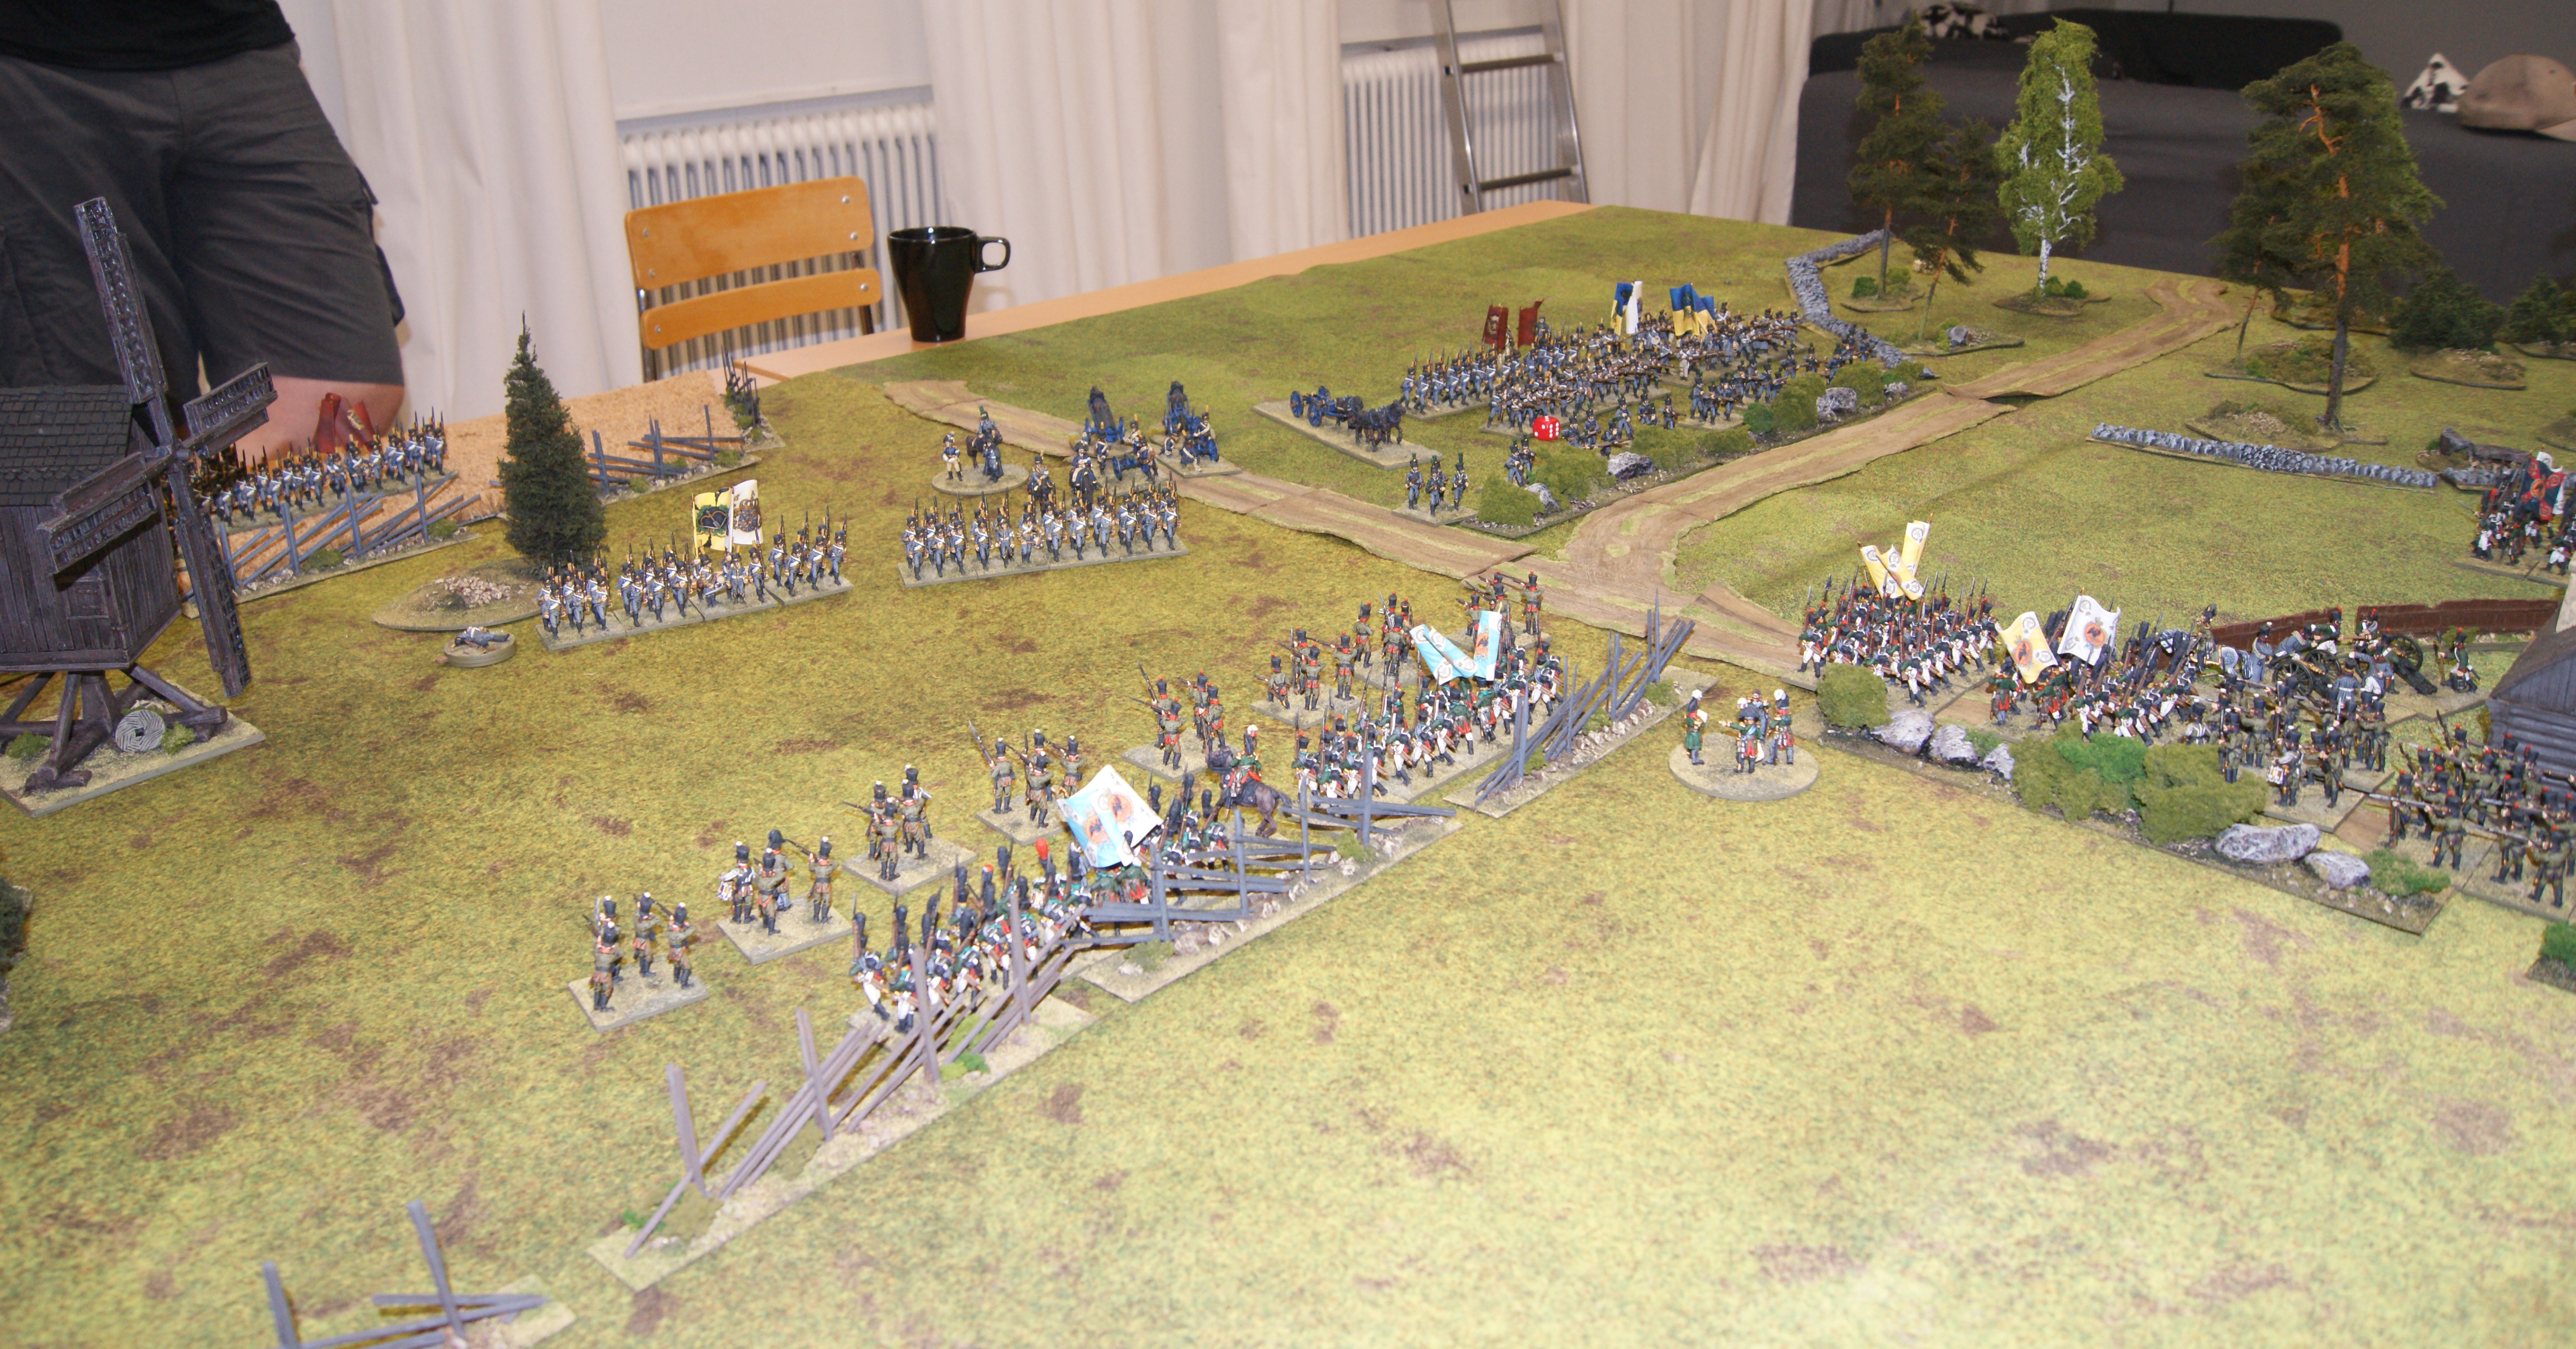
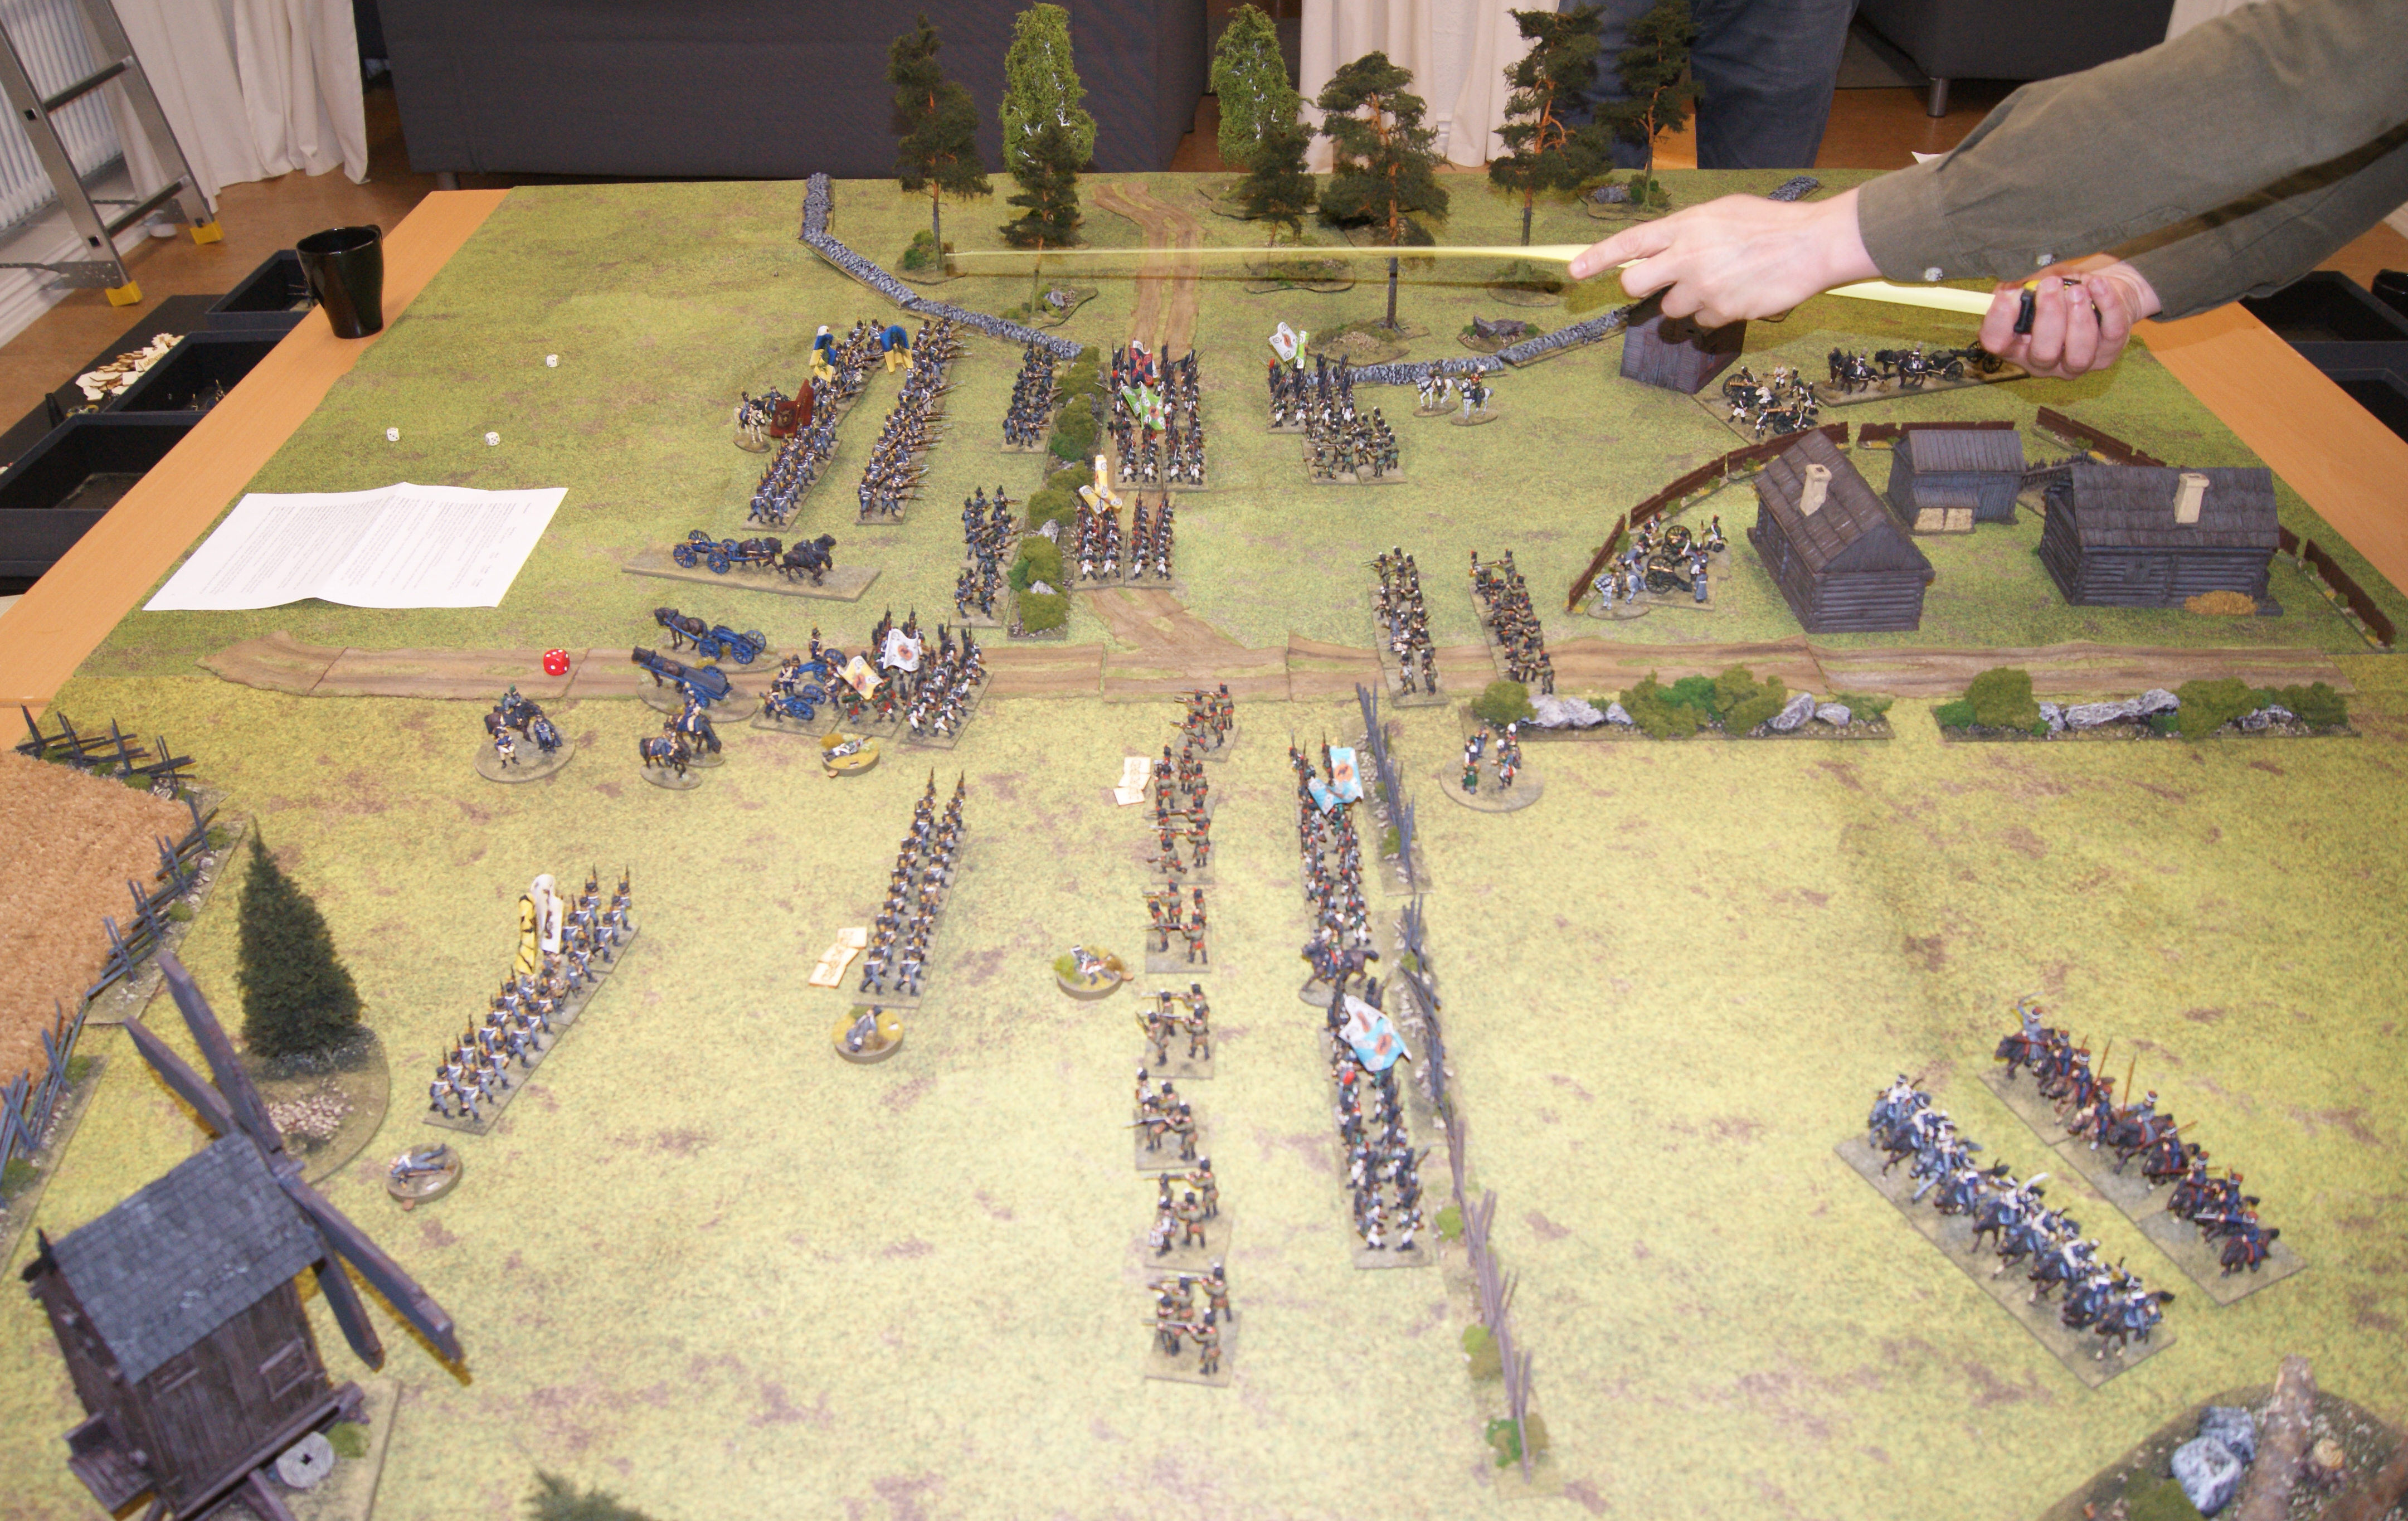
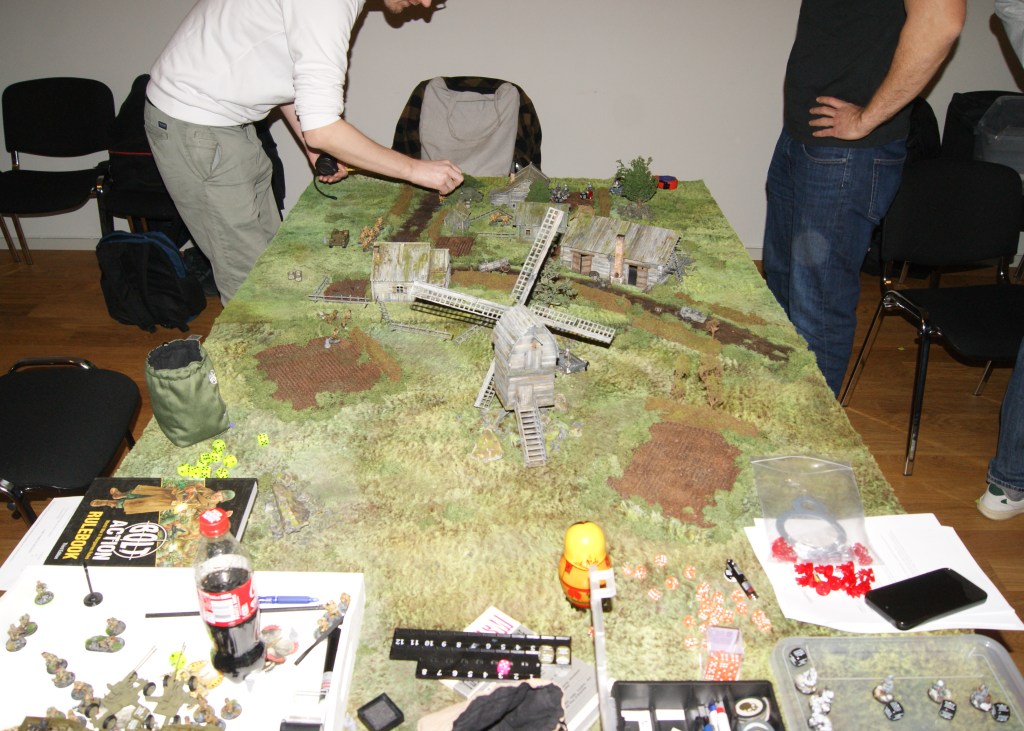
The hosts had an appropriately sized table, so that the playing area was approximately 240×180 cm. I was reasonably happy with how the terrain looked (I had brought everything except the grass mats in my car!). The Grand Manner windmill in particular looks huge besides the figures – and these are still 28mms! I have to say that the windmill is a great addition to the battlefield, precisely because it is massive and looks great, but it doesnt take up a lot of space and therefore doesnt hamper the game. The same can be said for the relatively few, but tall trees (which I have described in a previous post a while back).
The other buildings were painted some time ago and while they looked fine at a distance, they could really use some more shading, highlighting and weathering. I had recently made more of the Scandinavian style fences (gärdesgårdar), but as I suspected, we really could have used a lot more of them! A section of the board featured a wooded area, which we kept open enough for jägers to enter. However, this never happened, and that part of the battlefield remained inactive. That could also be something to tweak somehow for future games.
The game was fought over three objectives: The first was the central crossroads, the second was the village/farmstead, and the third objective was the windmill.
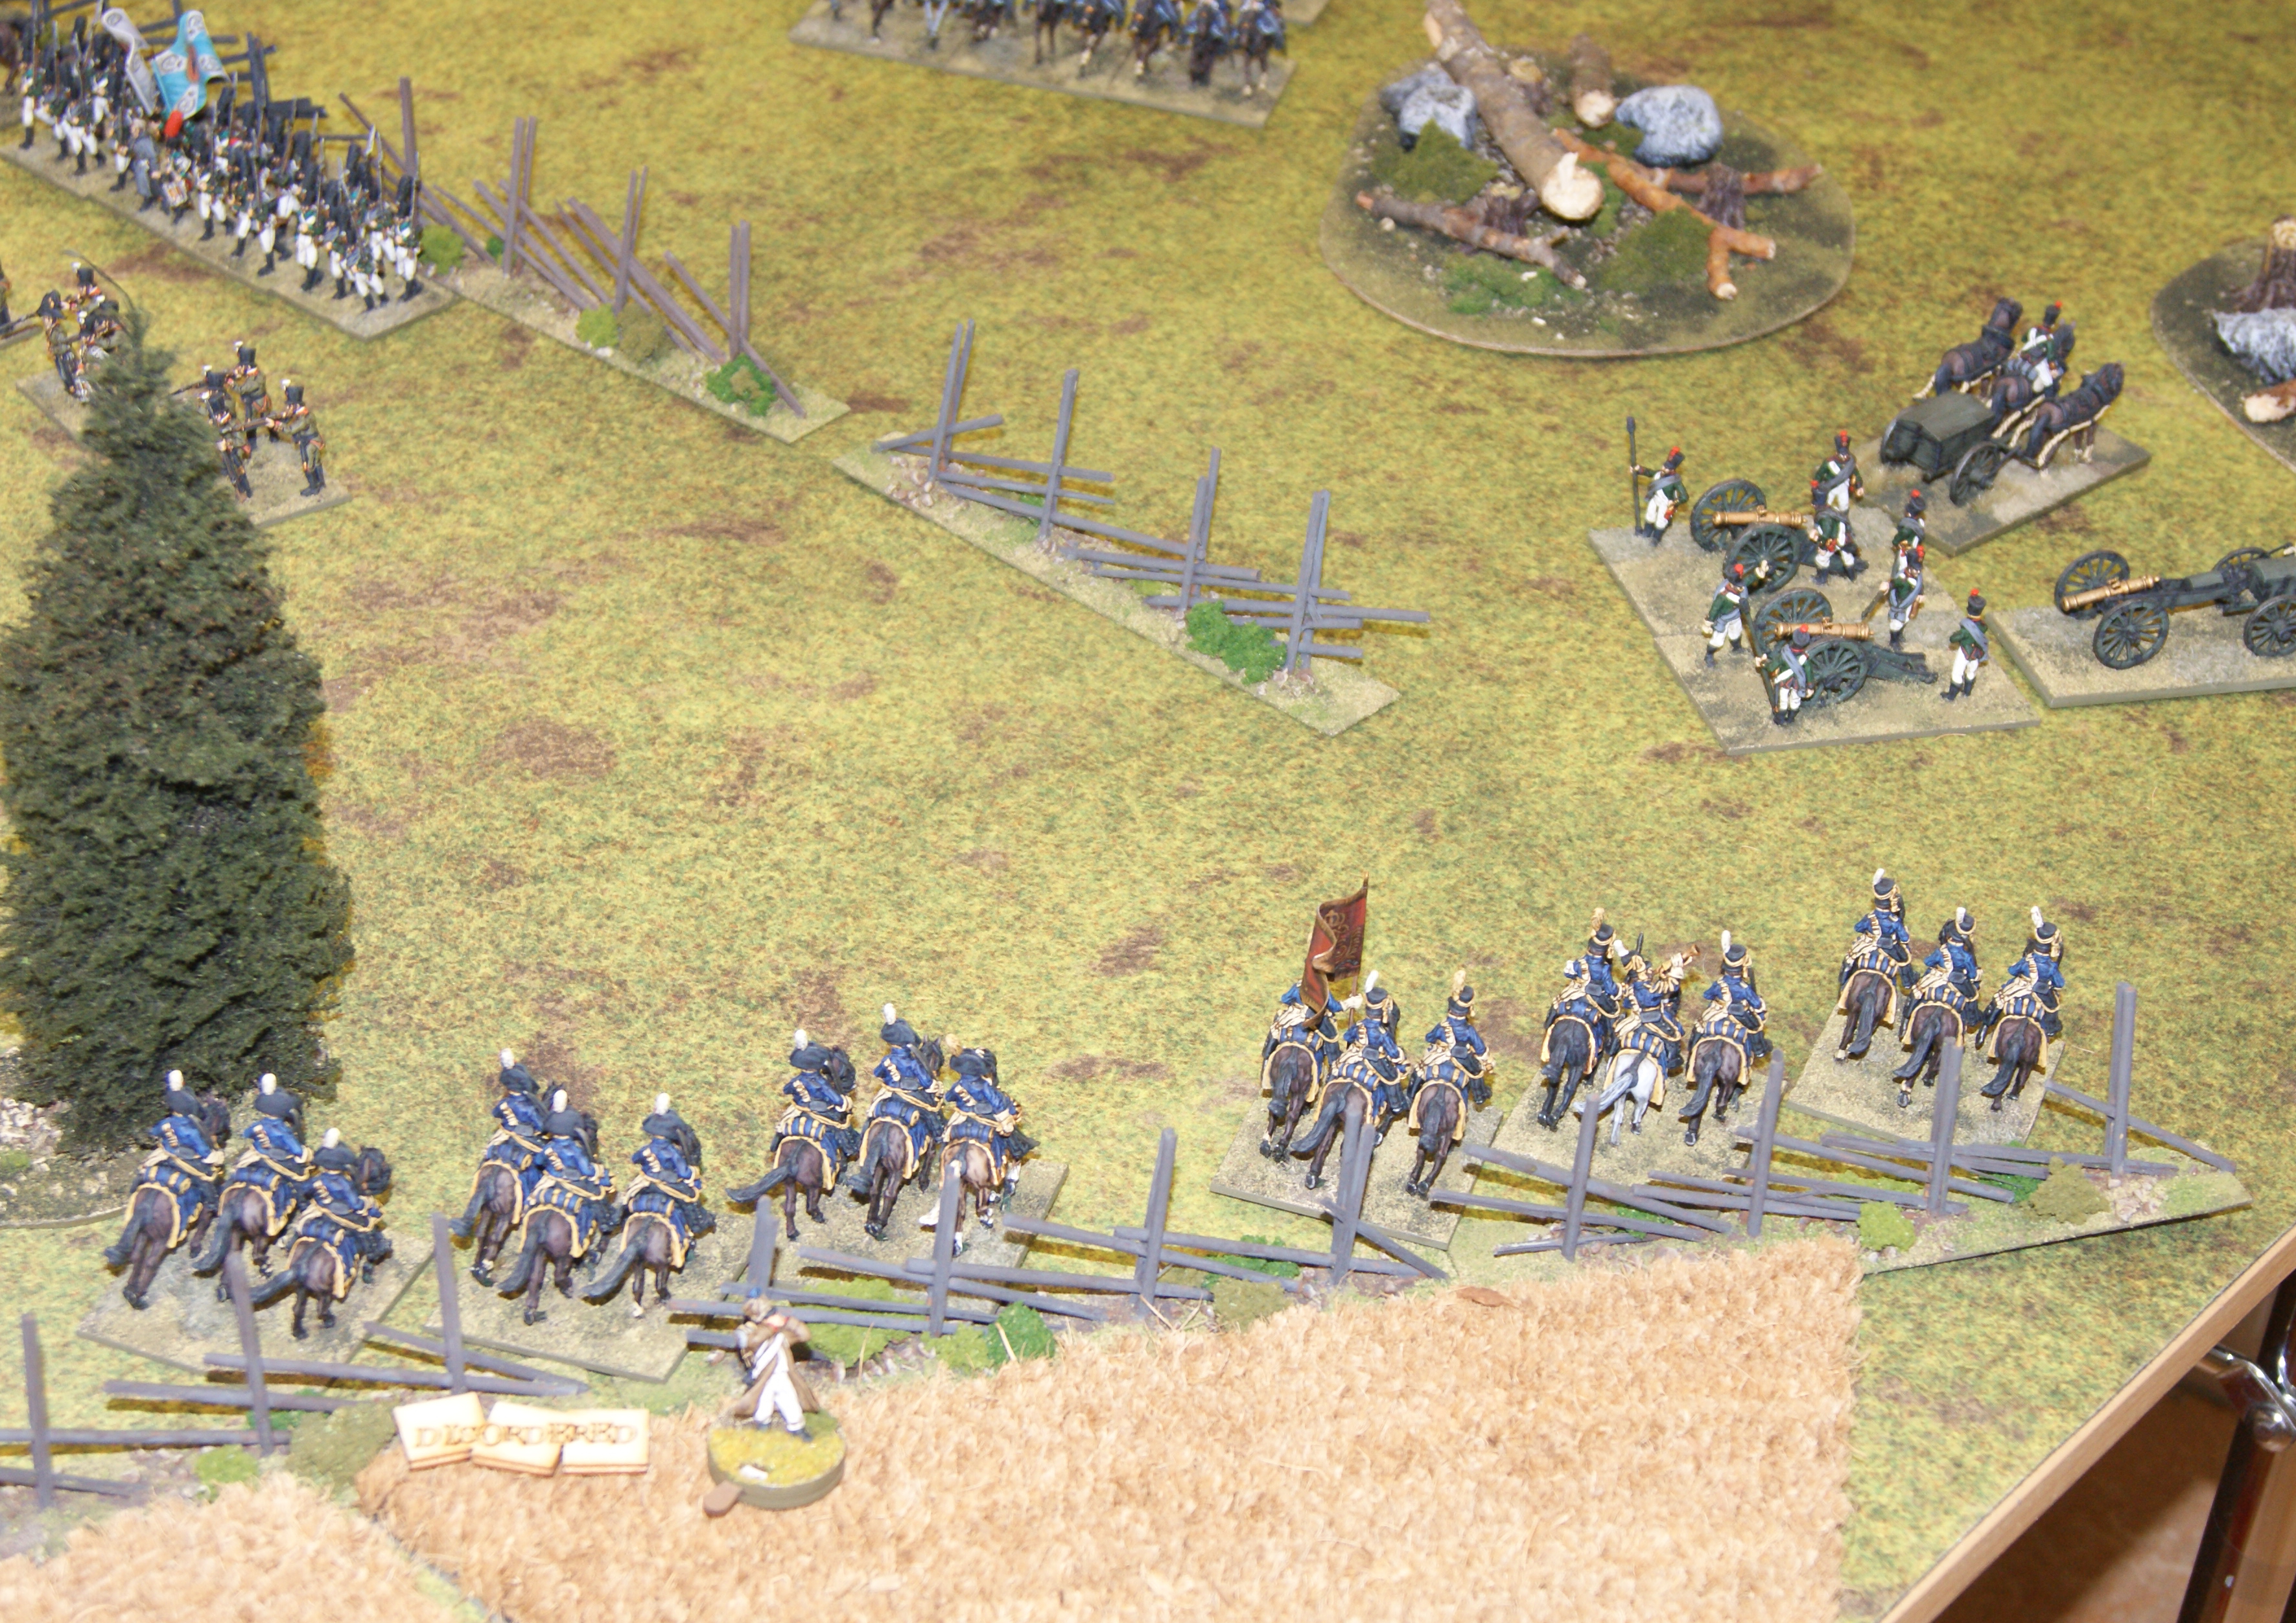
The game itself ended with a Russian victory. We played a good number of turns (I dont remember exactly how many…), and when the game ended the Russians were in possession of two out of three objectives. One Finnish brigade had broken and was in retreat. Despite this, the game hung in the balance for quite a long while, with the Finnish 4th brigade fighting tenaciously before finally breaking. At the same time, the Russian left and center had suffered casualties, while the Finnish 3rd brigade on the right flank was still quite unscathed at the end of the game. The Russian cavalry had been repulsed on the far (Russian) left; the Finnish cavalry had also taken casualties but managed to rout a Russian battery.
The positions towards the end of the game: the Finnish 4th brigade in the center has broken and mostly retreated, while the 3rd brigade has only just advanced to attack the Russian left flank. However, the Russians are in control of both the village and crossroads.
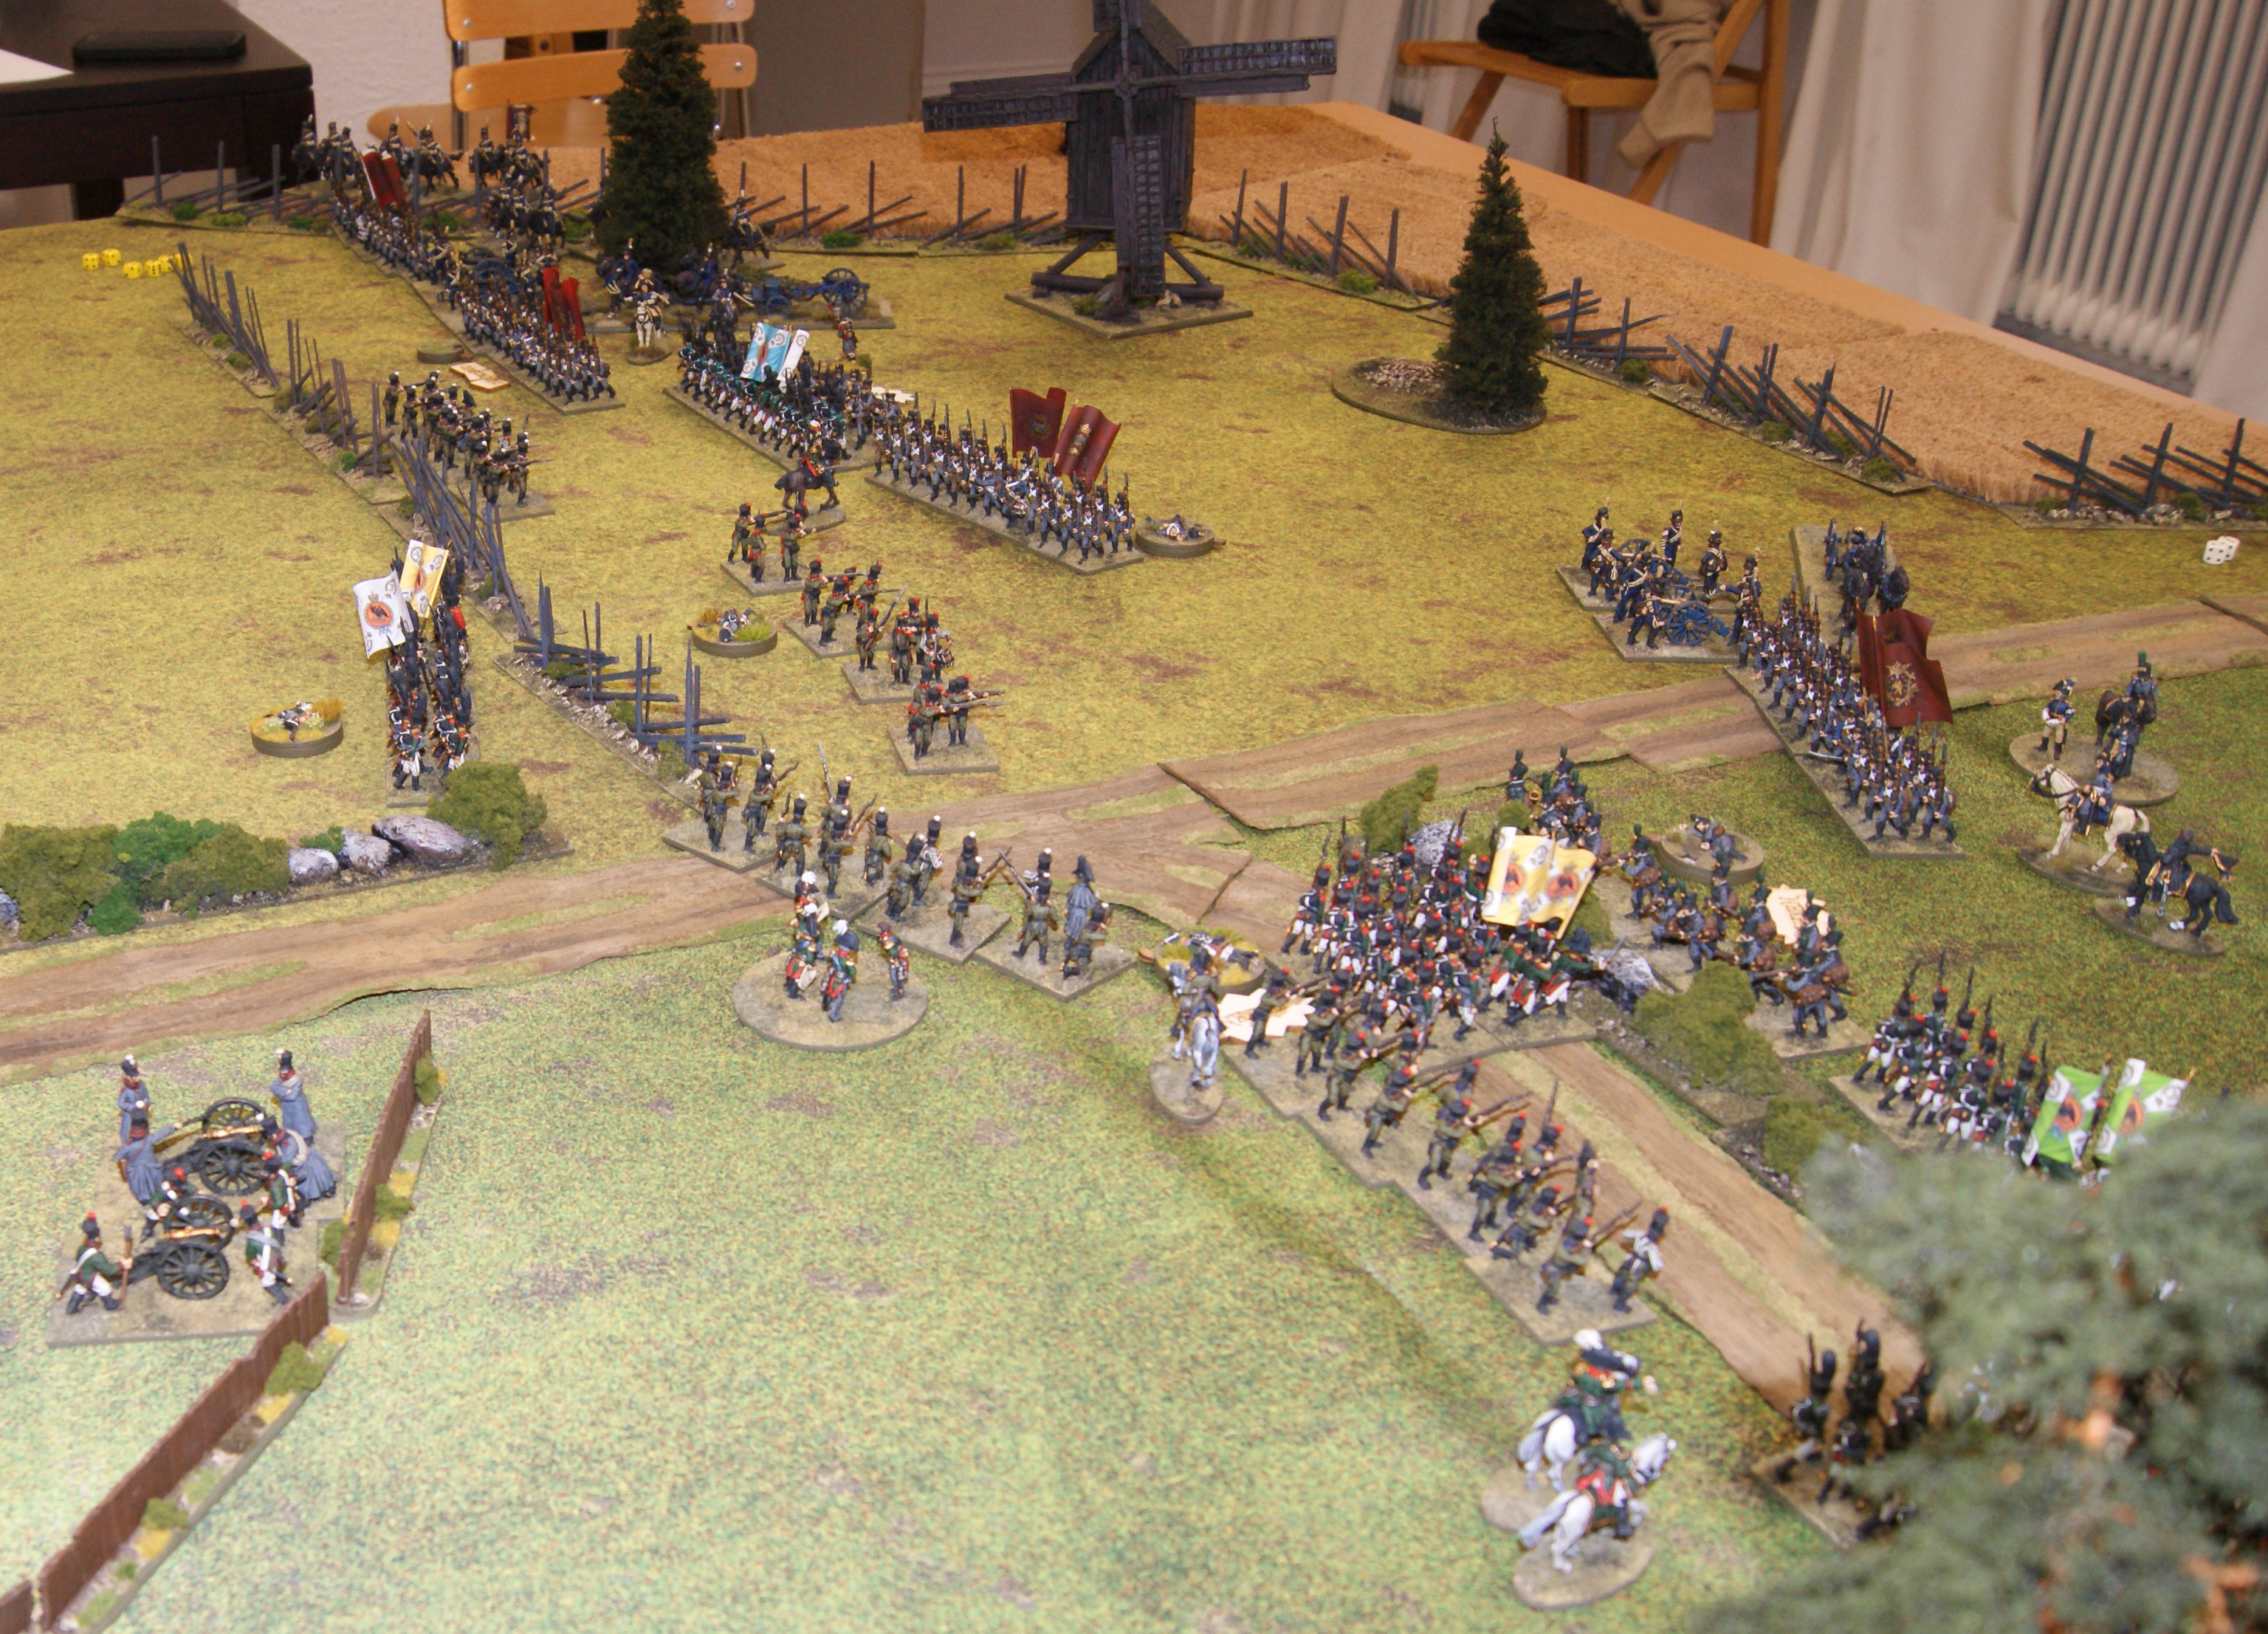
As this was one of the first occasions where I could put two proper divisions on the table, a couple of things became clear. With so many units, space is limited even on such a large battlefield. I can see how larger units (36 figures on 6 bases) would look great. This would be nice in a game of 2 brigades per side, or perhaps with having fewer, but larger units for some brigades (like the Russian line). Having 36-figure units as the normal size however, does not seem necessary – particularly for units such as jägers, who will often deploy in skirmish formation. That would take up a very large frontage and cram the board. A similar thing is true for the artillery. One piece per battery will often be enough, but with the option of two one could represent larger and smaller batteries depending on the scenario.
The game was great, and as we were four players, we divided up the command in proportion: one player commanding either two brigades or one brigade and a cavalry contingent. This is a great way of playing Black Powder. It was all a very enjoyable affair and hopefully, the players were given a taste of what Napoleonic wargaming is all about. We talked, amongst other things, about options for building armies, for example for the 1813 campaign, for which I also have some figures. We shall see what the future may bring.
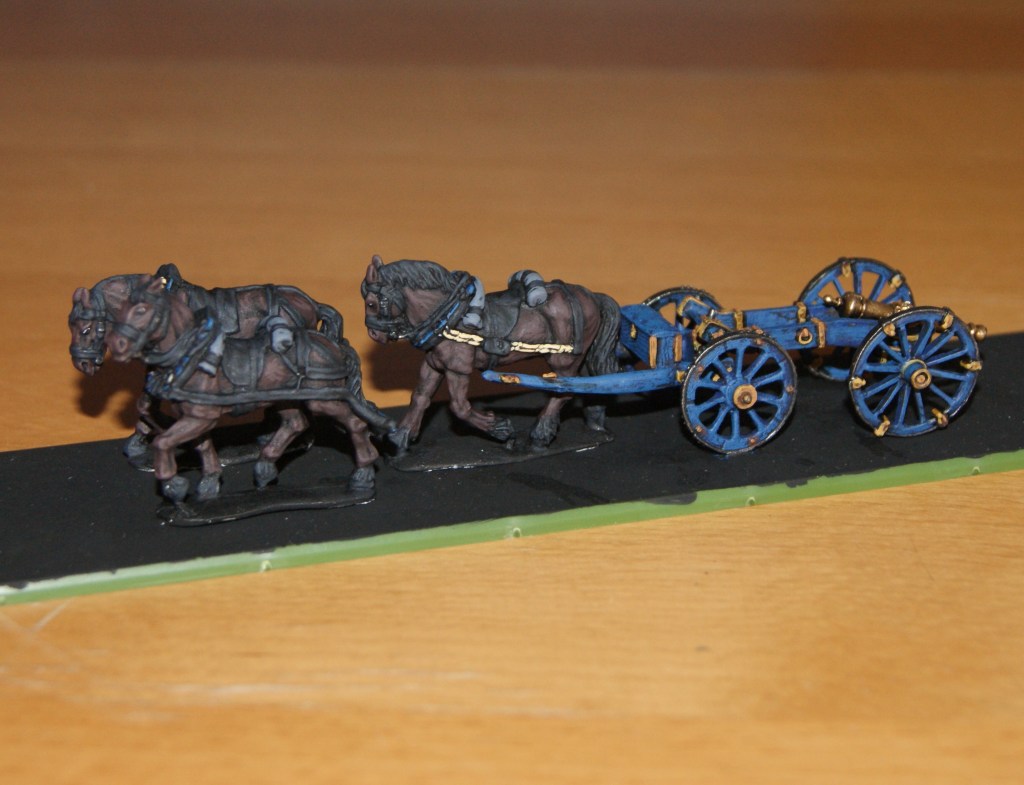
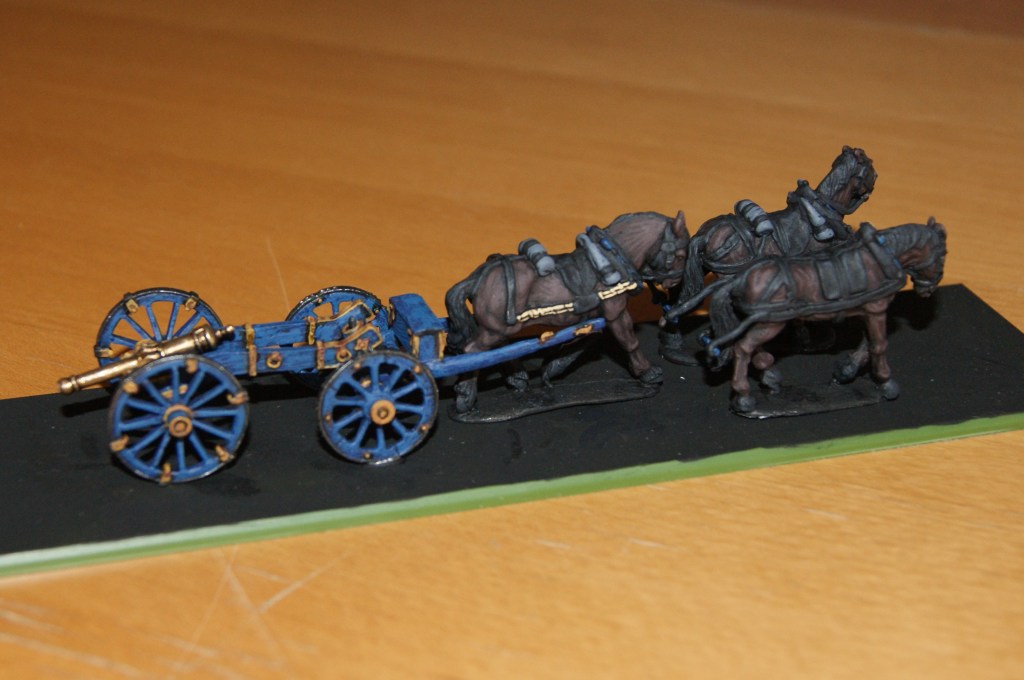
After much pondering, I have finally decided on an idea of how to model a Swedish 3-pounder artillery piece. I only have written descriptions of them, but they indicate what seems to me to be a setup which would have been old-fashioned by the eary 19th century. But then again, the 3-pounders used in 1808 were old, and the design for them was even older. There was a plethora of different models of artillery in the late 18th century, but one of the designs still in use was essentially the Cronstedt system, introduced in the late years of the Great Northern War, i e in the 1710s. Some changes and addition were made: the ammunition box on the limber was added and the old system of harnessing horses directly to the artillery piece when in action was dropped. The second change would not be visible on this model of course, but adding a ammunition chest was easily done. The model is based on two different Perry AWI light limber/artillery sets, with a couple of horses added from an Austrian Foundry set (if I remember correctly). I will add drivers to it, also based on figures from the Austrian set with new heads.
While this isnt a huge thing in itself, this particular limber was one of the last important elements missing from my Swedish/Finnish collection. So I am very happy to have finished it. Scratch building limbers is a particularly difficult project, especially when you dont really know how the pieces looked and there are no good proxies available. At the same time, having finished so much of my 1808 project, this piece was the very last last thing missing from my three Finnish brigades. The Russians now have three limbers of their own as well, so that things are coming together very nicely.
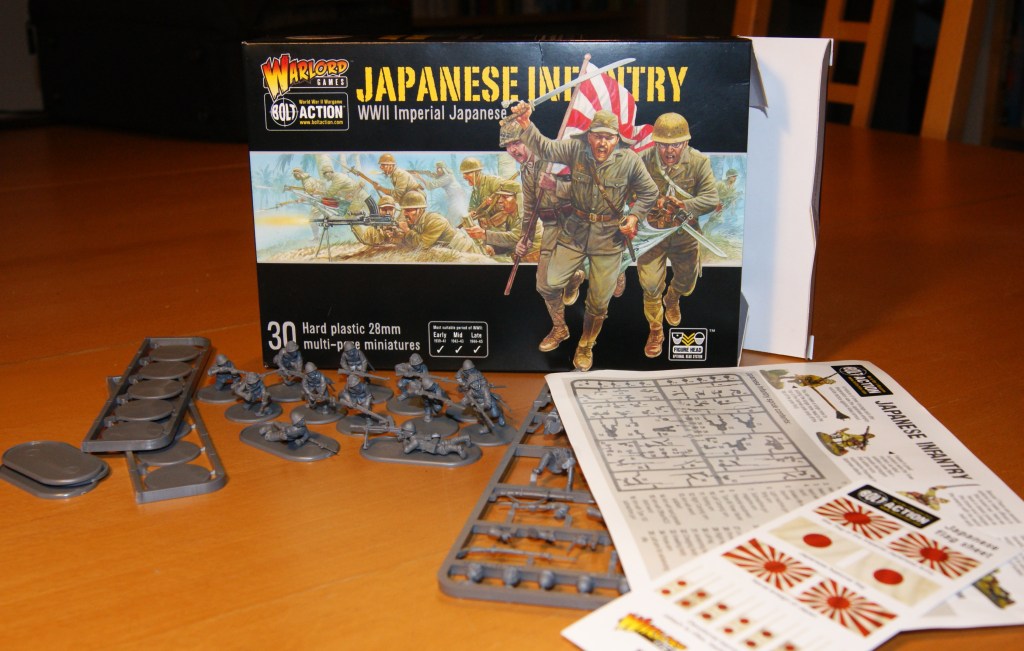
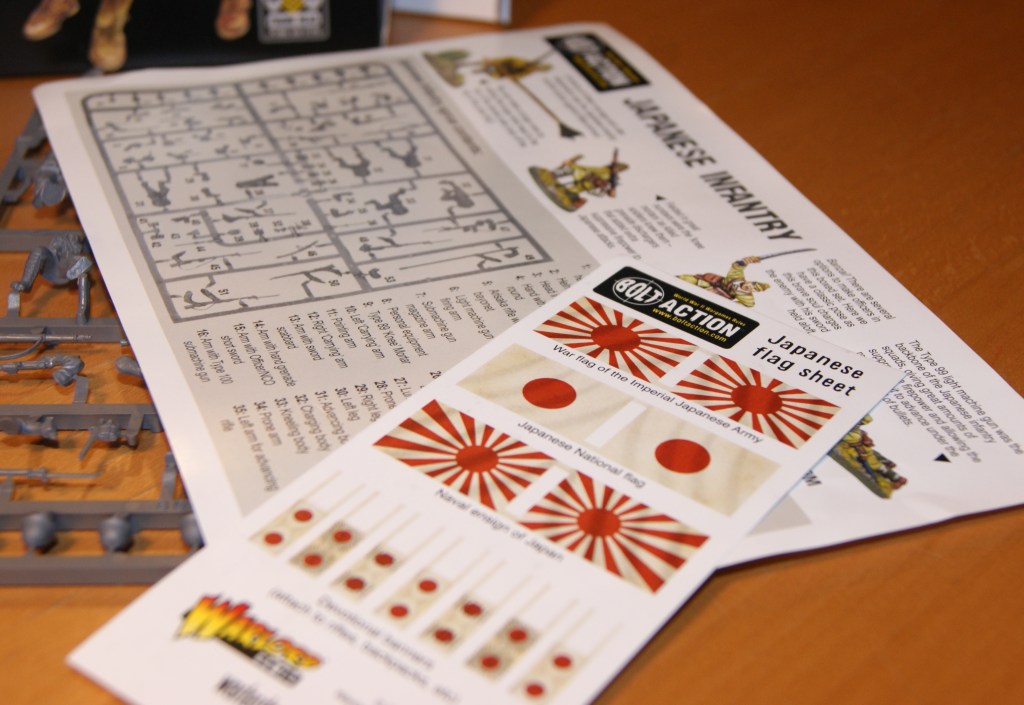
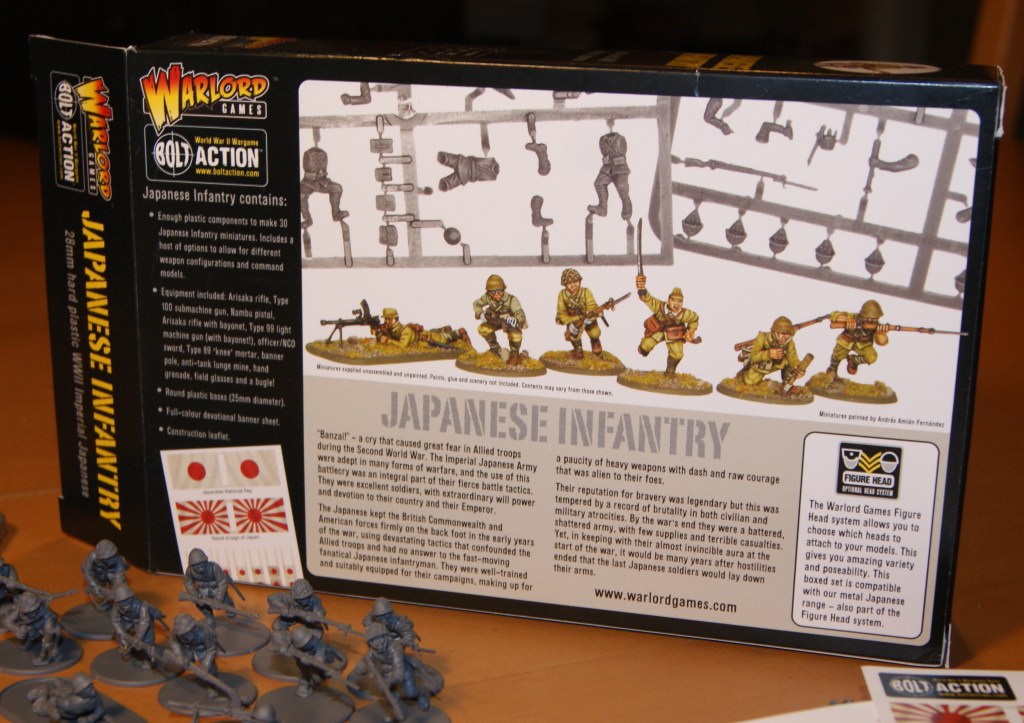
During the holidays, I was able to grab a set of Warlord Games plastic WW2 Japanese. They were offered at quite a discount, as they are being replaced by a new set. I really like the old figures, and I already have several of the old metal sets, both infantry, officers and support weapons. A full Japanese platoon was larger than the platoons of many other nations, which means that the 30 man set will not provide enough figures on its own. Fortunately, the metal figures match this plastic set well.
I knew that this was a good set, as I had read one or two reviews before buying it. It is also pretty obvious that the Japanese are very similar to WG (old) plastic Russian set, which I also like very much. The detail is great, and with many options which make the set versatile.
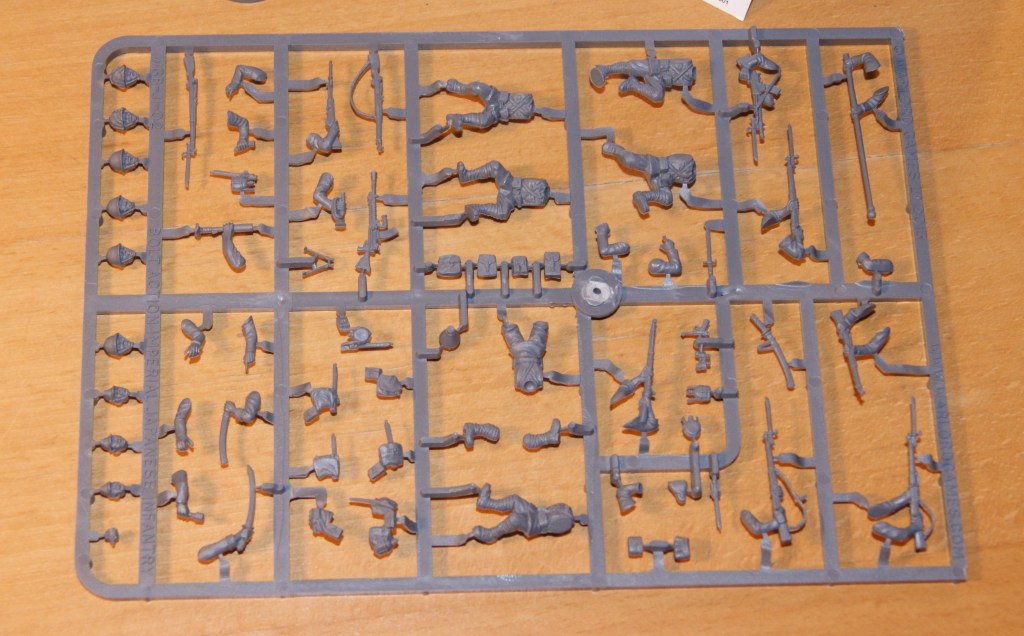
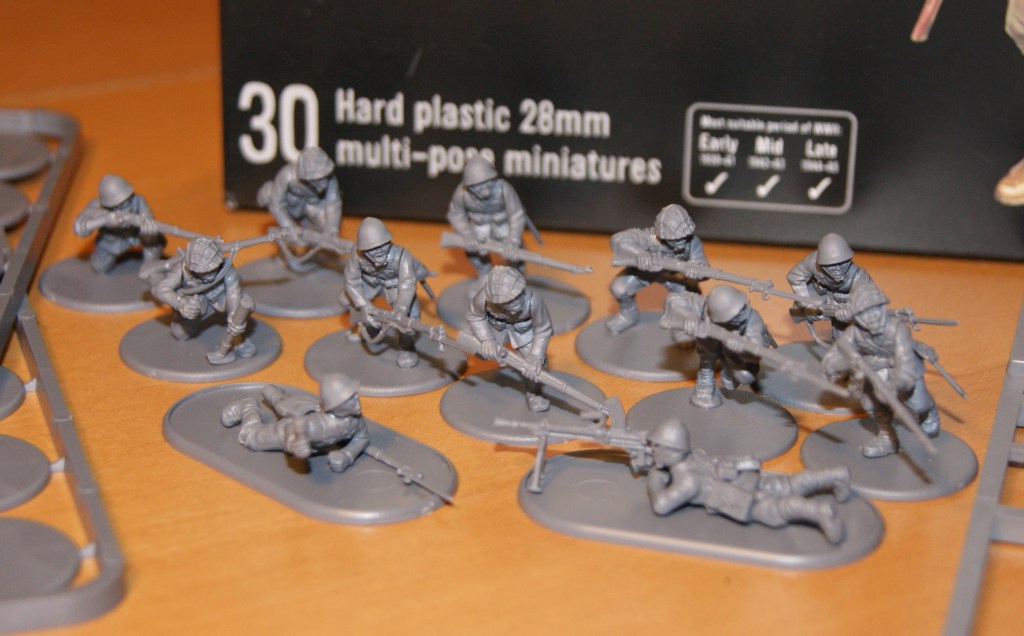
Having looked more closely at the contents and assembled some of the figures, the first impression is confirmed. The details are very crisp, and the set is logically organized. I had some problems assembling the figures, but the problems are the same with other similar plastic sets: for example, the bipod support for the prone light machine gunner is very difficult to cut away from the sprue. I tried it twice with different knives, but the small piece broke in two, both times. I ended up gluing the piece back together and this worked well, even though it was fiddly. It has to be said that this and some other of the fine detail can require some patience and modelling experience to get through. As for the machine gun pieces, there are six of them, but you’ll only need one or two, especially if you are doing full sized Japanese squads. In fact, strictly speaking you dont need them at all, as there is an option to build up to six figures carrying the machine guns in an upright position as well – they dont suffer from the problem with the bipod.
The versatility of the set has a down side: some figures have to be assembled from as much as ten separate pieces. However, for me at least, I will be doing most of them as standard riflemen, which means body, head, arms, equipment pack and base. The equipment packs come as one piece and most of the arms come as a set of two arms holding a rifle. In other words, in most cases, the figures will be assembled from five pieces, including the base. This isnt too bad. Comparing this set to Warlord’s Russian set, which I have used a lot, the Japanese only get one prone figure per sprue, where the Russian set has two on each sprue. This is probably a good thing, as five prone figures is already really more than you need.
One feature of the Japanese platoons of WW2 is their use of several light mortars. As I understand it, a platoon would typically include three of them (this is not as strange as it may sound, I believe that the Soviets, for example, had two in the early part of the war).
This is reflected in the plastic set, which includes one mortar on each sprue, which will have you covered. However, the mortar arm seems only to fit well with one body (the one which is in a kneeling pose). It would have been even better if it had been possible to use the prone body with the mortar as well – as I hinted before, the prone bodies arent that useful apart from maybe one or two light machine gunners.
However, no set such as this will be perfect. I have seen many, including more recent ones, that are a lot worse. The WG SS infantry and the Wargames Atlantic Panzer Lehr both come to mind (if you are interested in partly used boxes of those figures, let me know…).
What I really like about these are the poses of the figures and the general sense of proportion. WG do figures which often tend towards the cartoony, caricaturesque. This is partly true here as well, but still sensible. They are much more reasonably proportioned and posed than many of their later figures. The newer set, which has now been recently released does not appeal to me at all – maybe mostly a personal preference, but true just the same.
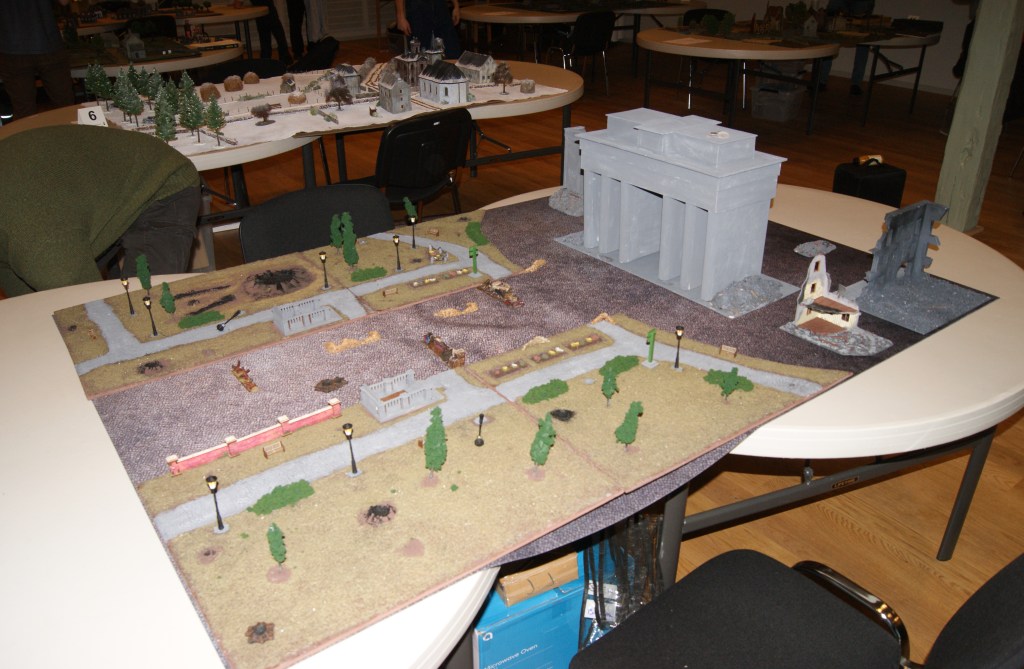
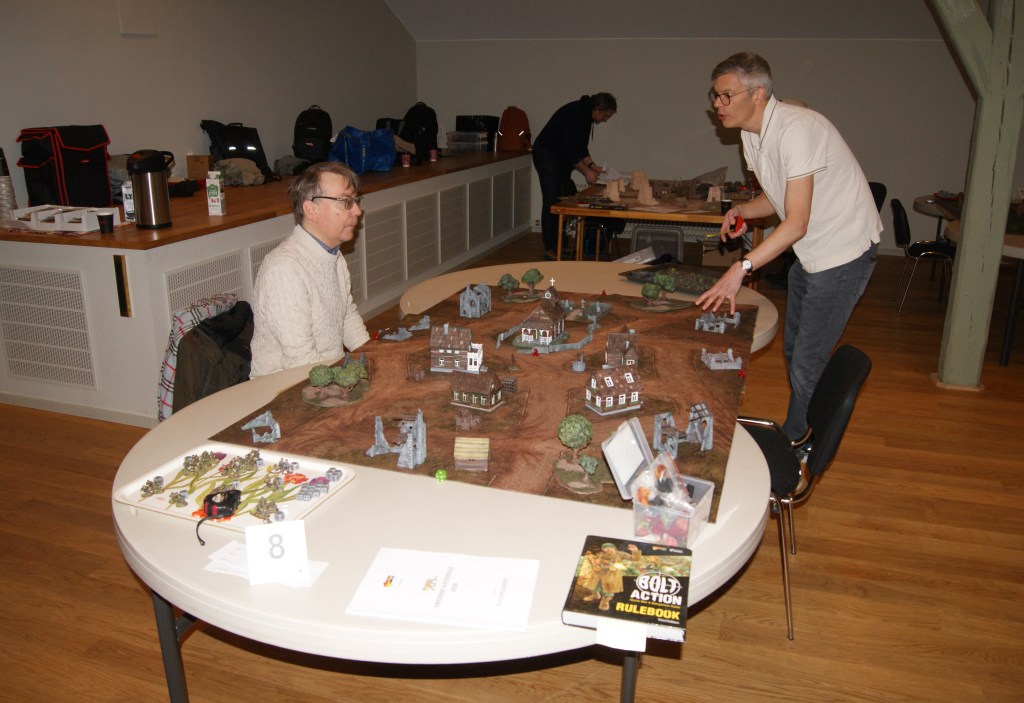
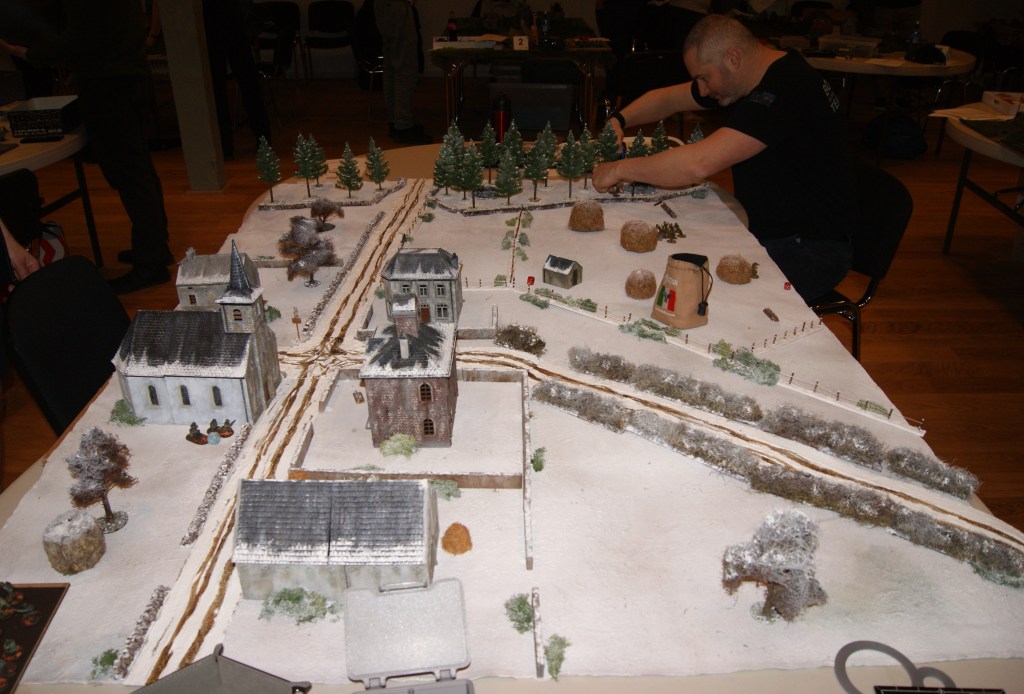
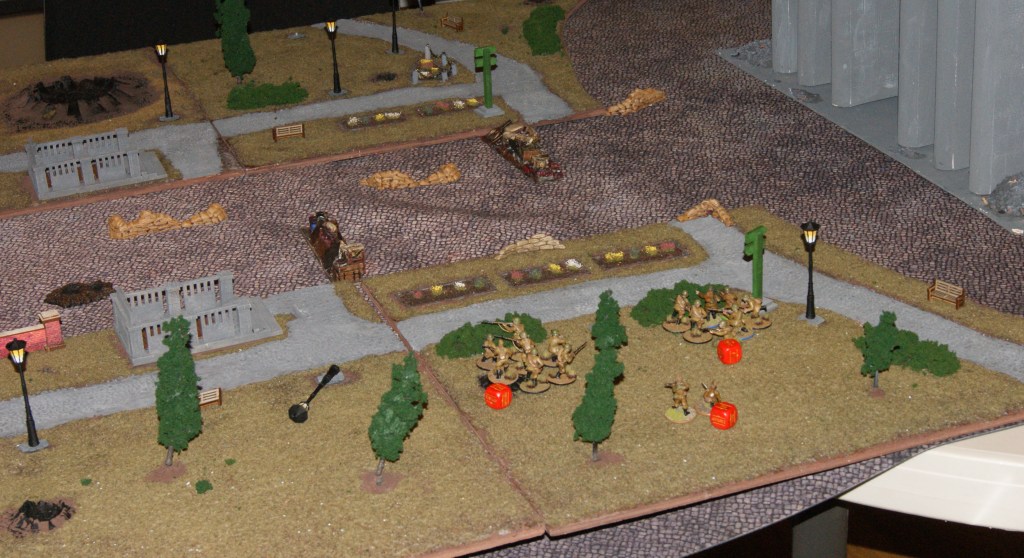
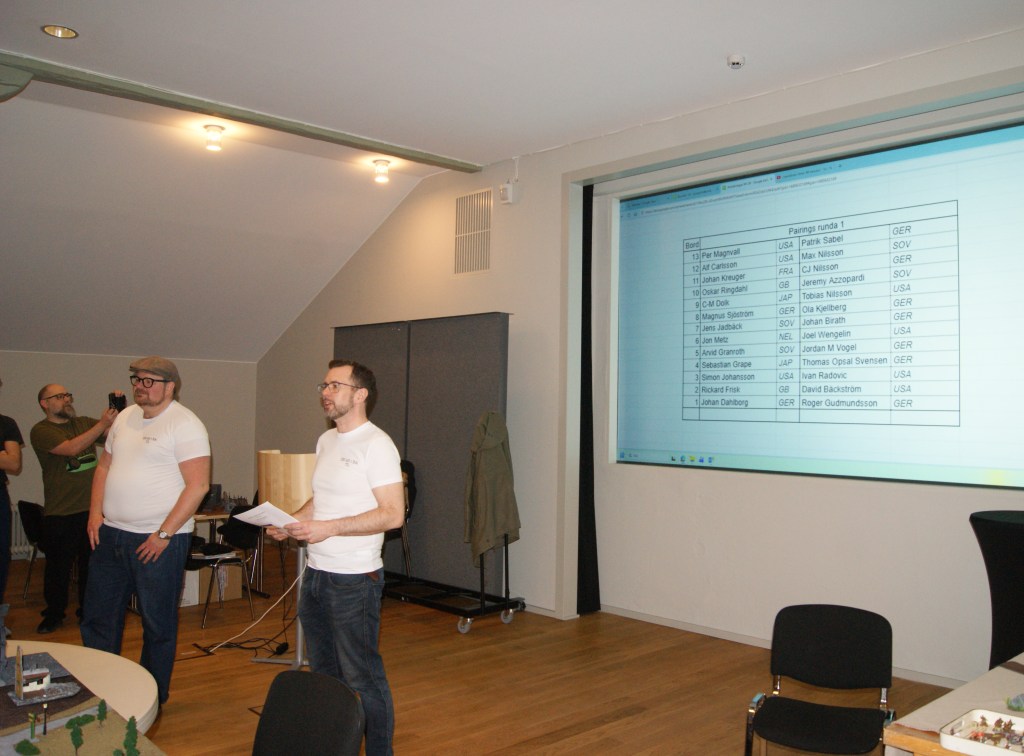
After stumbling across some Bolt Action players at the Army museum in Stockholm, I was able to make a late sign up for the Swedish BA championships which are held at the museum this weekend. Ill only fill in for a participant who is not able to make it to the games on day two, so my participation will only be that of a stand-in. Nonetheless, the tables look great and the guys have a perfectly positive attitude. Some seem to be more competitive players, but most are casual gamers, some of whom have just recently learned the rules. This is partly true for myself these days, as BA is now in its third edition, while I have hardly learned the changes that happened with second edition yet. It has been a while since I played the game at all – but the basics are simple and havent changed too much as far as I can tell. As I didnt play on the first day, I had time to take a few pictures and talk to the players in the morning morning – I hope I didnt distract them from the game too much.
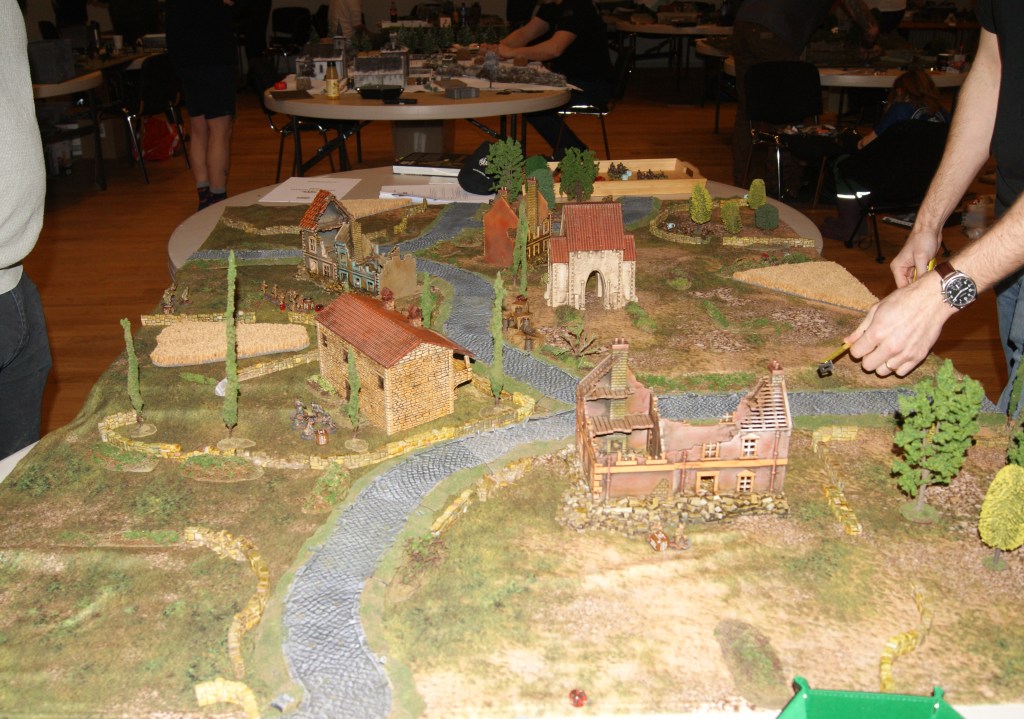
In terms of armies, there was a slight over-representation of Germans among the participants. But there were also some more niche figures, such as East Indies Dutch and Japanese bicycle troops, both of which must be commended for their originality if nothing else! The organizers must also be applauded for their work in setting the tables (there were 13 of them!), many of which were very well prepared indeed. The organization seems to have been good over all, with well thought out scenarios and guidelines for players. The event also benefits from several sponsorships, which is great to see as well. The greatest resource however, was the sportsmanship among the players.
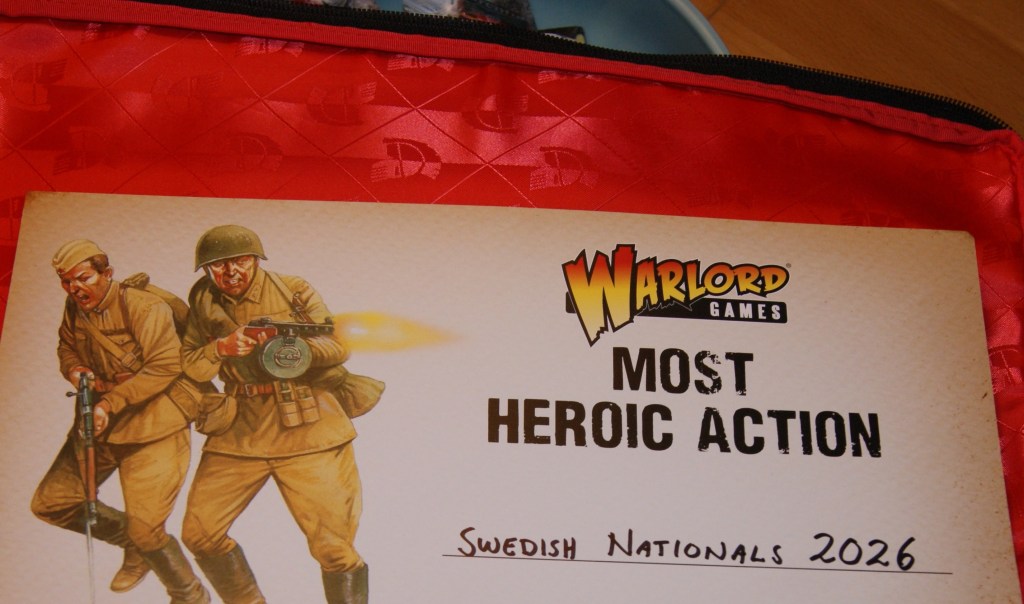
During day 2, I played two 1000 point games. I won the first and lost, badly, the second. The award for “Most heroic action” was appropriate for my Soviets, but was of course awarded for me filling in for a player who couldnt participate during day 2. Having seen the event this year, I am likely to sign up again in 2027. As there were surprisingly few British armies in the tournament, I might switch to using my dusty, old BEF figures next time around!
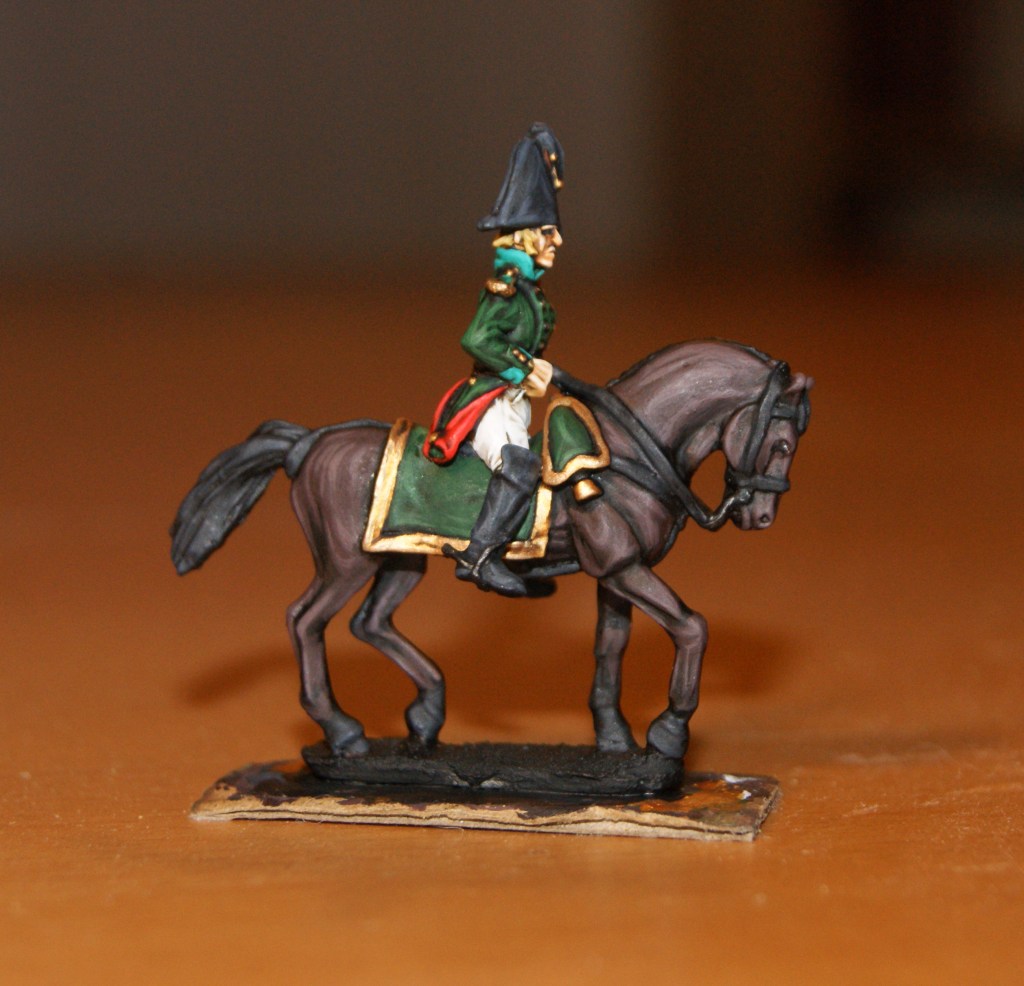
As a commander-in-chief vignette for my Russians, I have painted up some of the generals on foot from the Perry pack (no. 1 in their Russian range). These are slight overkill in terms of the 1808 Finland campaign, but there were several generals in action at the major battles, and possibly one or two adjutants. So they are not totally out of place. The figures are great, with an immense amount of detail. I could not resist putting some extra effort into the highlighting and detail work on them.
As many readers will know, Russian officers in the early Napoleonic period seem to have worn bicornes (and they continued to do so to some extent until the end of the wars). However, after 1805, officers were allowed to wear a shako, and at least by 1807 there was a distinctive officer’s shako with an eagle ornament and decorative chin straps or chains. It is difficult to determine (for a non-Russian reader at least) to what extent this type of shako was adopted. There are some depiction of them at least, such as the one from the Vinhuijzen collection.
There are no miniatures that I know of with this headgear, so I decided to try to convert one. The conversion was very simple, I just swapped heads with an NCO model (both figures are by Brigade Games). I did two and they will make up officers for my musketeer skirmishers (mostly because I had surplus command figures). Although the conversion was straightforward, I did mess up. Halfway through painting, I dropped the Sevsk officer (turquise facings). The miniature fell head first and the glued on head came off… This is actually not an uncommon occurrence. I tend to drop figures regularly! It is also mostly quite easy to glue a head back into place and that turned out to be the case with this figure as well. What tends to happen is that there is a thin crack in the paint job where the head split from the body. In a best case scenario, this can be painted over. This worked for the Sevsk officer, although it took a few coats. I dont think it is very noticable if you dont look very closely…