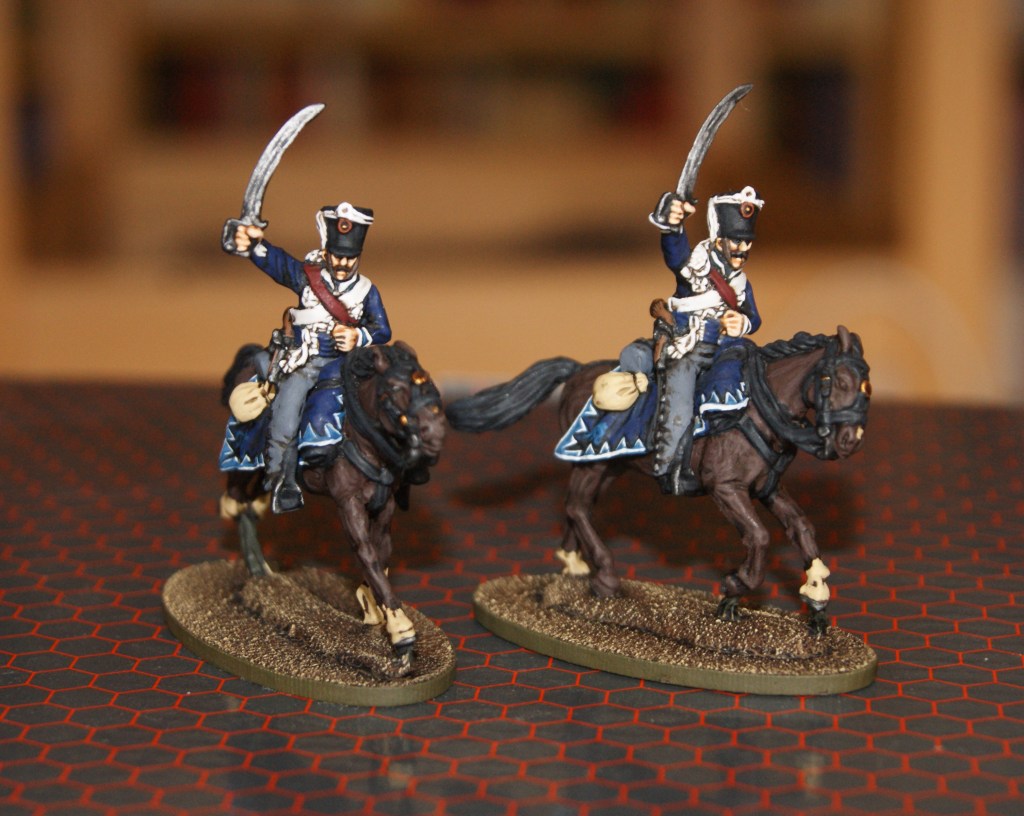
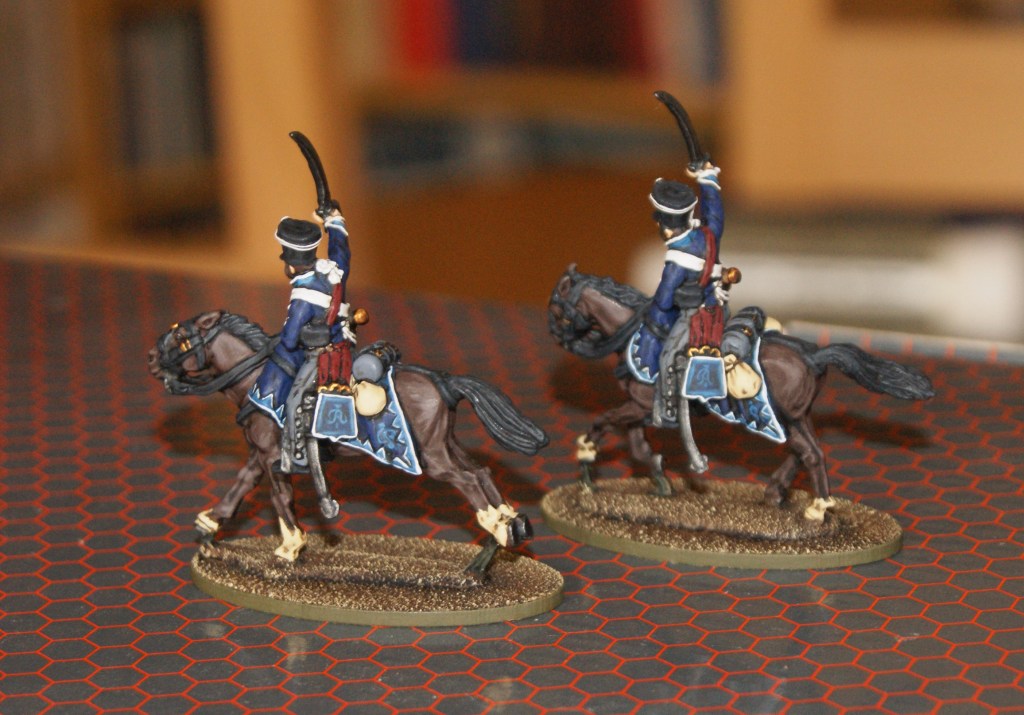
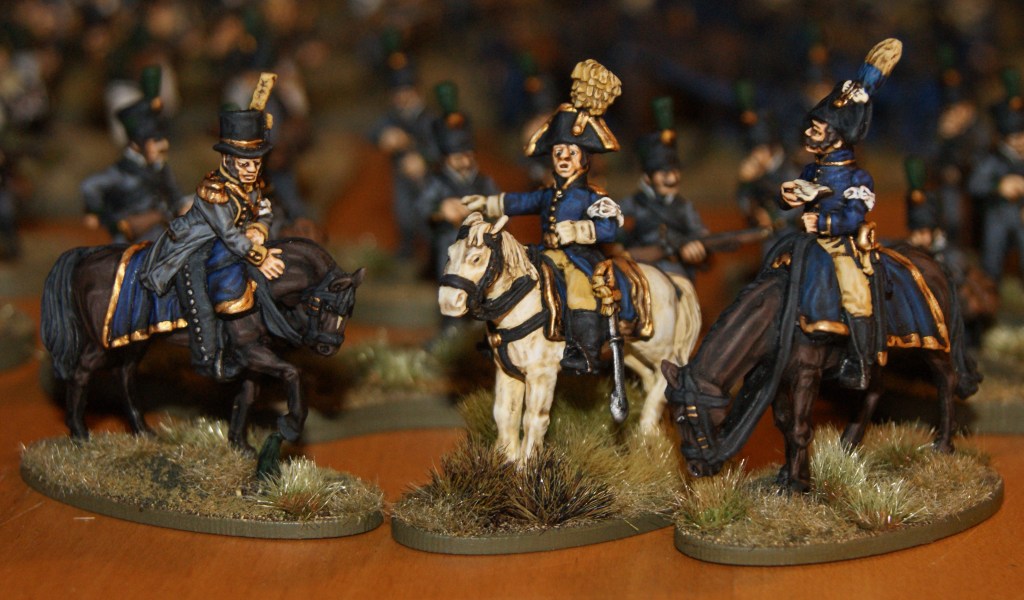
A recently finished two more badly needed Russian hussars. I started with these many months (even years?) ago. They are a pain because every figure requires a bit of remodeling to fit the period (1808). The base models are by Perry miniatures, but the heads have been replaced with period appropriate Brigade Games heads wearing older type shakos. The tassels are scratch made using wire and green stuff, which is fairly difficult (at least for my skill level!). To make matters worse, the painting process was nearly ruined because of cracking of the AP wash, which is a recurring problem for me. Whether it is caused by shoddy undercoating, humidity (too high or too low?), too short a drying time, I really dont know. Anyhow, I am happy to have finished these, these Grodno hussars were the most commonly seen Russian cavalry unit in the Finnish war together with the ubiquitous cossacks of course. Consequently I will need to do at least 12 or preferably 16 of these. So far, I have done 3…
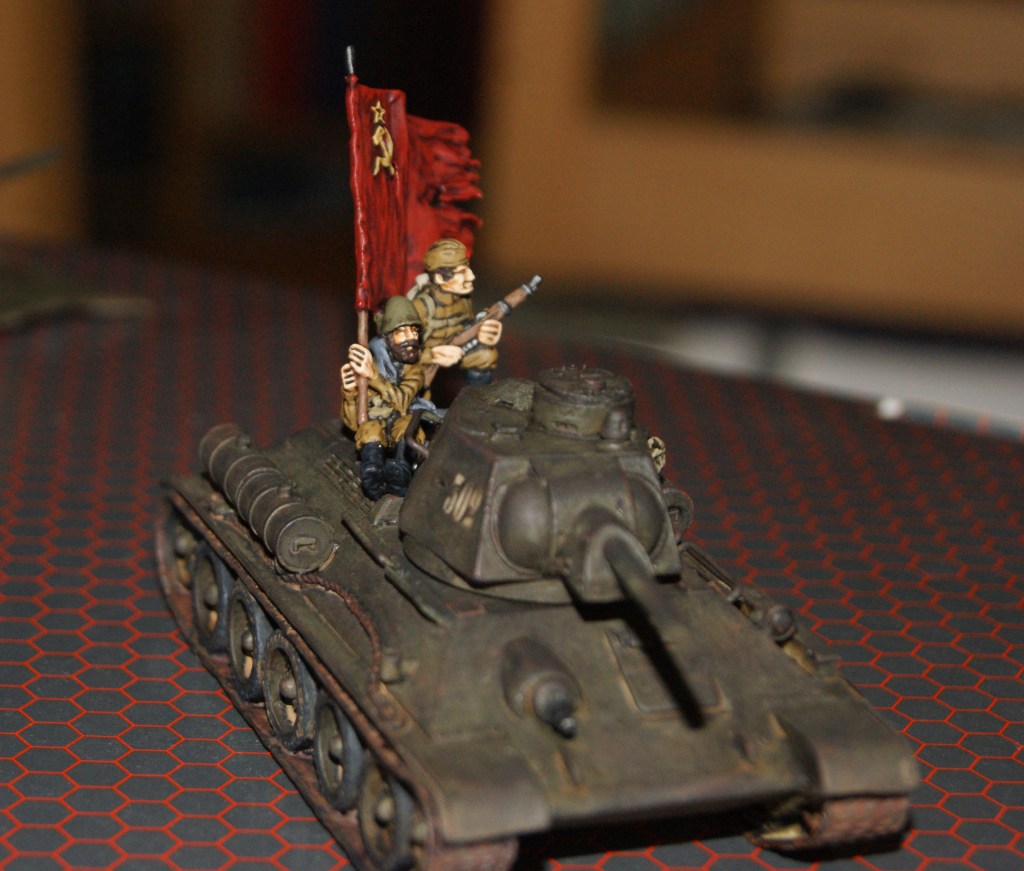
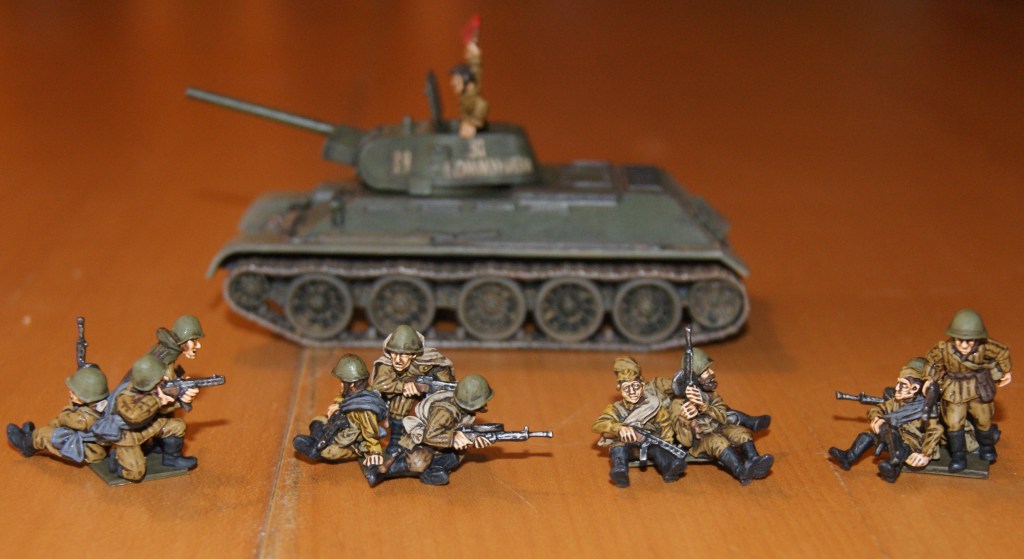
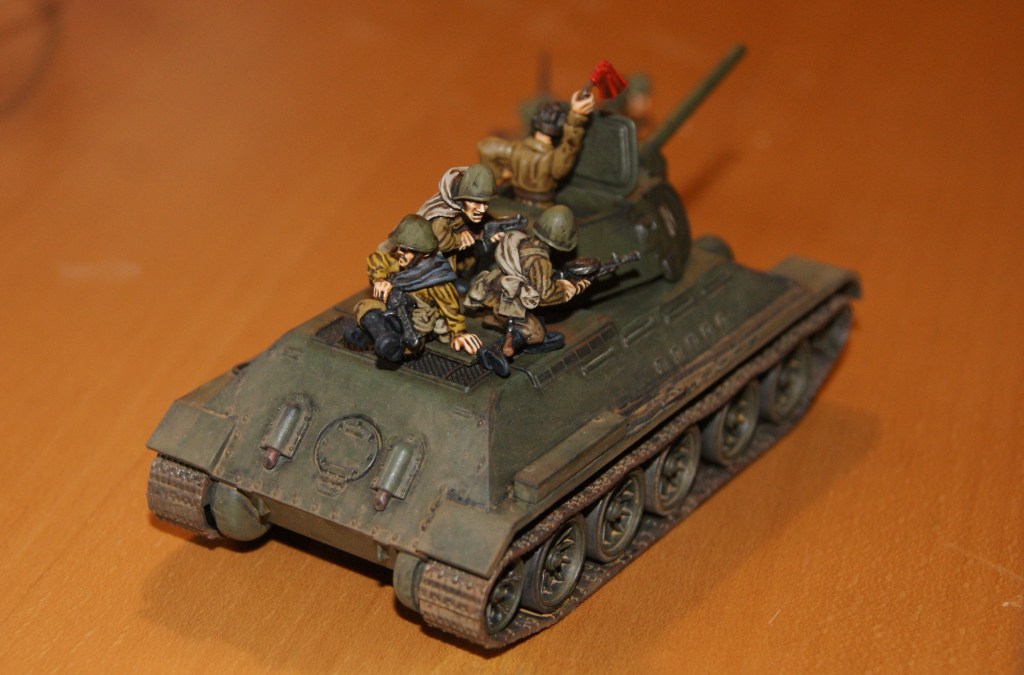
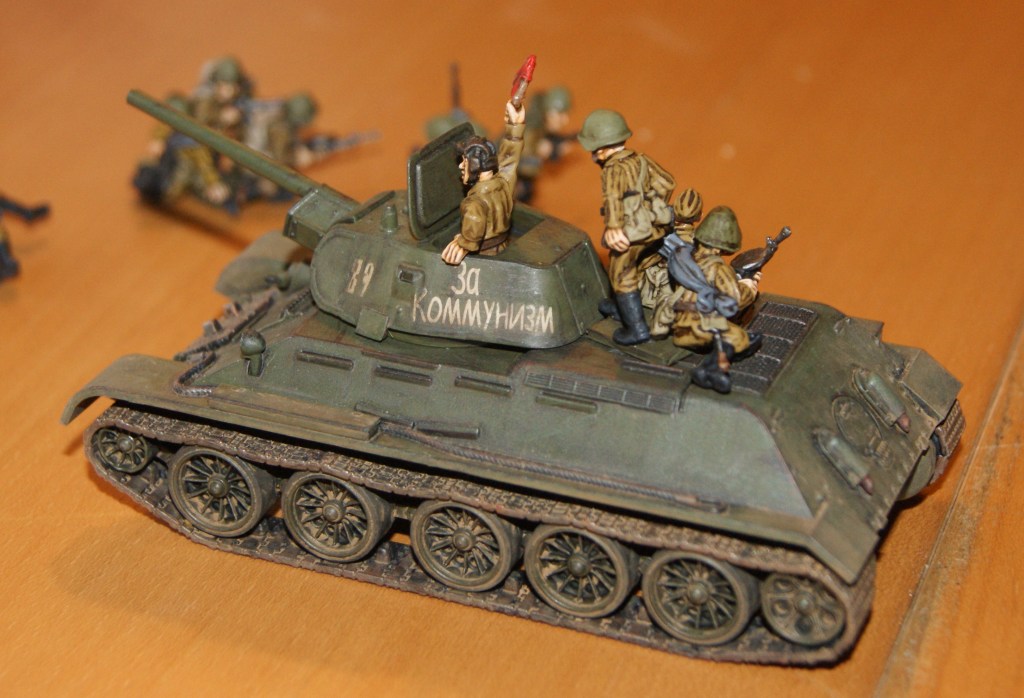
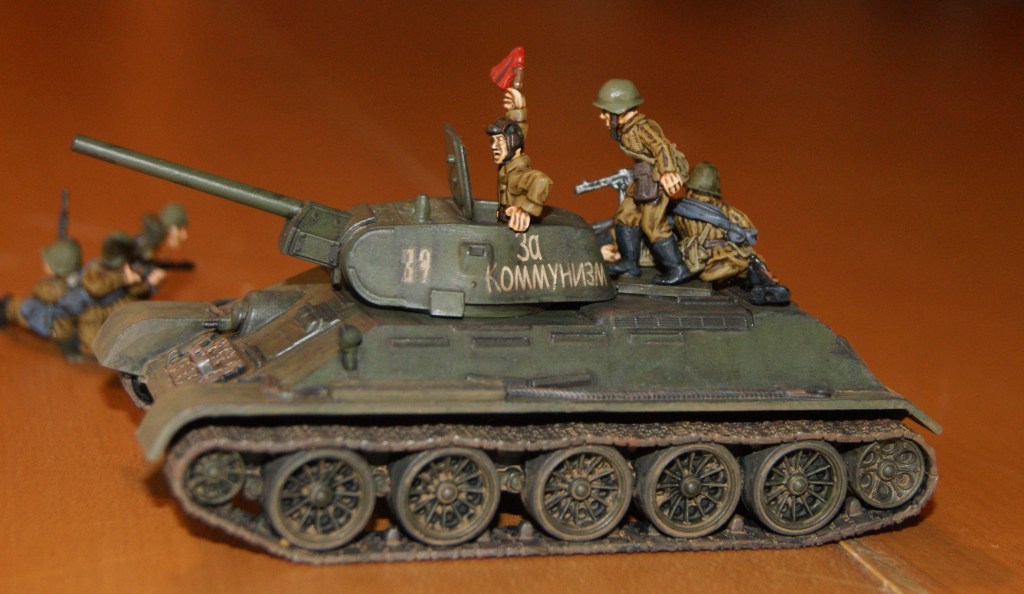
For my last set of tank riders, I thought of a crazy idea. One of the officer figures I have for my Soviets is a bonus figure that comes with the Warlord Games army book. The bonus figure holds a flag in one arm. I though this was silly at the time, and just removed the flag and used the figure with an open hand where the flag had been. But I still had the flag in my bits box, and when I was working on my tank riders, I noticed that the figure holding a machine gun could quite easily be modified to hold the flag instead. I removed the mg and connected the flag to the figure by sticking a steel spear into drilled holes at both ends. The figure of course was very top heavy, and would have fallen over on its own. So, to balance the figure up I glued it to a base on which I also mounted another figure, so that the flag could rest on that figure. In that way, the base became better balanced, and could sit well enough on the back of the tank.
I will paint the base and add one more figure to it, perhaps an officer. The flag could serve the purpose of marking out an officer group from the infantry squads on the other tanks. The Bolt Action rules actually dont mention officers being able to ride on tanks, but it seems logical, and can easily be house-ruled that way. Of course the idea looks more like a propaganda poster than something that would have happened in actual combat, but its neat just the same. And it makes me want to get all my Soviets on the table all at once for a pic. They are problably 150 men now, with 10+ vehicles, several artillery pieces and numerous support teams.
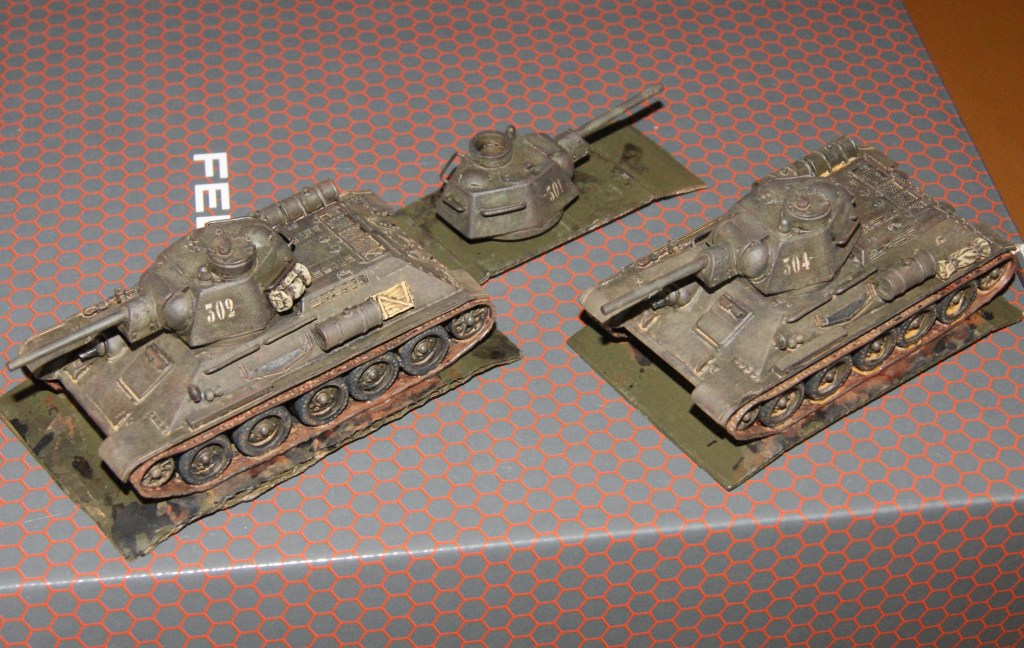
These are T34/76s of the model 1943 version, and with the commander’s cupola; basically the very last version of the 76mm gun tank. As far as I understand, this version was first used in the summer of 1943, which is a perfect match for the rest of my stuff.
The tanks are resin kits by Die Waffenkammer. Ive done a few of their tanks in the past, but these may be the best of the ones Ive tried. The detailing is excellent and they are pretty accurate as far as I can tell. However, that fine detailing can be fragile, which is the case with the handlebars on these tanks for example. I had a couple of those come off when assembling and painting. Fortunately, they were relatively easy to glue back in place. They do need to be handled with some care though.
The paint job is a very simple one, mostly with drybrushing and doing the “paint chipping effect” with a piece of foam (the kind that is in blister packs for metal miniatures). To be quite honest, the finished tanks probably have too much wear on their paint job and too much rust on them. Considering the fact that they would have been brand spanking new in July of -43, I dont see how they could have become so worn down in just a few weeks! However, weathering like this gives a very realistic look (although it is really, hrm, quite unrealistic…).
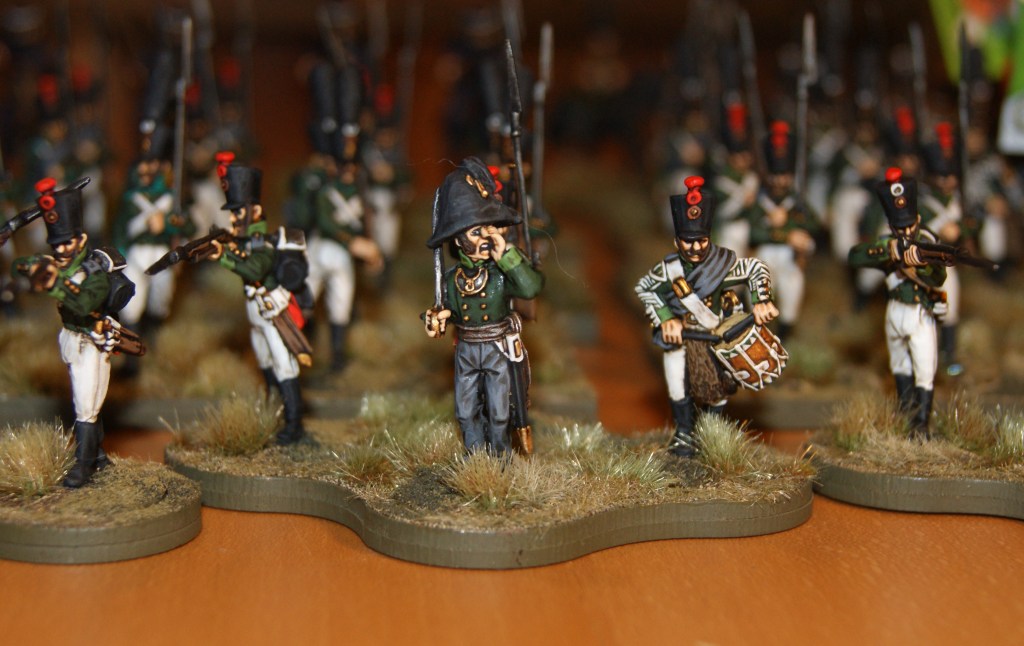
I had reason to survey all my finished units of Russians and Swedes/Finns recently, and naturally I took a few pictures. A few new additions have been made in the recent months, but I need to pick up pace with infantry and cavalry (especially on the Russian side) to really get this project into a position to start a major campaign going. Also, the Russians are lagging behind the Swedes. I have done a total of 12 battalions of infantry (three of them are 24-man units) on the Swedish side. The Russians are 9 battalions (two of which are 24-man units), with less artillery and cavalry too. I am currently working on both a couple of more cavalry and infantry units for the Russians. As both armies are only meant to be played against each other, trying to match the strength of both sides is a good idea. In typical Napoleonic wargames terms, the numbers are small (thank God!). But the good thing about the Finnish war is that even the largest battles (such as Oravais in september of 1808) involved only about 15 battalions on each side. I am feeling some frustration that I really only have a few more units to paint until I have a really good selection for a number of scenarios. Its just that I cant quite seem to focus on those must have infantry units that would be really useful, and I go convert a general figure or paint some fancy uhlans instead…
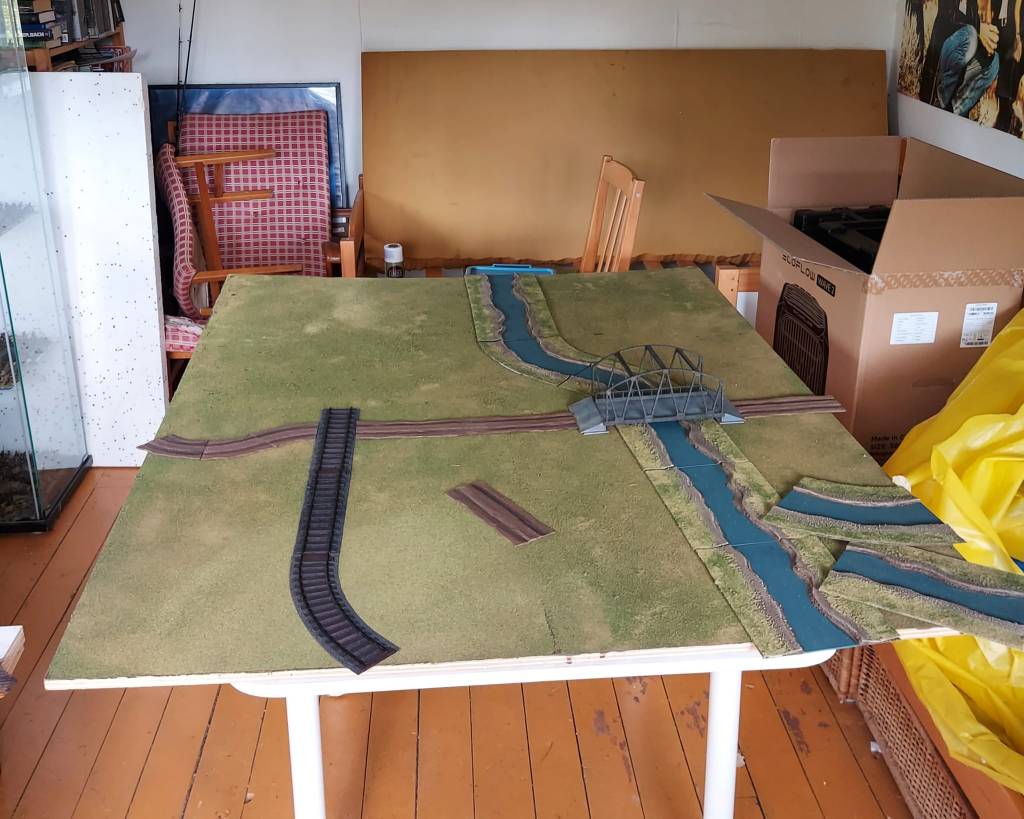
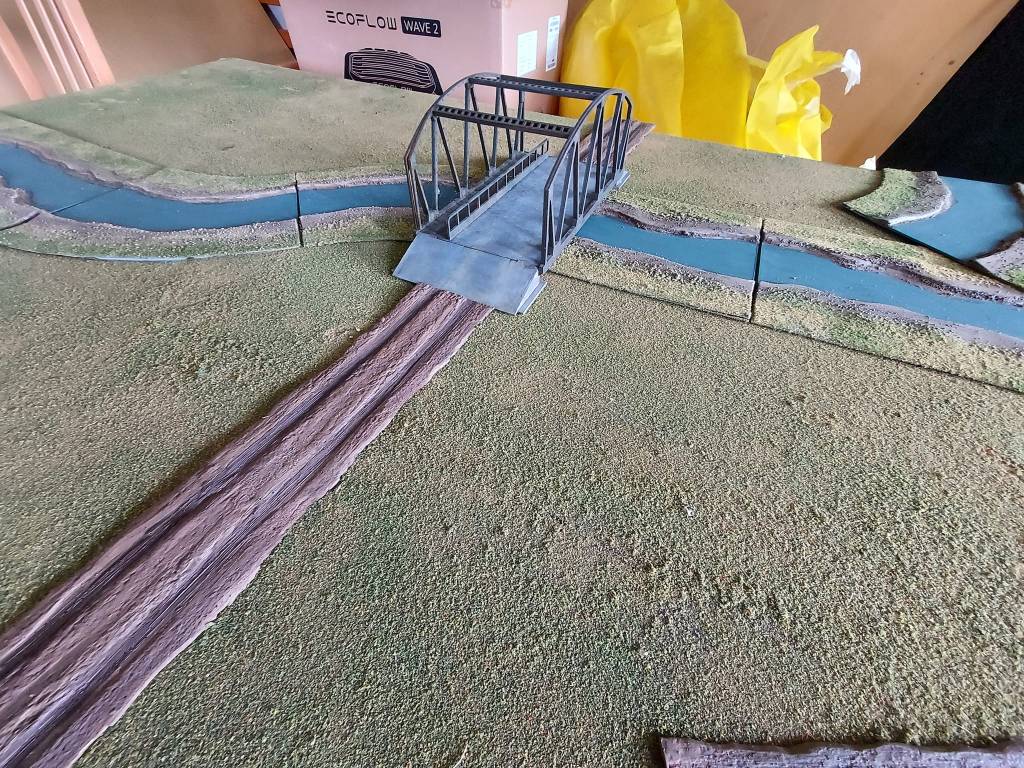
I generally spend much too much time on painting figures, and too little on doing the terrain for my game board. Ive been trying to change that, doing some river sections, roads and railroad sections. I am also working on expanding the gaming board itself, with a couple of additional smaller boards (not seen in the pictures).
The river sections are a type of moulded hard but thin plastic made by a company called Amera. I bought them relatively cheaply from a Swedish online wargames store. The material is similar too the plastic they used to do disposable plastic coffee cups with, but slightly thicker. It comes as plain white plastic sheets moulded in the river shape. I then added a plasticard base to each section to make them more sturdy, and painted the banks with textured paint (regular hobby paint+some sand). I then sprayed a base coat of brown over that, and painted the river itself a green-blue mix. Then I washed the textured river banks with a much watered down dark brown-black mix, and highlighted that with brown and finally, a beige white (Vallejo’s dark sand). In other words, I painted the river banks the same way I do the bases of my figures. On the outer edges I added some flock, a mix different shades of Woodland Scenics materials, to match the look of the table.
The Amera plastics seemed to me very easy to work with. It took very little effort, as I used very simple techniques. In the future, I may add a water effect to the river, but I am pretty happy with how it looks at the moment, so theres no rush. Amera seems not to get a lot of attention – Id never heard of them before I spotted the river sections online – but I must say I think their stuff was pretty good. Doing rivers can be pretty difficult if you do it yourself, from scratch, but at the same time, its one of those basic items youd want for your gaming table.
The roads are also pretty neat. I ordered them from another online source, I think they are in eastern Europe somewhere… Anyway, the road sections are made from latex rubber, which makes them flexible and quite practical when setting up a table. They werent super cheap, but I prefer them from DIY alternatives. I have painted them with Vallejo US Field Drab (again, a color I use for basing miniatures), which was washed dark brown/black and drybrushed with the base color again. If I have the time, I will throw some dust/earth pigments on them to give them a more dust-roady feel.
Both the bridge and the railway sections are mdf kits from Sarissa. Now, these are a different thing entirely. Ill admit, Sarissa do very nice kits. But, they take time to assemble and then a very long time to paint, in my experience. Granted, most good looking scenery items with a lot of detail will take some time in order for them to look really good. The bridge did turn out really well and was worth the effort. Its also a nice thing to have on the board, after all.
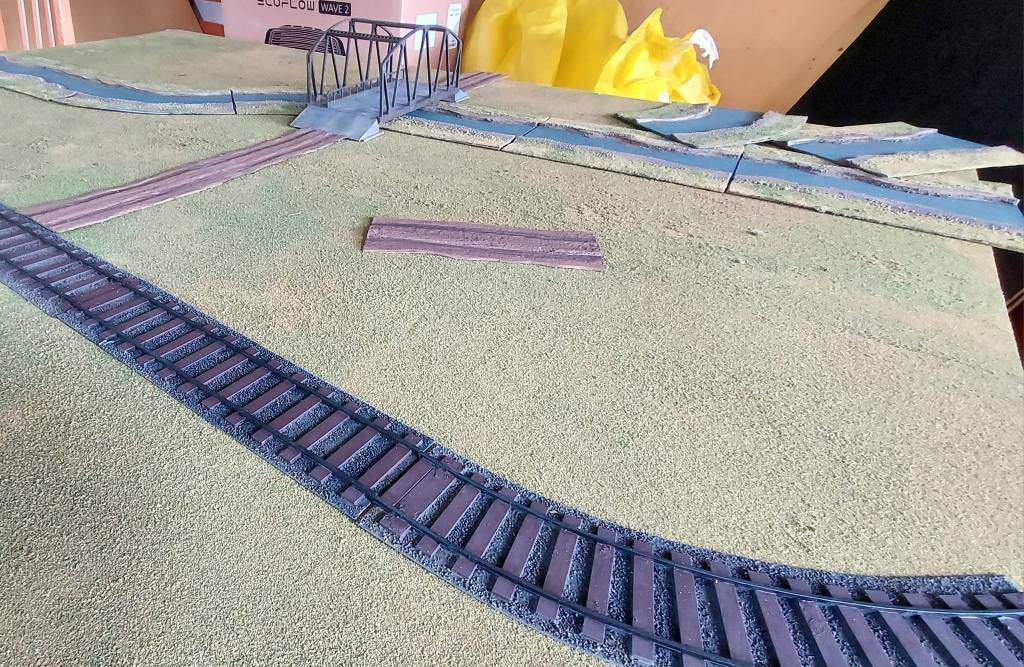
The railroads though, they are some of the most time consuming things Ive ever done. It such a simple thing, railroad tracks. How hard can it be? Well, first, the building takes some patience (its a couple of years now, so I don remember every detail, to be honest). I personally didnt like Sarissa’s system of connecting the sections together, that just looked silly to me. So I cut those parts away, but then I had to adjust them slightly, and so on…
Anyway, the painting was the most difficult part. I am still not finished with all of the sections I have put together. At first, I couldnt get the look of the ballast, and I tried a few different sizes of sand and various shades of paint. Having finally managed to get something I was relatively pleased with, on to the sleepers and the track itself. Thats several metres of detail painting, and theres no getting around the fact that you have to paint hundreds of individual sleepers. And preferably, some a rust effect on the track once you have painted it in the dark metal shade that is appropriate. As you can see, I havent done the rust yet, and the sleepers are only done in a single shade of dark brown, which could do with a highlight, and maybe I should do some grass around the edges, etc, etc… In the end, I settled with a “table top standard” paint job – its just so much work if you want to do 2 metres worth! Much better to do the whole thing in a plain but acceptable look so that it can be used than it sitting on a shelf for another year…
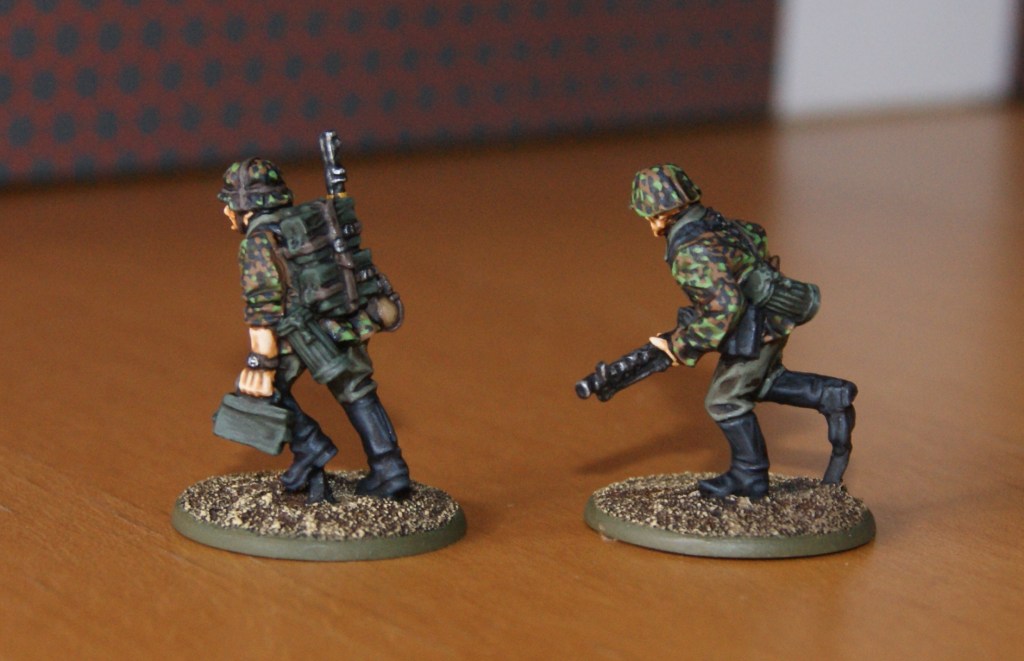
Another addition to my very slowly growing collection of WW2 Germans. This is a lmg team and a nco, figures are by Warlord Games. Originally, these were sculpted to look like cavalry, but the only thing I needed to do was remove the spurs on their boots and they pass for regular infantry or panzer grenadiers especially of the 1942-1944 period. The figures are some of the best of the WG range and the camo scheme is always an interesting painting challenge, but it does take a bit of extra time. If I were to have any point of criticism, it would be that the hands are somewhat out of proportion, as often happens in this scale, but particularly with WG figures of this era.
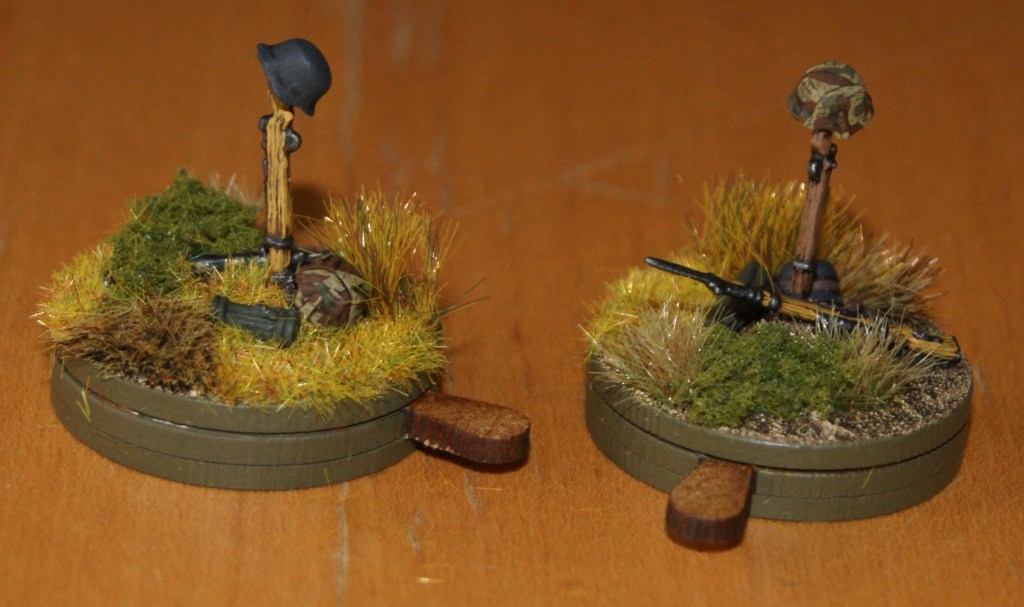
These are some markers for WW2 gaming. Casualty figures are from Great Escape Games, pin markers were made from Warlord Games’ old markers for Bolt Action with some extra bits, mounted on bases from Warbases. Lastly, fire/smoke markers, mainly for marking knocked out tanks or destroyed buildings. All work for both Bolt Action and Chain of Command. The burning tanks and dead Soviets arent really necessary to play, but they look nice. Casualty figures can be useful in game terms when you have weapon crews fixed to one and the same base and need to mark losses.
The fire/smoke markers were made from household cotton balls, which were sprayed with black, grey and white primers. The lower part was then first brush painted black and then drybrushed using a couple of different shades of red, followed by orange and yellow. One could easily make markers for a smoke grenade effect (commonly used in CoC, less often in BA) in the same way, just excluding the last step of red/orange/yellow. However, I had no base of the appropriate size (3″) at hand, so that will have to wait until another time.
The old Warlord Games tank rider figures are pretty cool. However, anyone who has tried using them in a game will probably agree that they are not very practical, especially the ones standing up. They just fall over and off the tank all the time. And the whole idea is that they will ride on the tank, which means youll be moving the whole set around, right?
To make them easier to handle and more practical in actual games, I decided to mount mine on to small bases. These were just pieces of plastic bases which I cut into smaller sections. Obviously I tried to make them as inconspicuous as I could, and I painted them in a color matching the tank hull. I think this turned out pretty well. The bases are about as small as I could make them and still fit the models on them, and they blend in well enough on top of the tank. Of course, one could well have made larger bases with more figures on them. That would have looked very cool, but I didnt feel it was really worth the effort doing a whole platoon’s worth of tank riders. On a larger tank, such as the KV or IS series, it will be possible to fit two bases on one tank, but on the T34:s that doesnt really work.
I should also add that about half of these were painted recently, adding to the ones I already had. Several of the figures originally had fur caps (ushankas). My Soviets are mostly not wearing winter clothing, so I thought that itd be more appropriate with regular helmets on. So, I decapitated them and replaced the heads with helmeted ones from the WG plastic set.
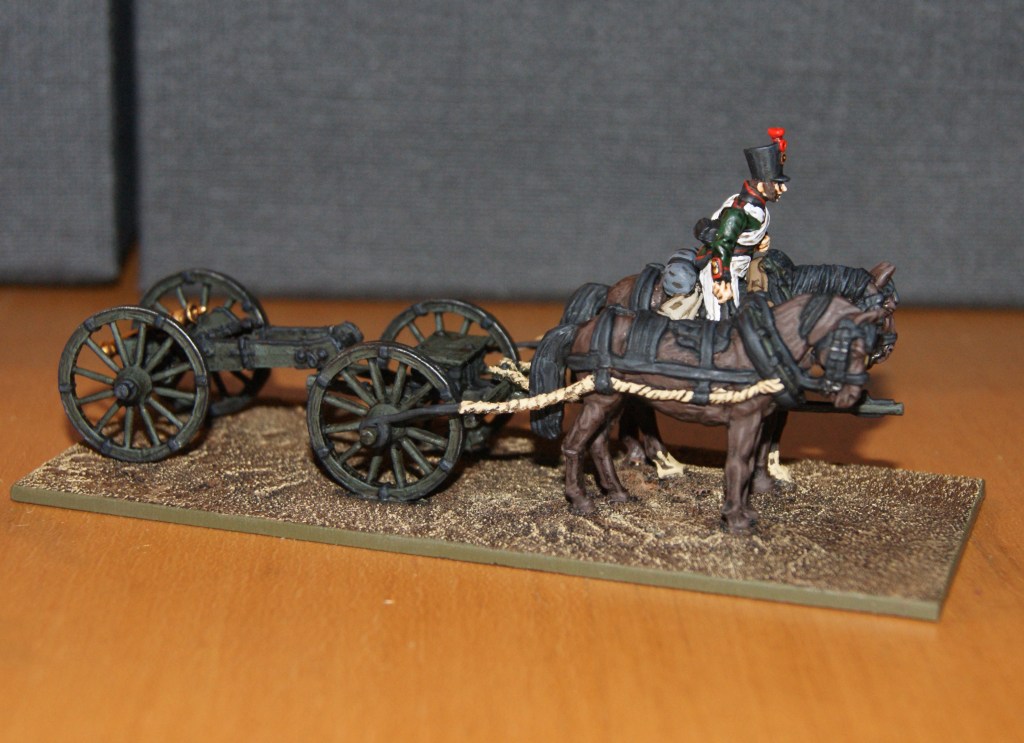
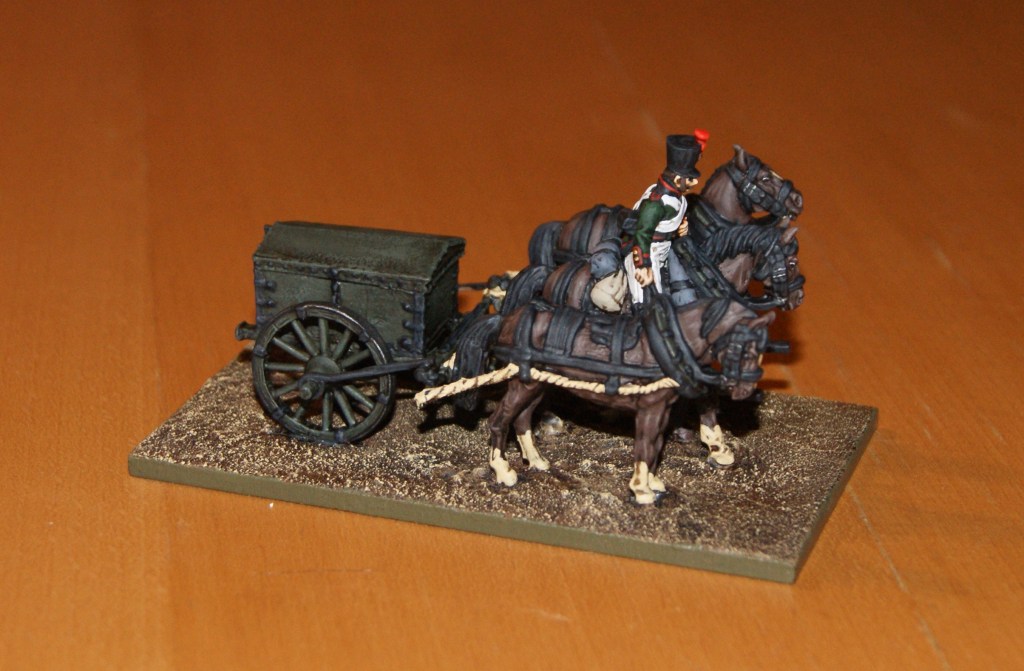
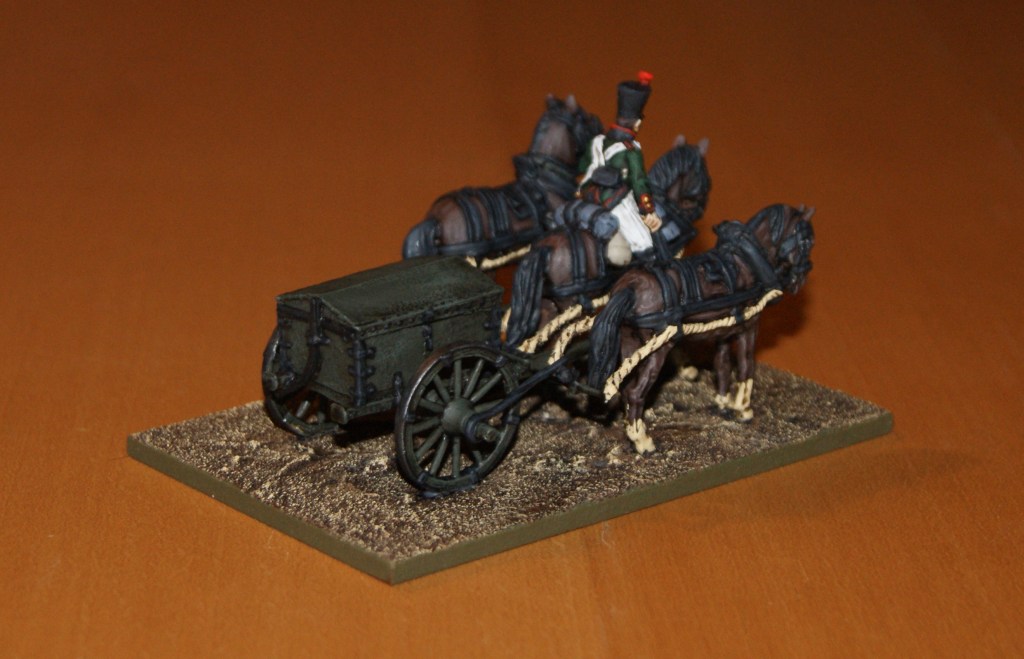
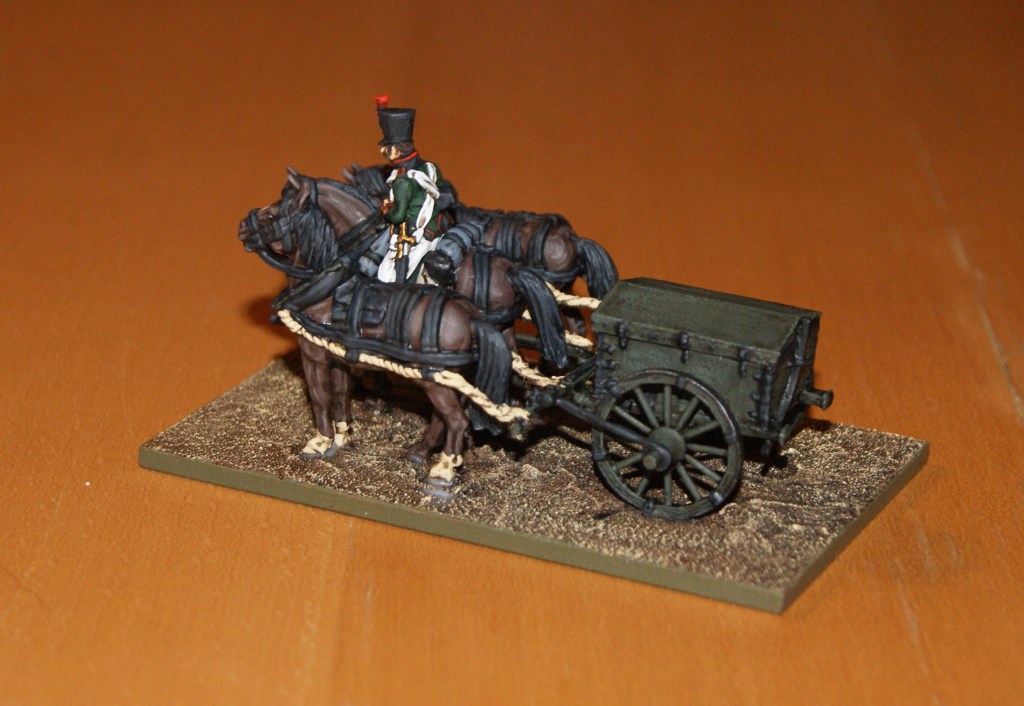
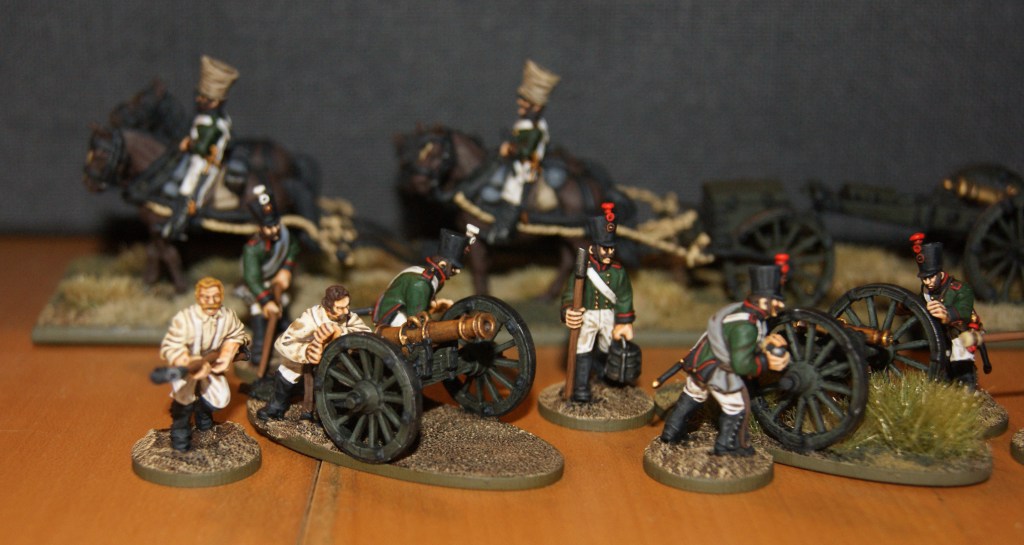
Ive recently painted up some more additions to my 1808 Russian artillery, namely a limber for my 3-pounder gun and an ammunition cart. The riders may not sit perfectly in their saddles – I just happened to run out of superglue so they are still loose…
Ive also re-based the guns themselves on small oval bases with separate crew figures on regular round 20mm bases, just like their Swedish counterparts. I would love to have two sets of 6-pounders and two 3-pounders complete with crew and limbers for all of them. The limber models (by Perry) are great, but they are also a lot of work, both putting them together and painting them.
The guns are are by Perry and Warlord; crew by Warlord. Heads from Brigade Games infantry.
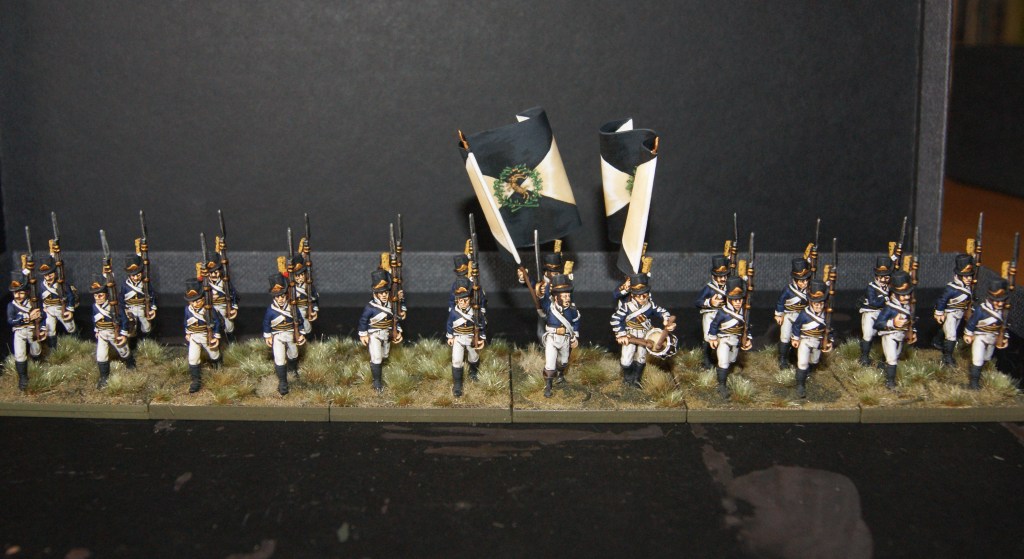
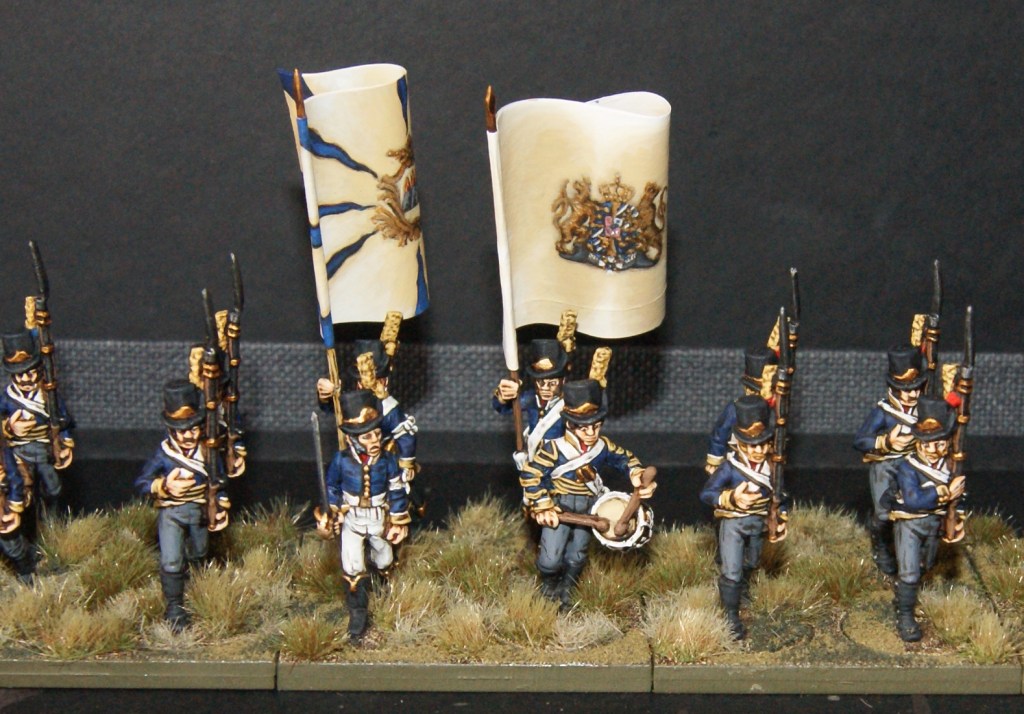
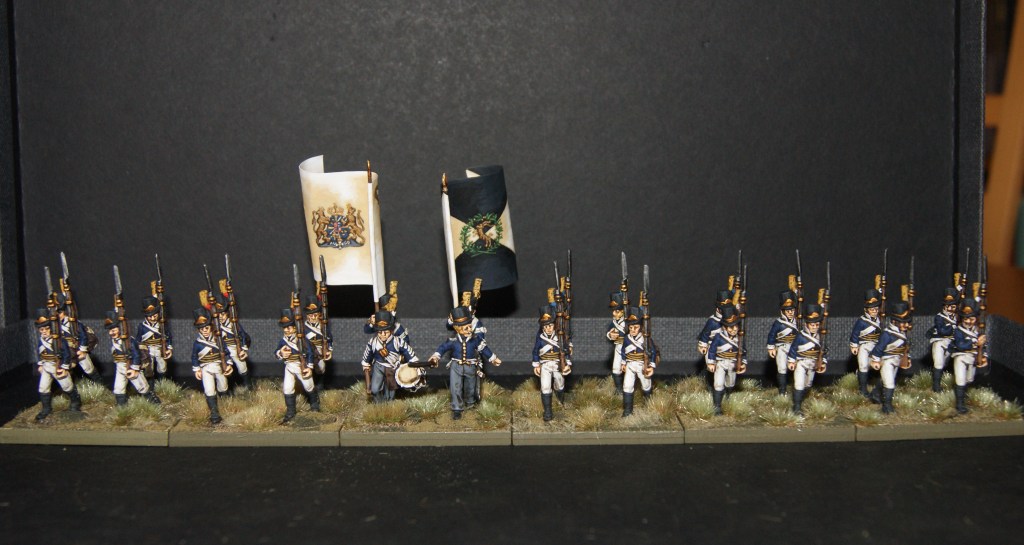
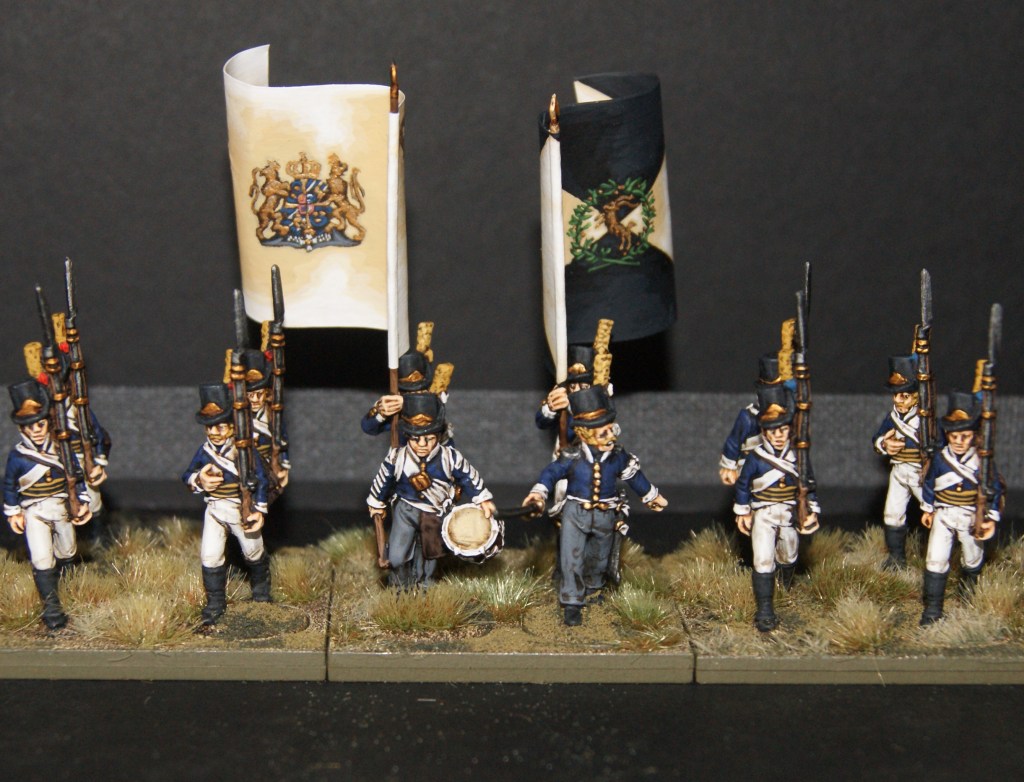
Looking through my old posts, I realized that I hadnt published any pictures on the fine Swedish regiments I finished in time for this years’ Salute show. So, here they are in all their glory, the first and second battalions of the Hälsinge regiment and the first of the Västmanland regiment. The paint job on the Hälsinge flags in particular were a bit rushed, as I did them the night before I flew to London. However, these pictures show that for all practical purposes, the results are good enough. It only goes to show that laborious blending of shades of black and white on these flags is really a waste of time…
Up until now I have painted small units of just 16 men. For the show, I needed to do 24-man units. Having played a few games with both, I have come to the conclusion that a compromise would indeed be a nice solution. 20-man units look very good on the table, while still being relatively small and fast to paint up. I should also add that when we play the Finnish war, we tend not to use the attack column formation, which might look a little odd with uneven numbers of bases.